


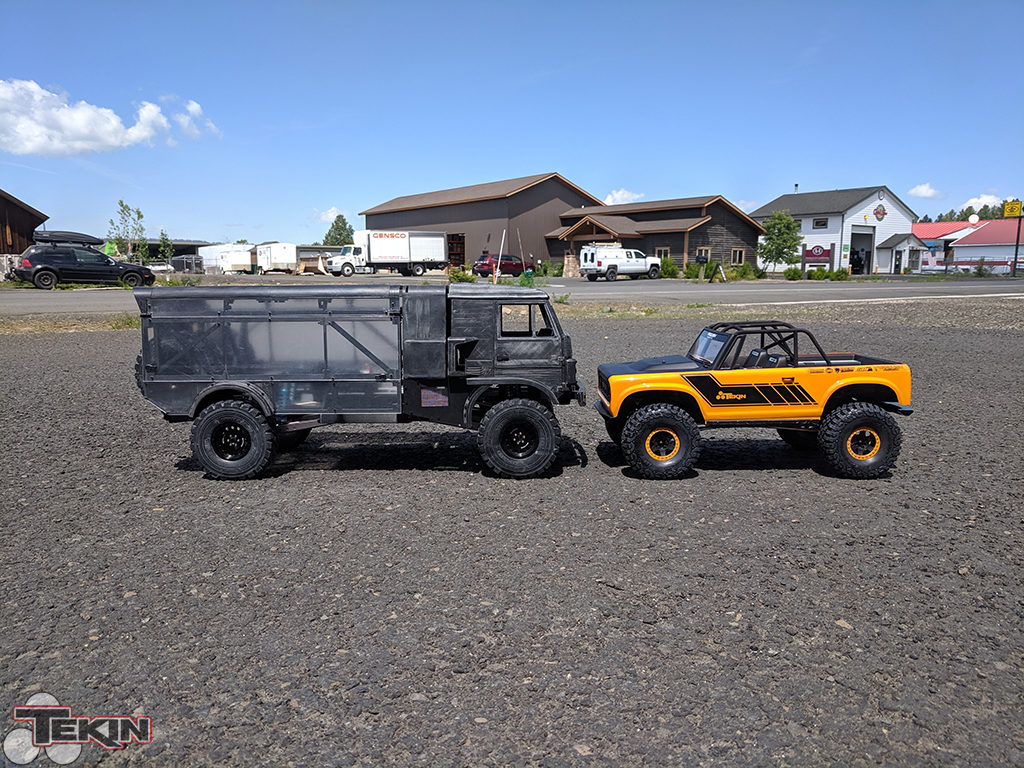
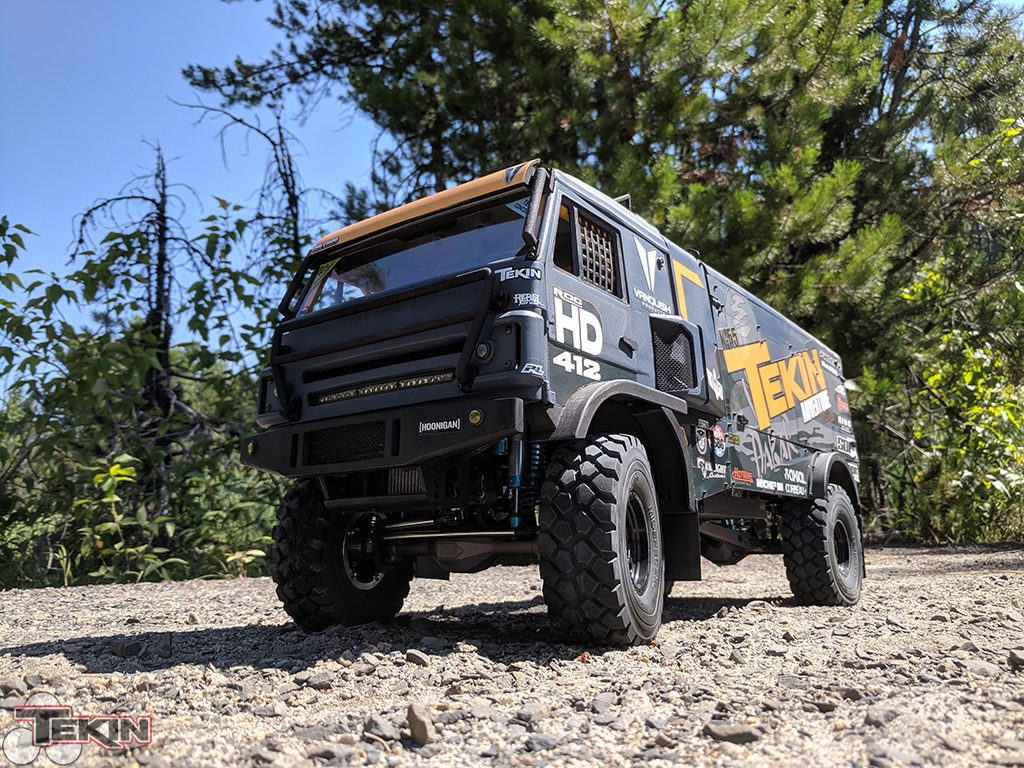
In 2017, we returned from Axialfest with the crazy dream of building a 1/10 Rally Truck like you’d see in the Dakar and Silkway Rally Raids. I am a big rally fan, but those big 10 ton trucks racing at speeds up to 120mph across all kinds of terrain for days on end is just intriguing and spectacular to watch. With the support of some amazing companies, we were able to bring that project to life. When that project, named the M-55 was complete and Axialfest 2018 was over, we immediately dove headfirst into the next truck build. It had to be bigger, better and faster. More features, cleaner layout and wiring and back up its looks with performance. It is safe to say, the new K-55 delivers everything we hoped it would.
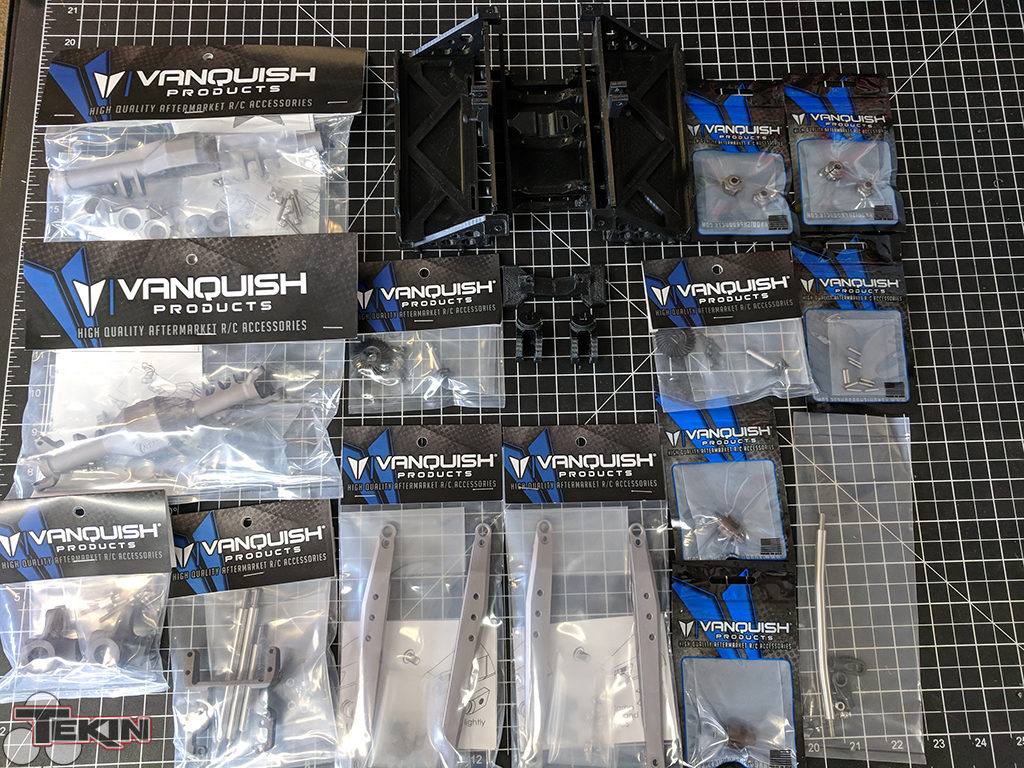
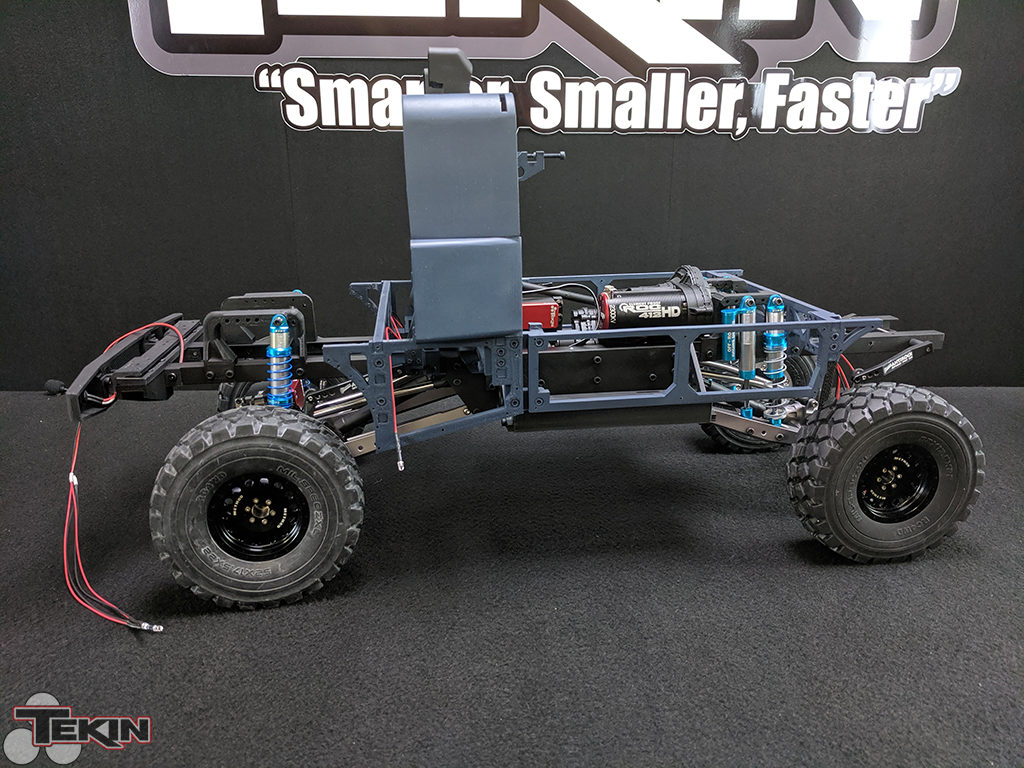
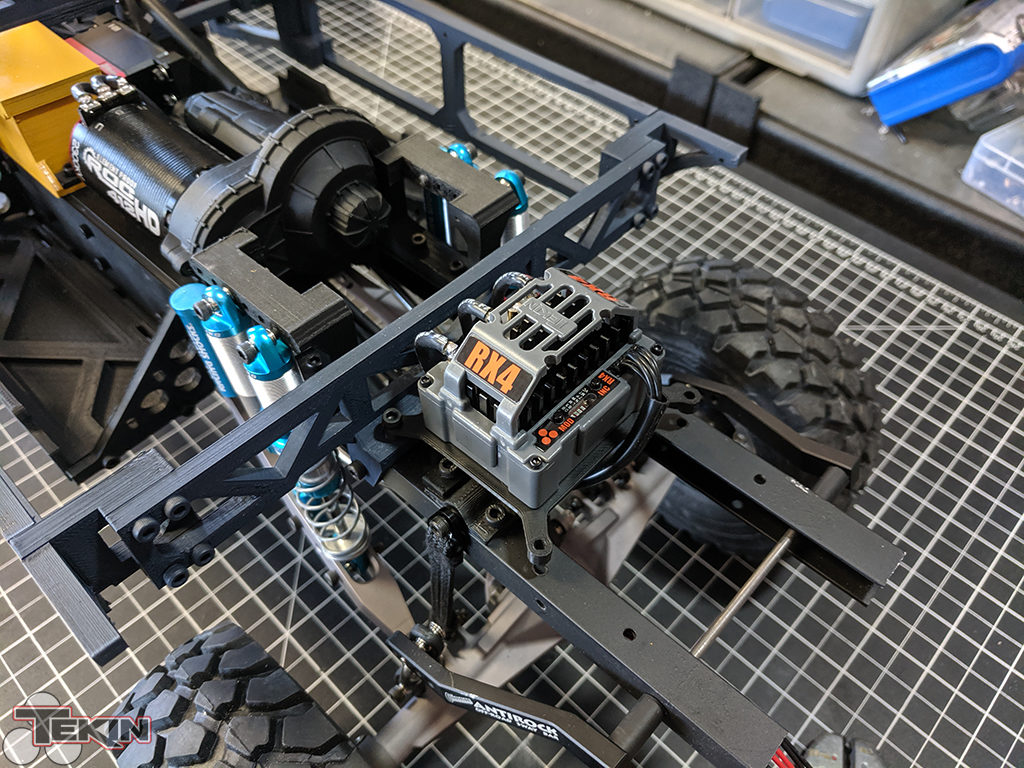
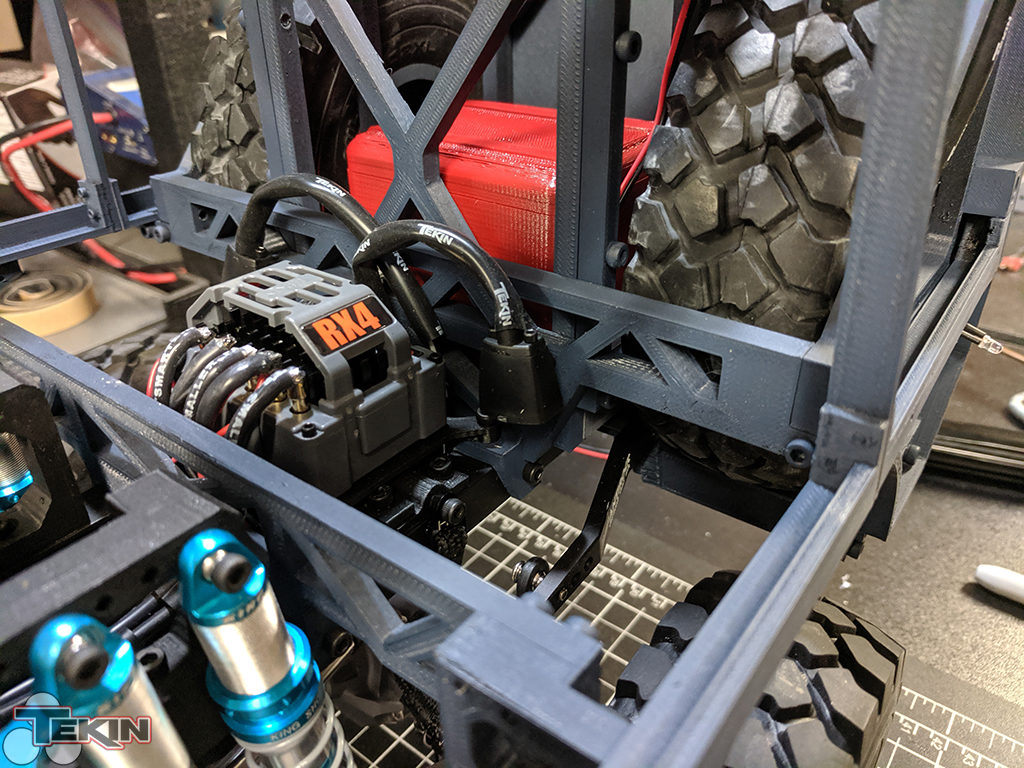
We started with the basics, which included a massive pile of Vanquish Products aftermarket parts for the SCX10-II and Bomber platforms, bearings from Fast Eddy Bearings, King shocks and 2.2 ZXL tires from RC4WD, a 2-speed SCX10-II transmission and a couple WB-8HD driveshaft kits from Axial Racing. There are LED bars from Pro-Line Racing, more LEDs from the interwebs soldered up by yours truly, an ESS ONE+ sound module and of course, Tekin gear to push the beast, shift gears and steer. 2 ProTek LiHV 8200mAh packs provide the go juice for the RX4 speed controller, the 2300kV ROC412 HD brushless motor, the T-440 steering servo and the T-120 shift servo. The livery is custom Tekin-designed and printed by SOR Graphics. Check the end for the complete build sheet and truck specs!

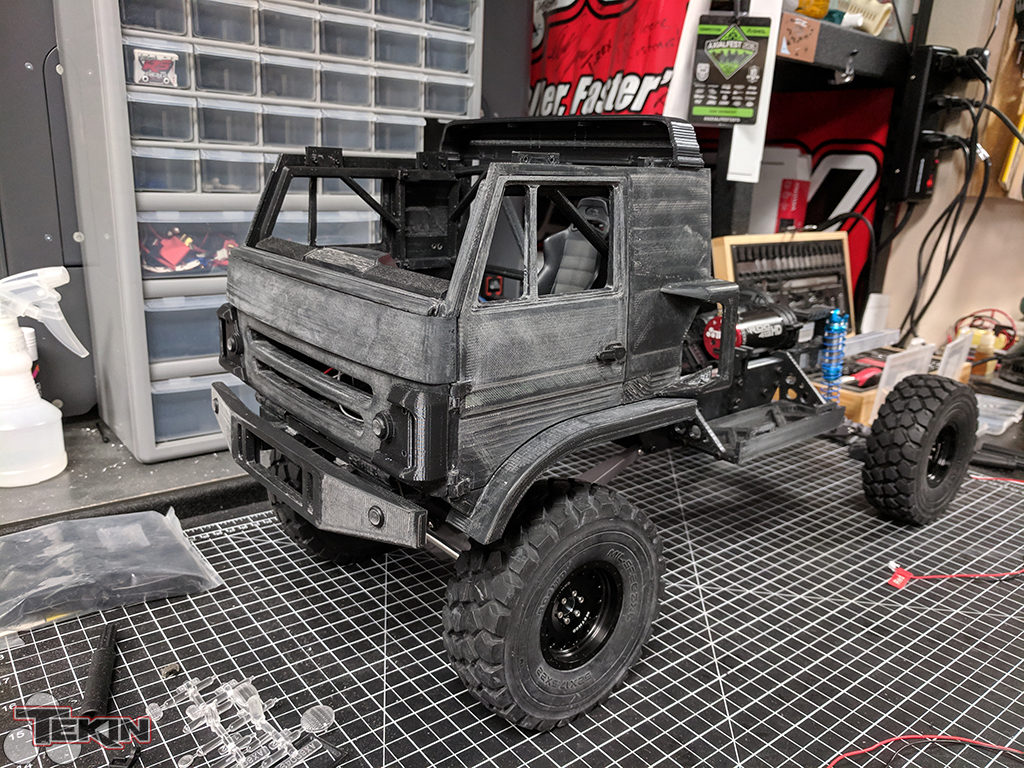
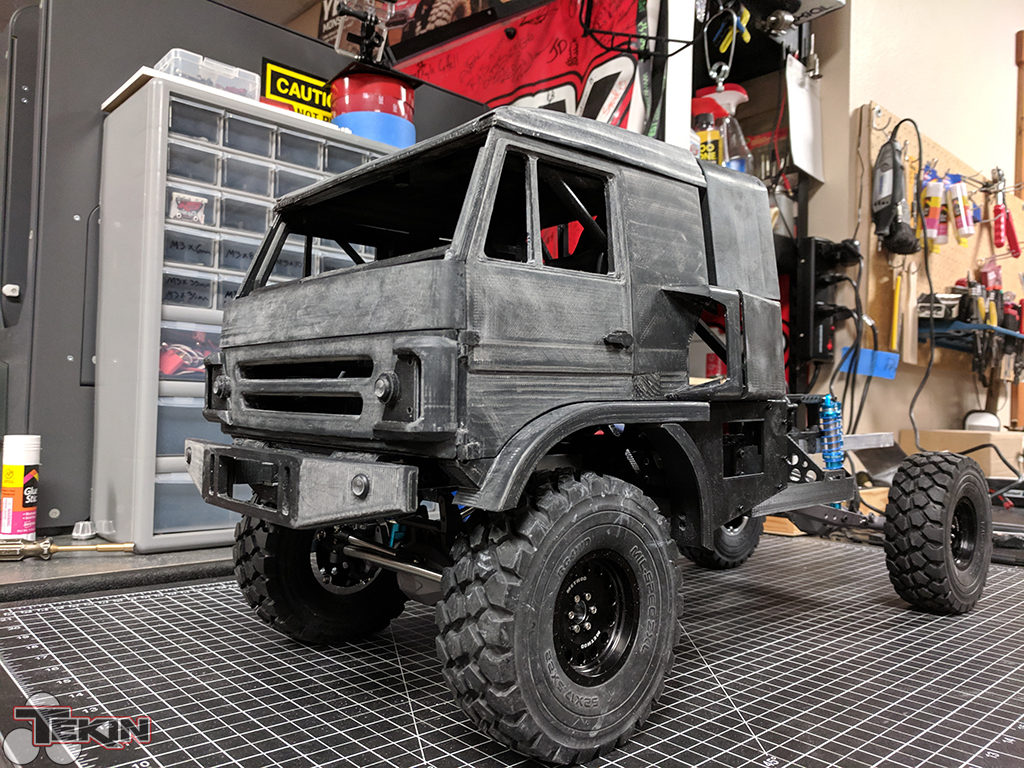
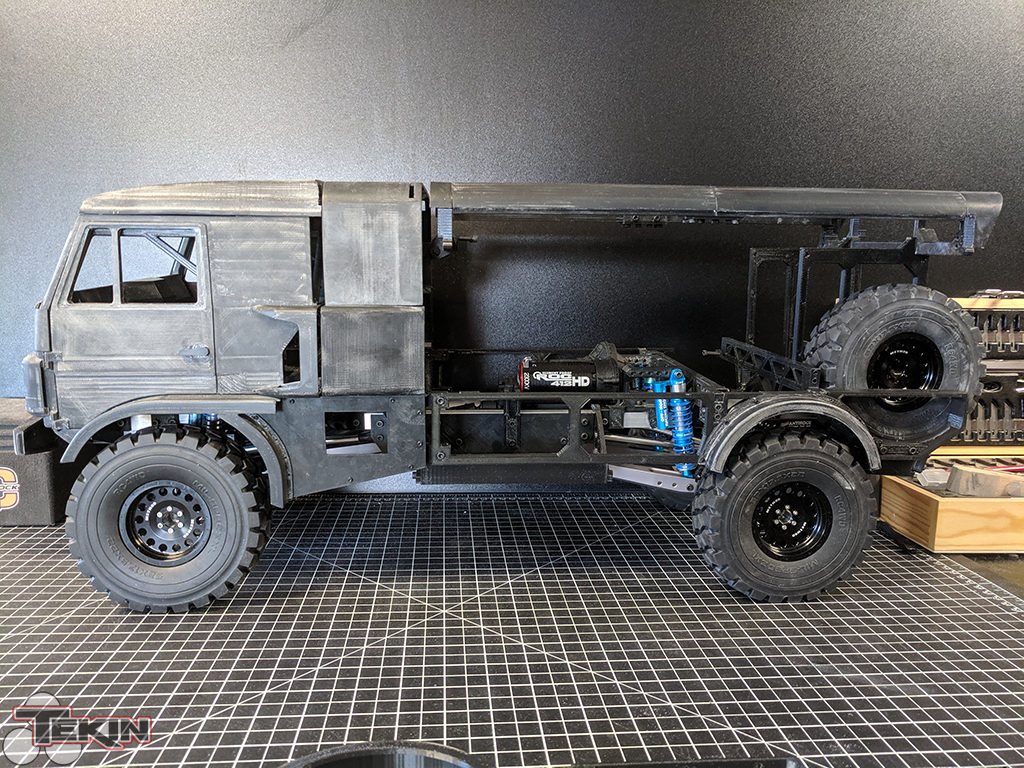
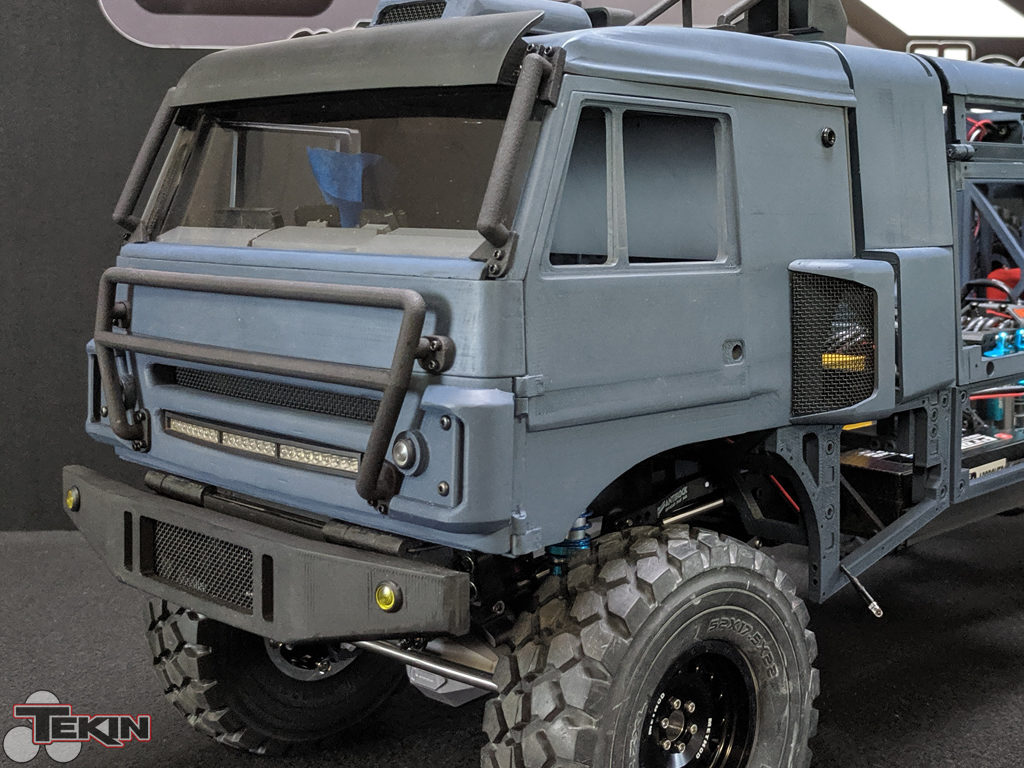
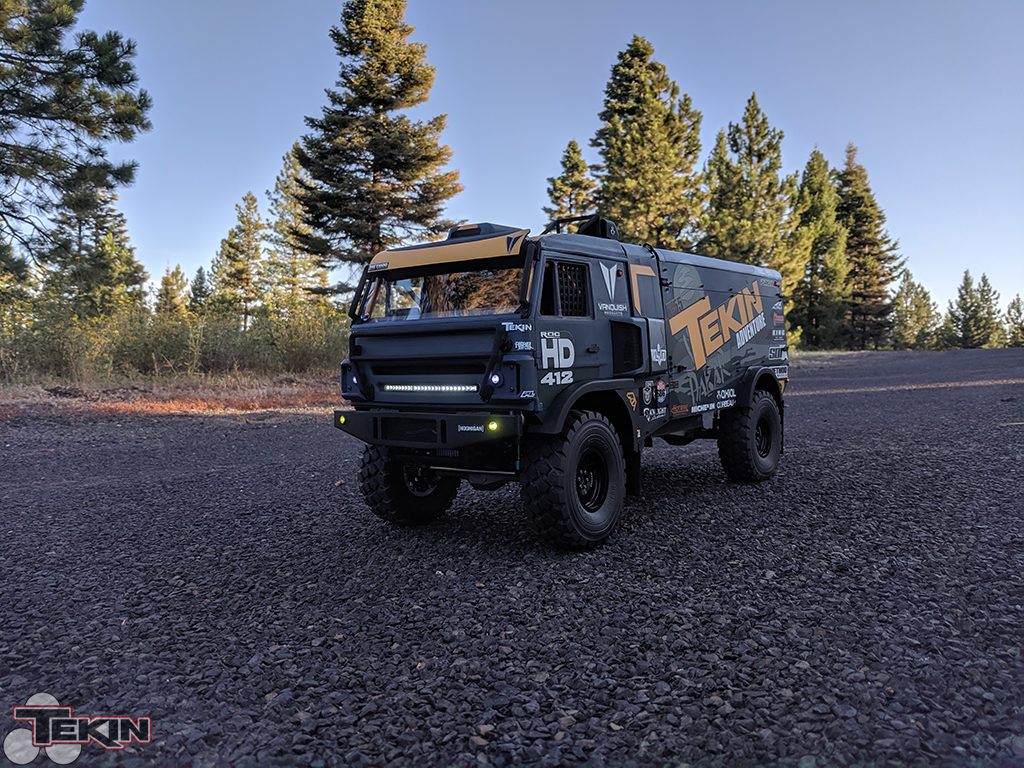
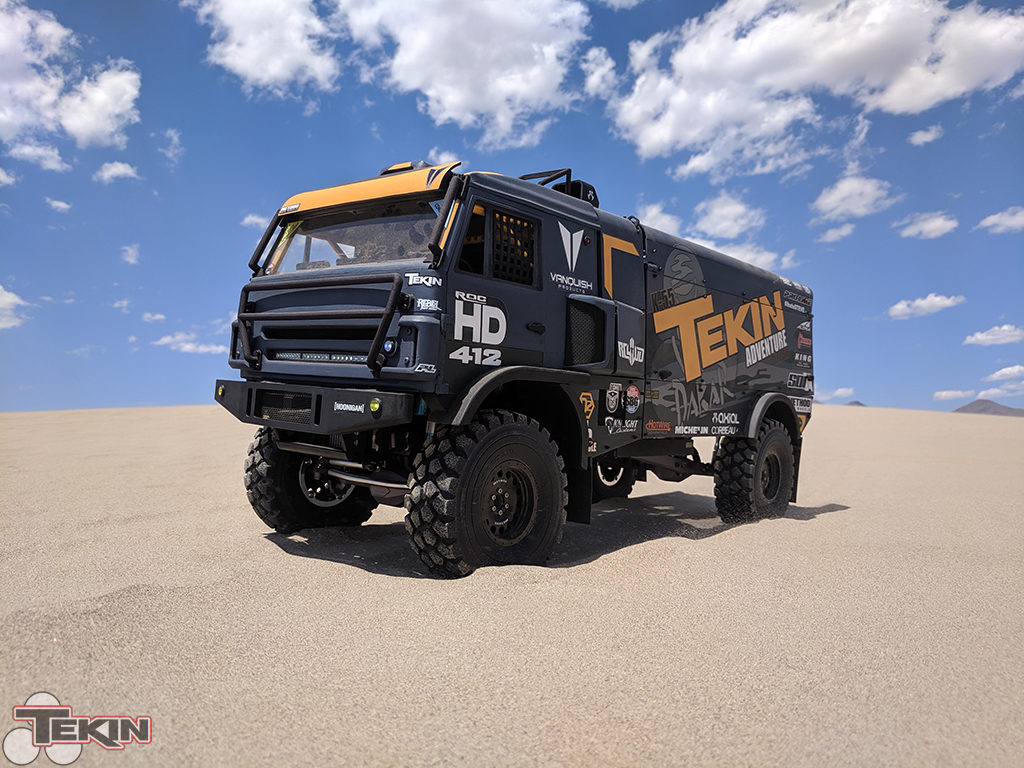
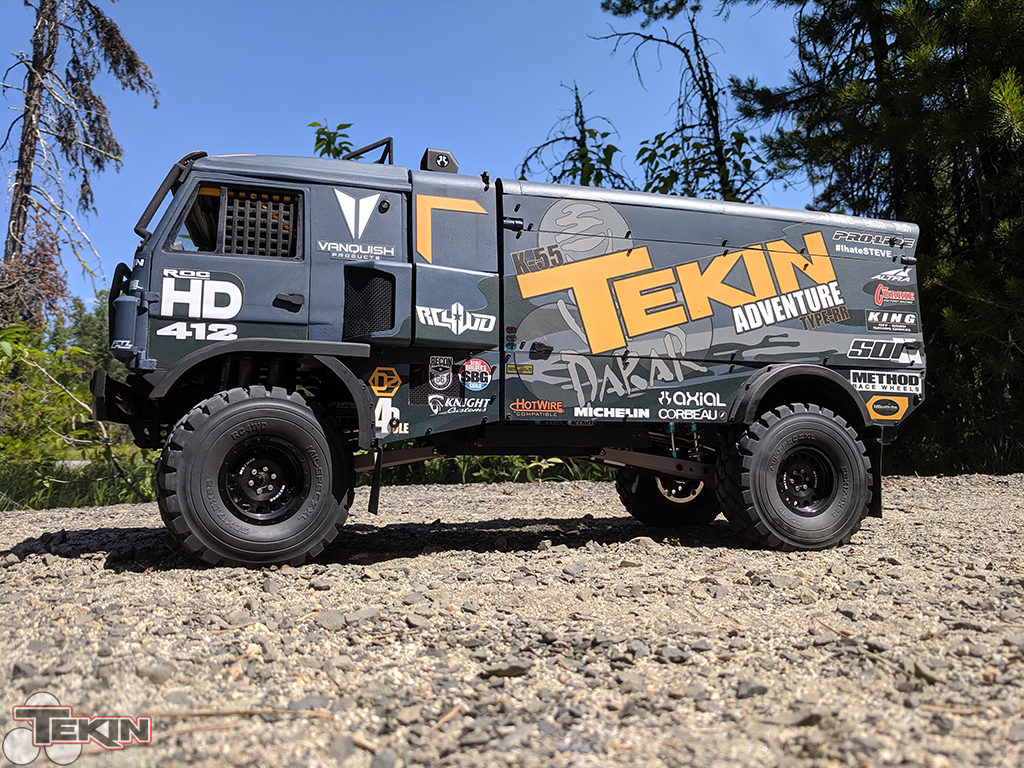
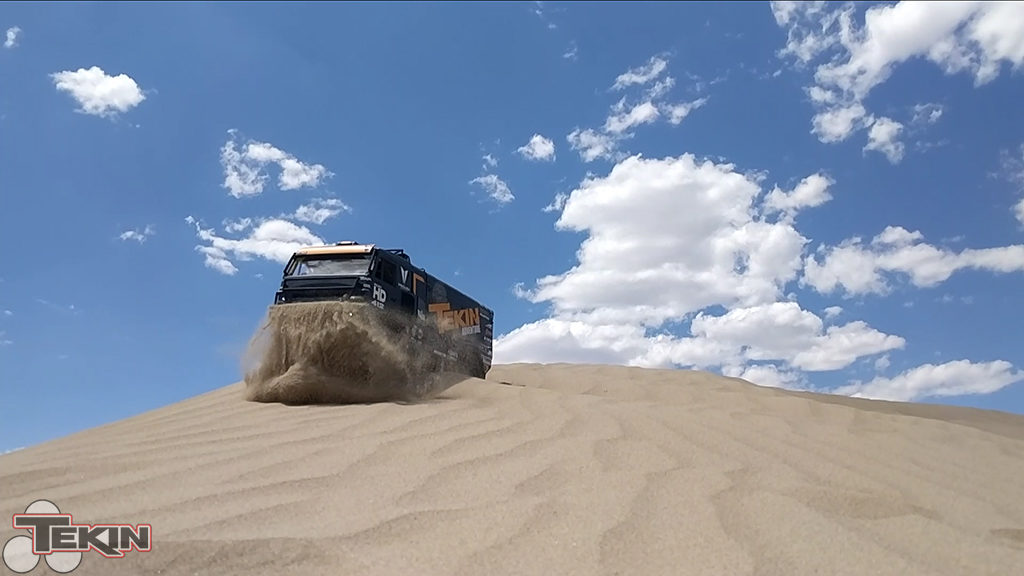
The inspiration for this truck came straight from Kamaz Master Sport. The Blue Armada, who have dominated big truck rally for decades build some of the baddest rally machines on the planet. We took our exterior design cues from these iconic Red Bull trucks and created a blue beast of our own. The K-55 project took nearly 9 months to complete with typical snags any big project will likely encounter. There are 285 3D printed parts in this truck. There’s over 30ft of wiring. It weighs in at 18.3lbs ready to rally. It flies.
Drive Train
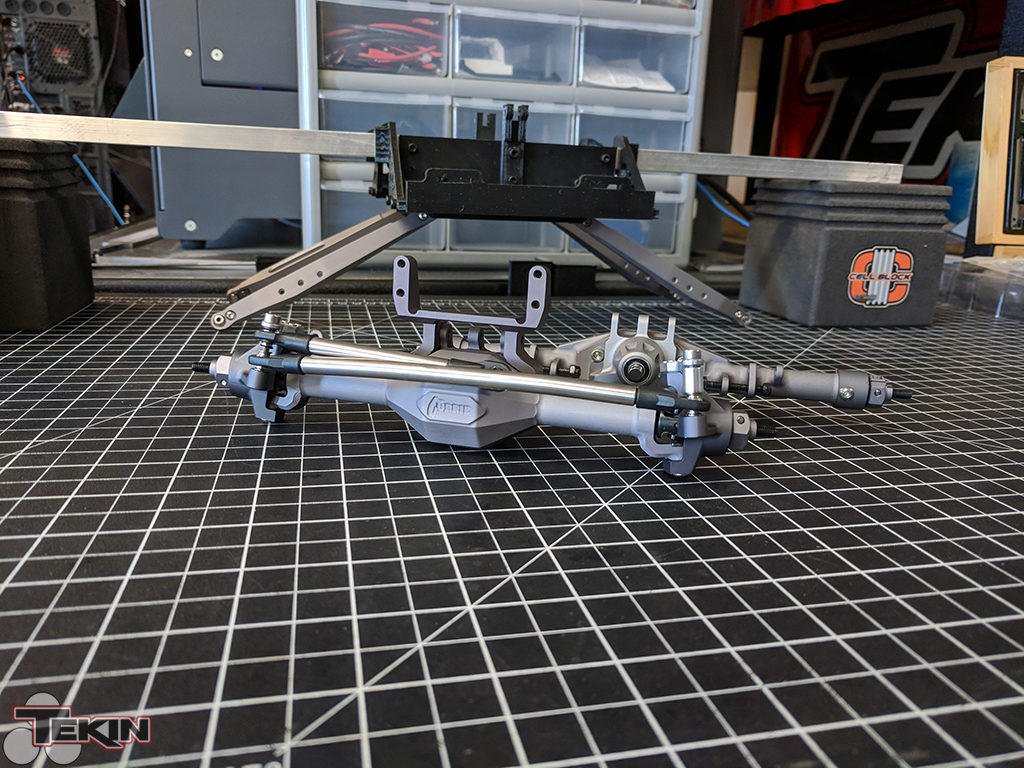
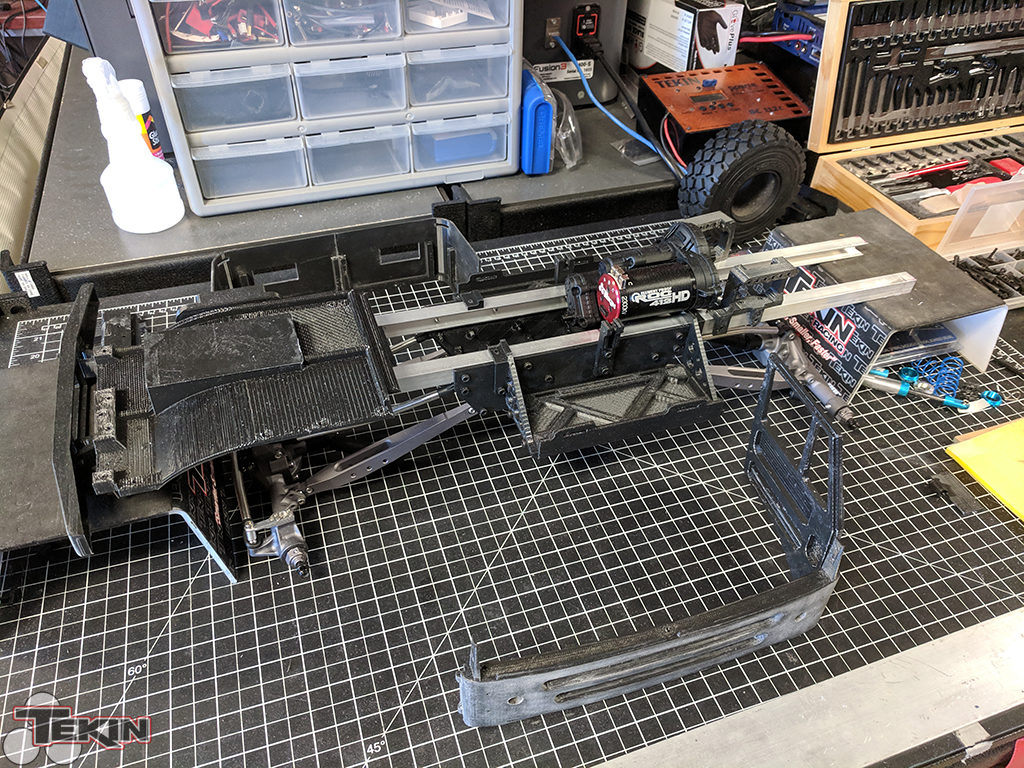
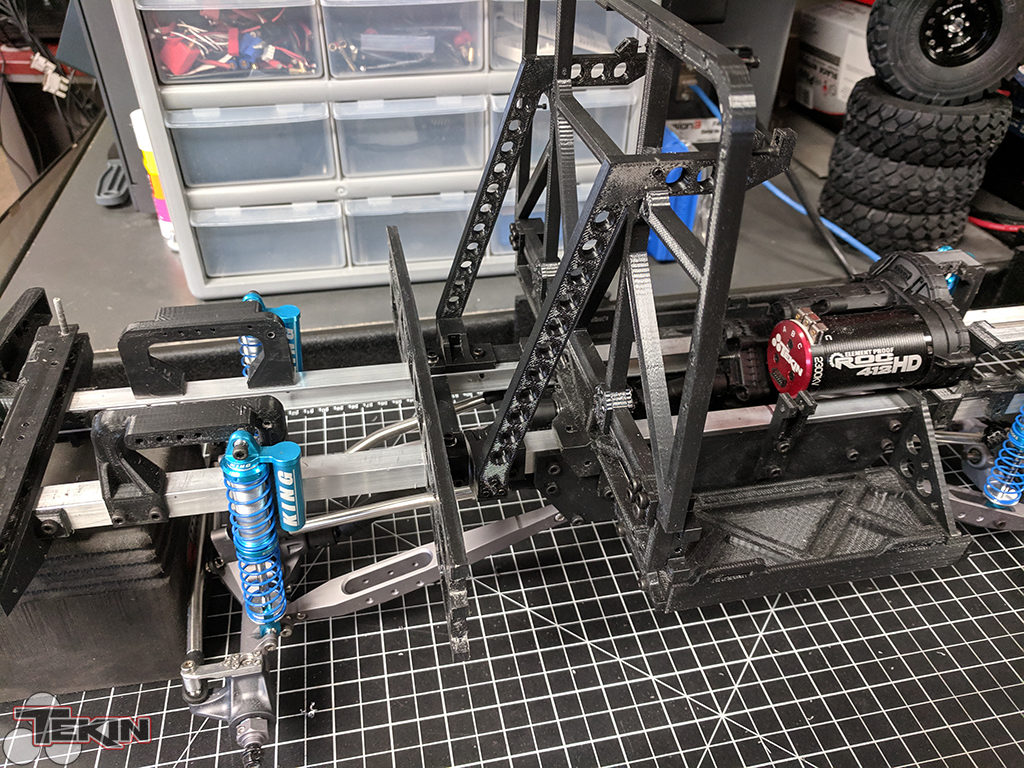
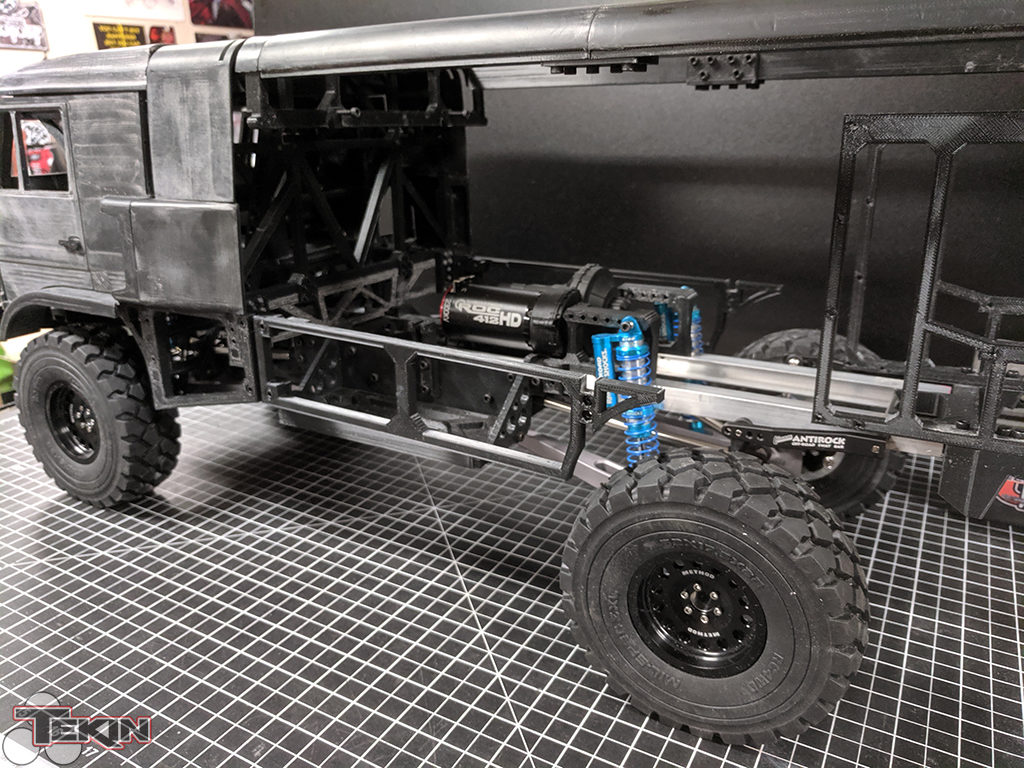
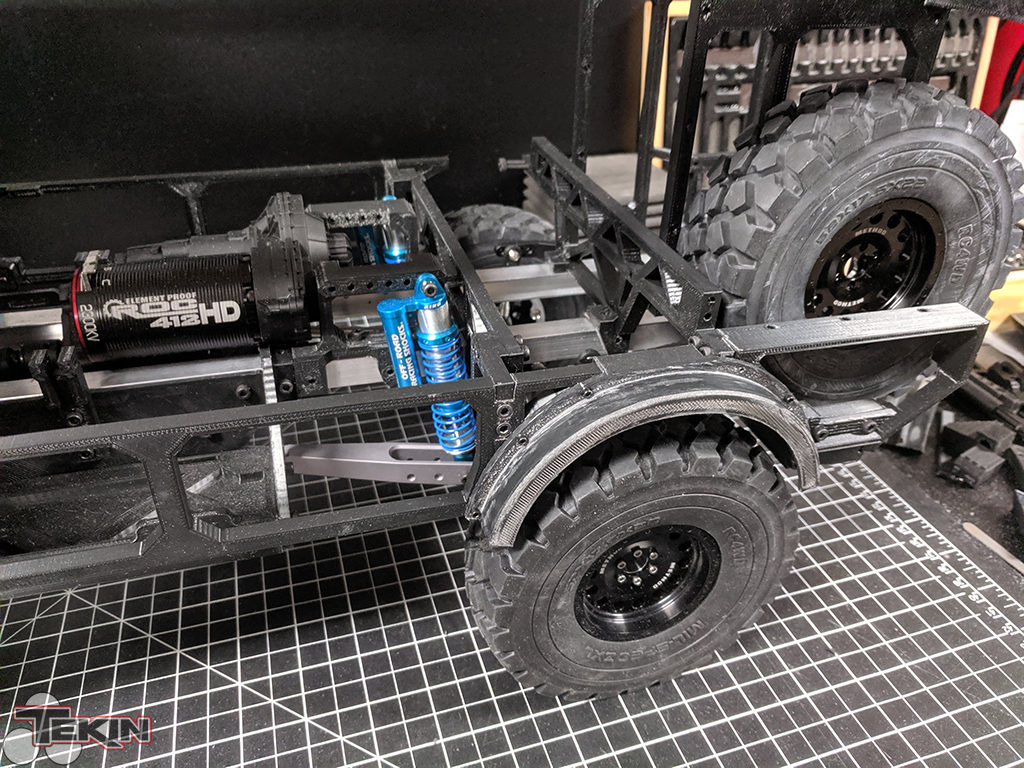
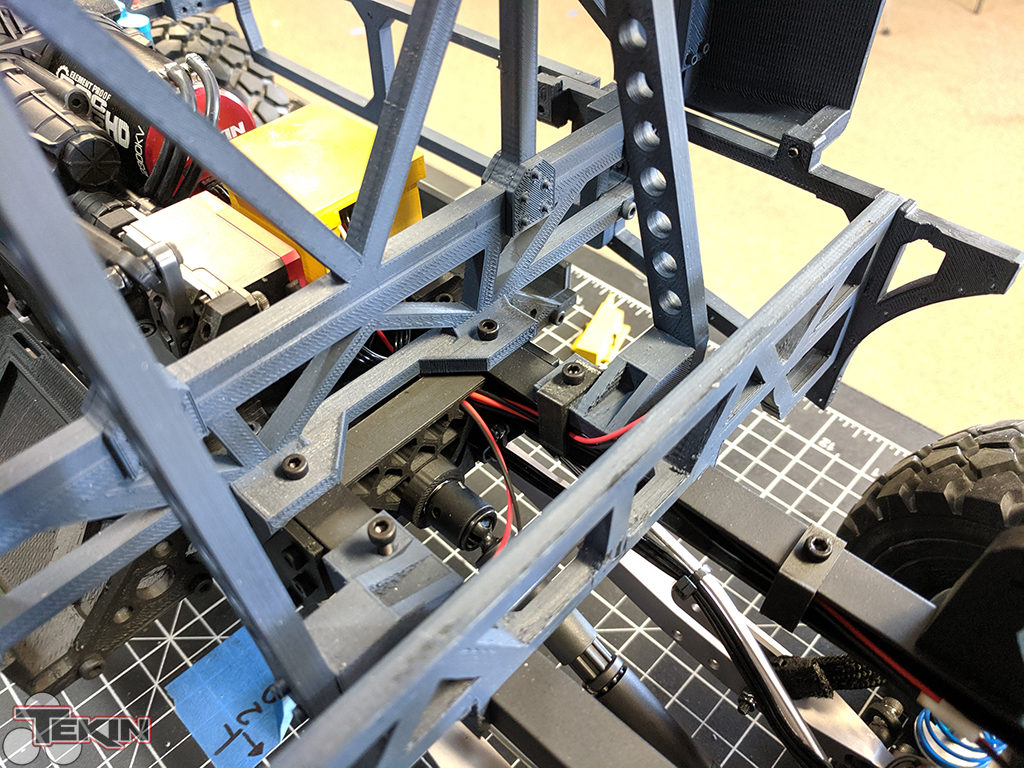
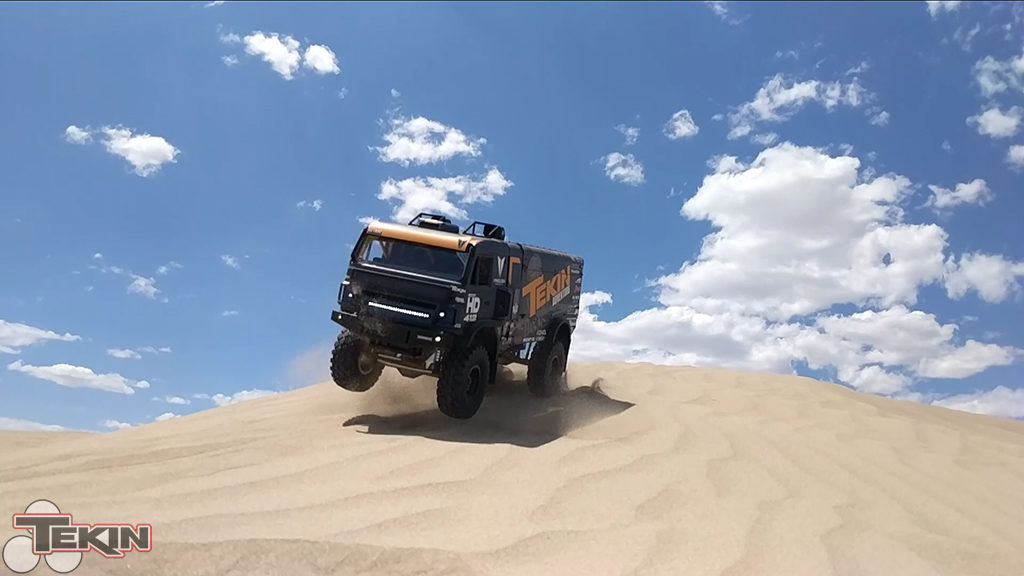
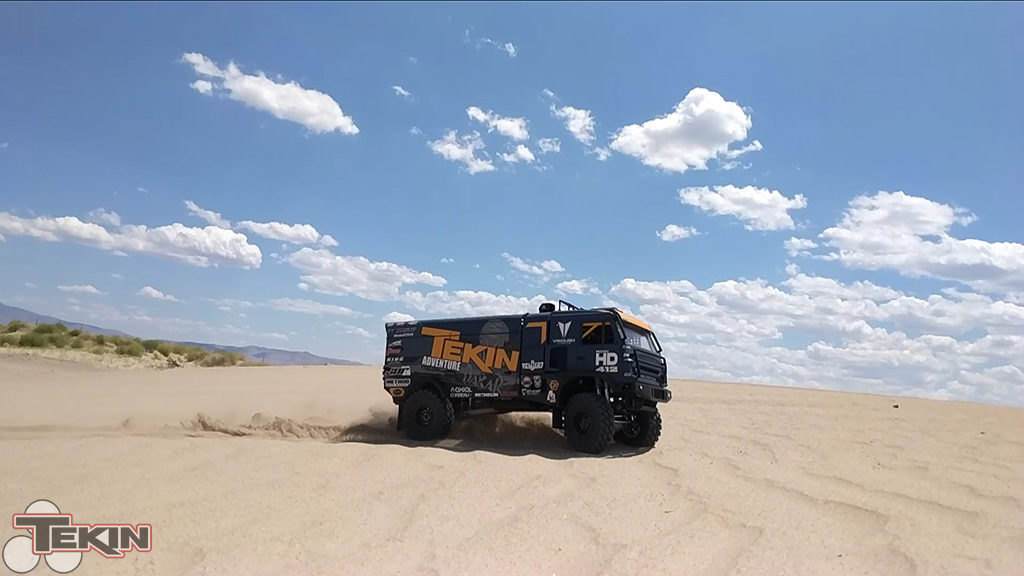
The drive train is Axial-based. The SCX10-II transmission has proven to be a tough unit and works great for this application. I went ahead and installed the 2spd gears so this truck would really move in 2nd and have more than enough wheel speed to play in the sand and soft dirt. The axles are Currie F9s by Vanquish for the SCX10-II loaded with Vanquish gears, axle shafts, universals, knuckles, wheel hexes and Fast Eddy Bearings. 3 Axial WB-8HD driveshafts transfer the power from the transmission to the axles. The 17.5″ wheel base provided a bit of a challenge as none of the shafts can cover that spread, so we designed and printed a bearing carrier and used an intermediate shaft to the front of the truck.

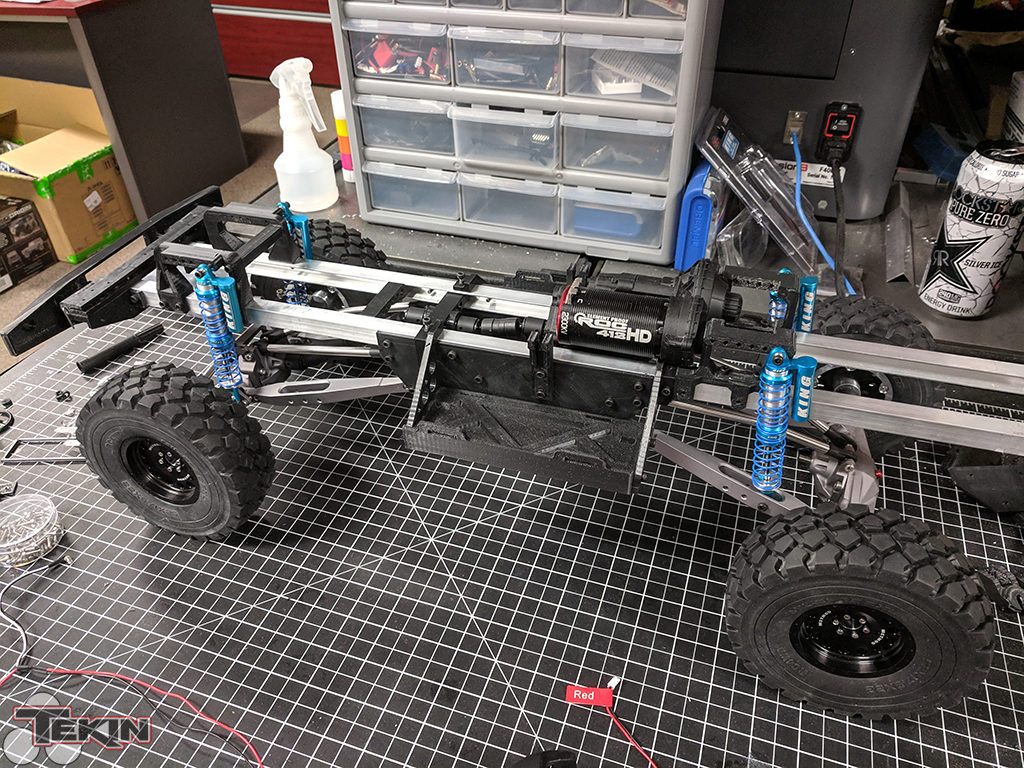
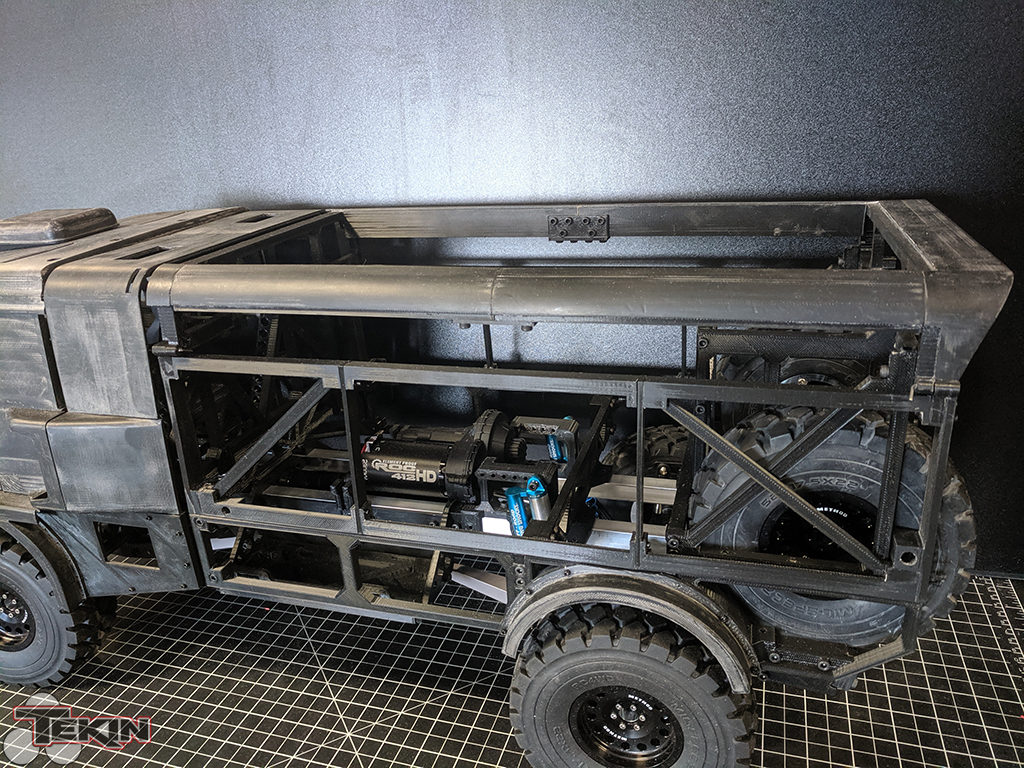
Chassis
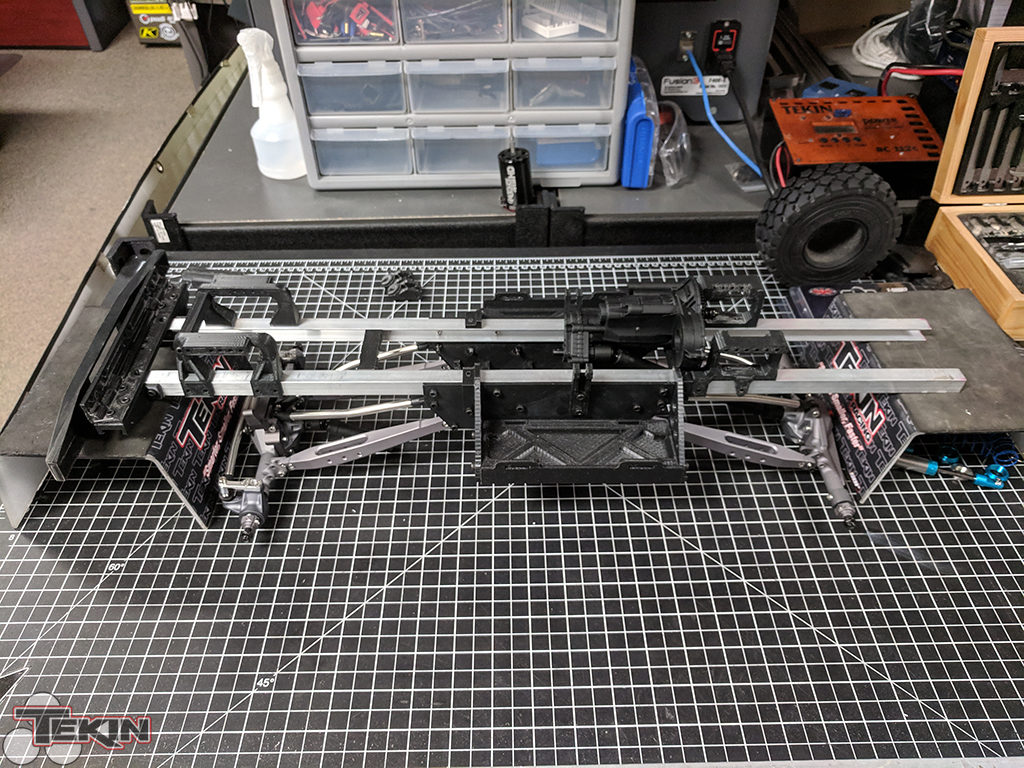
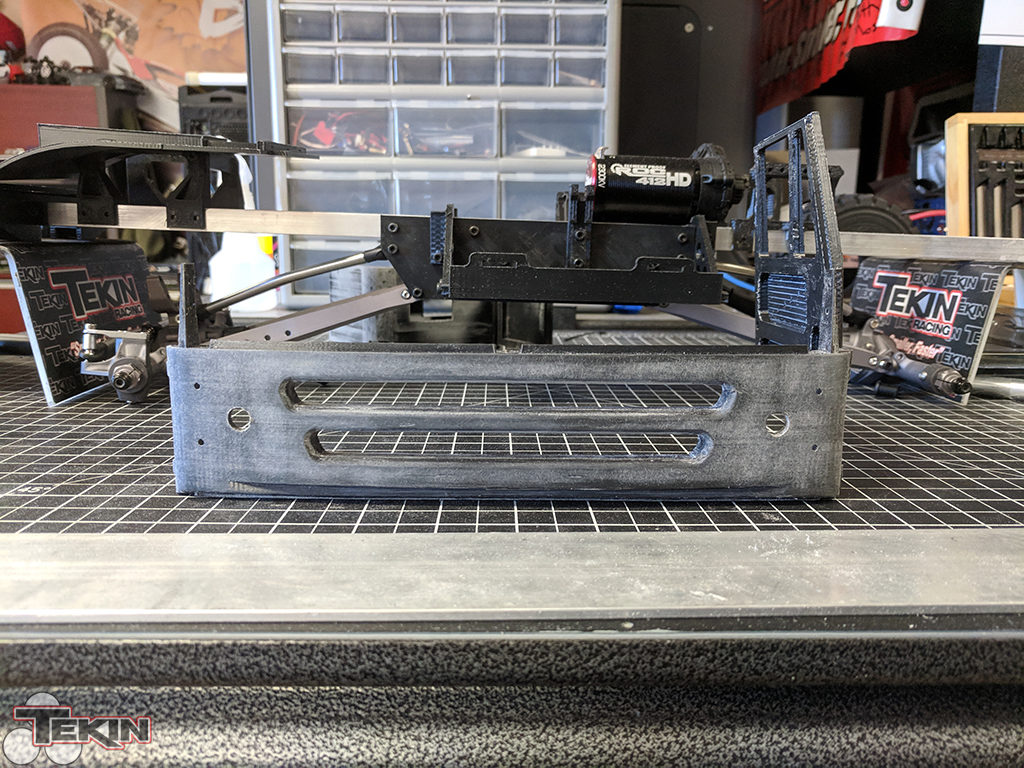
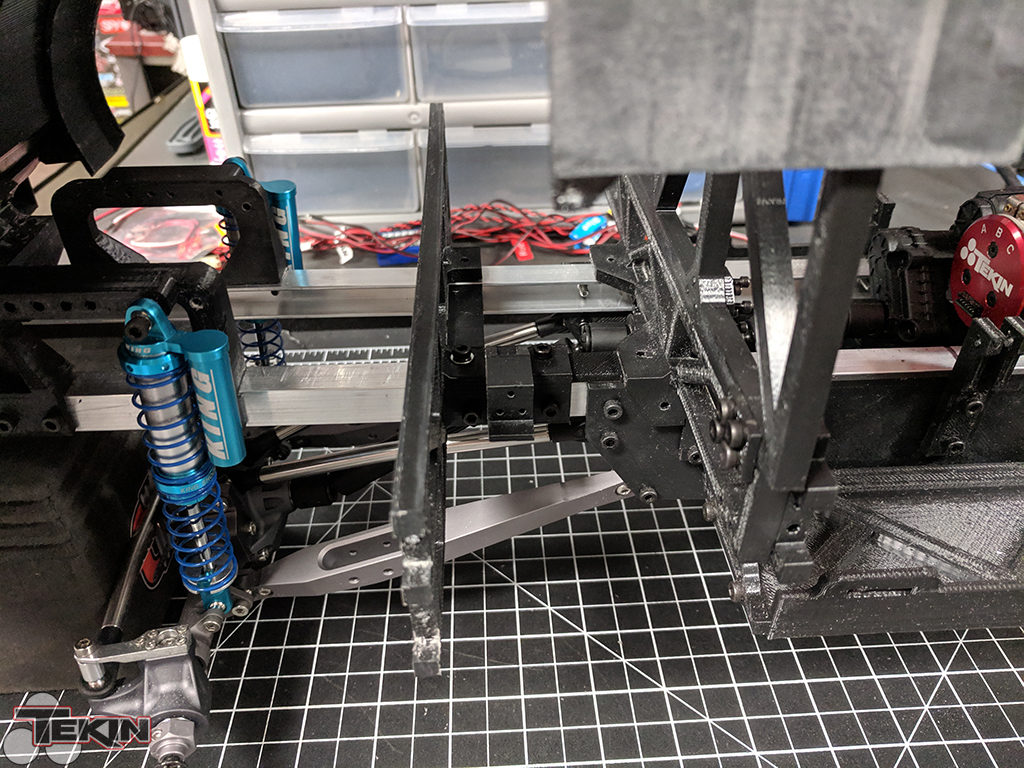
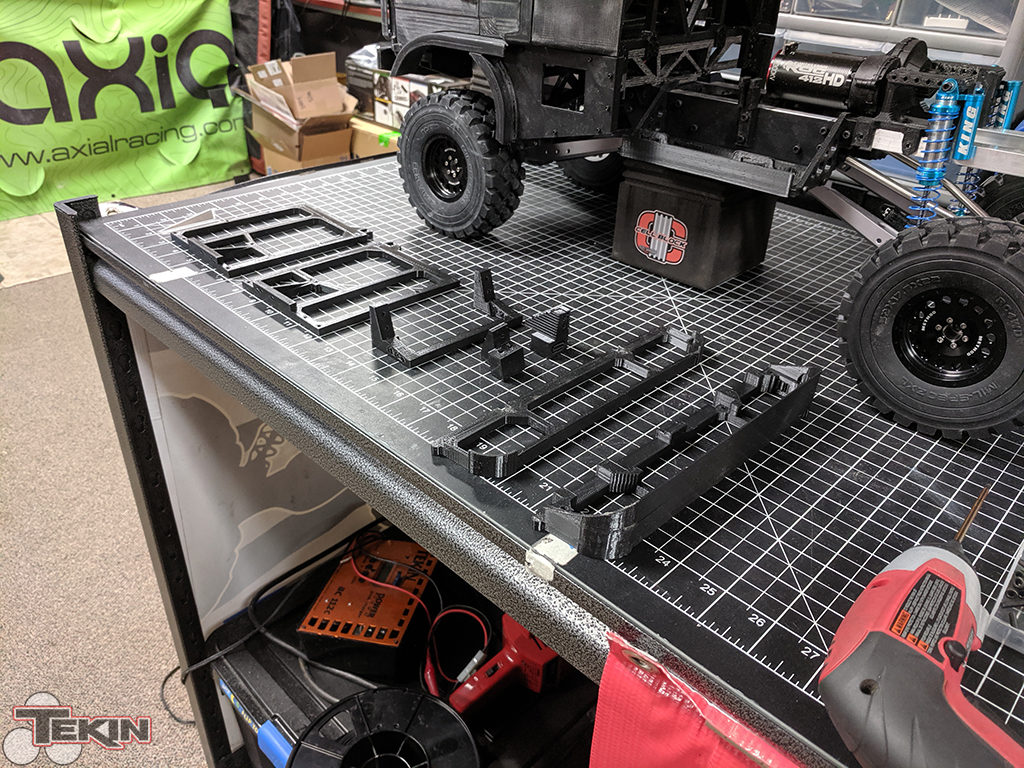
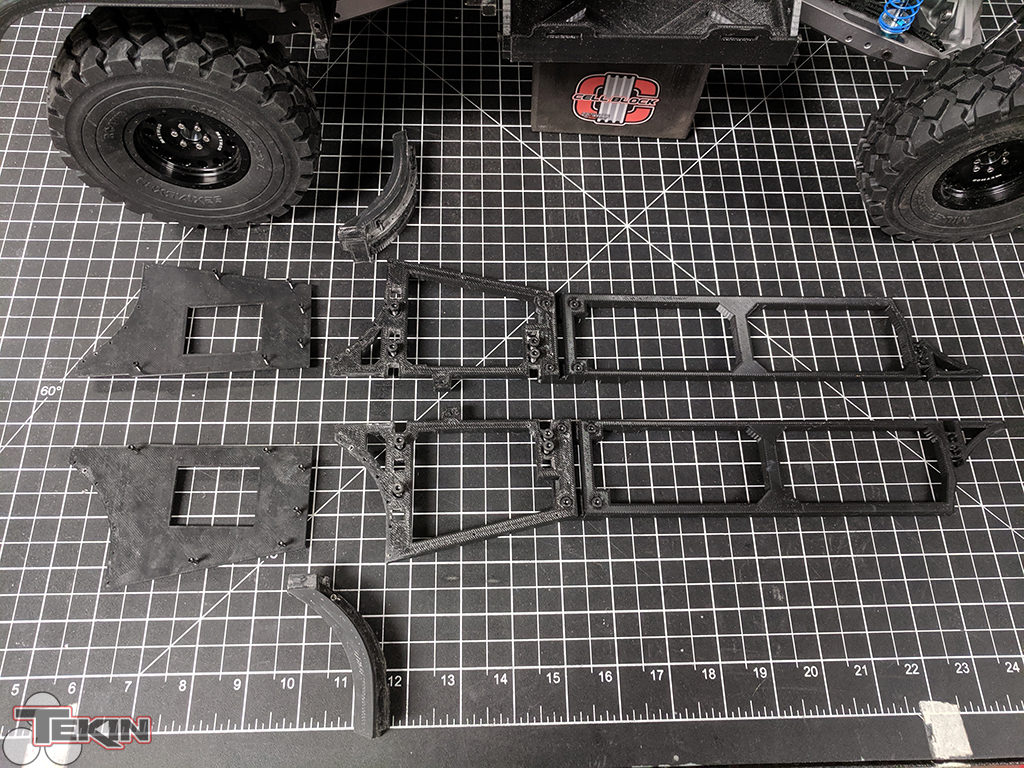
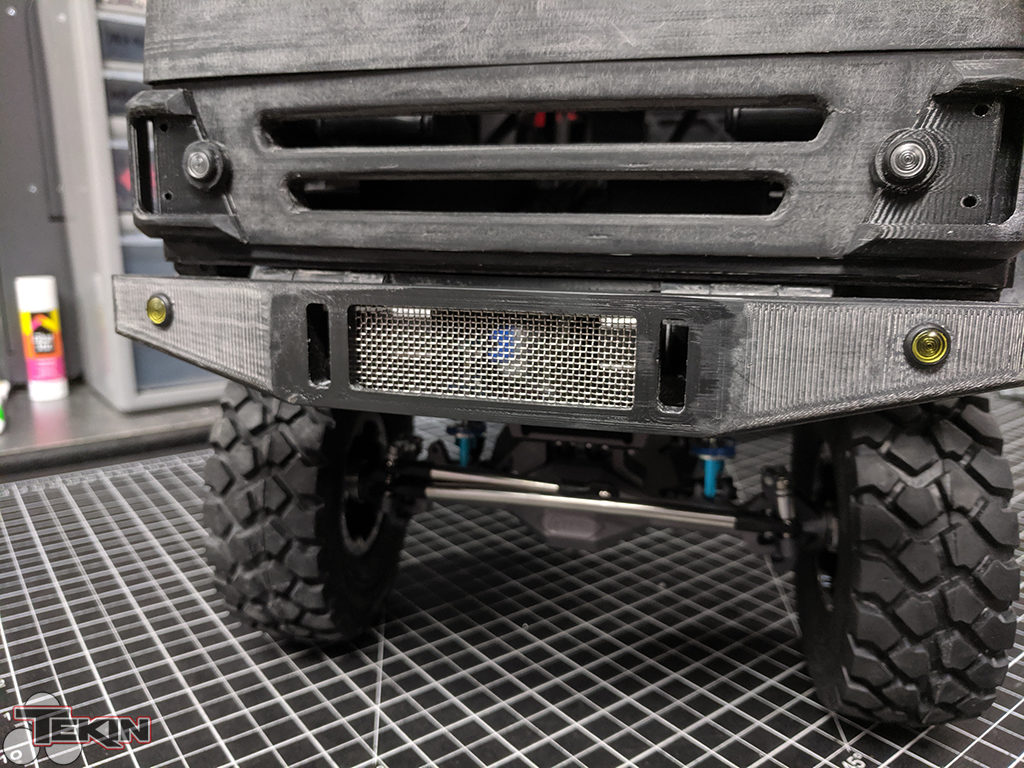
The chassis is custom made from 3/8″ aluminum c-channel you can find at any hardware store. It’s plywood edging, ultimately. Everything else on the chassis is custom designed 3D printed from ABS filament. Sub-frame, transmission mounts, shock hoops, bumper and bumper mounts, battery trays, all of it!

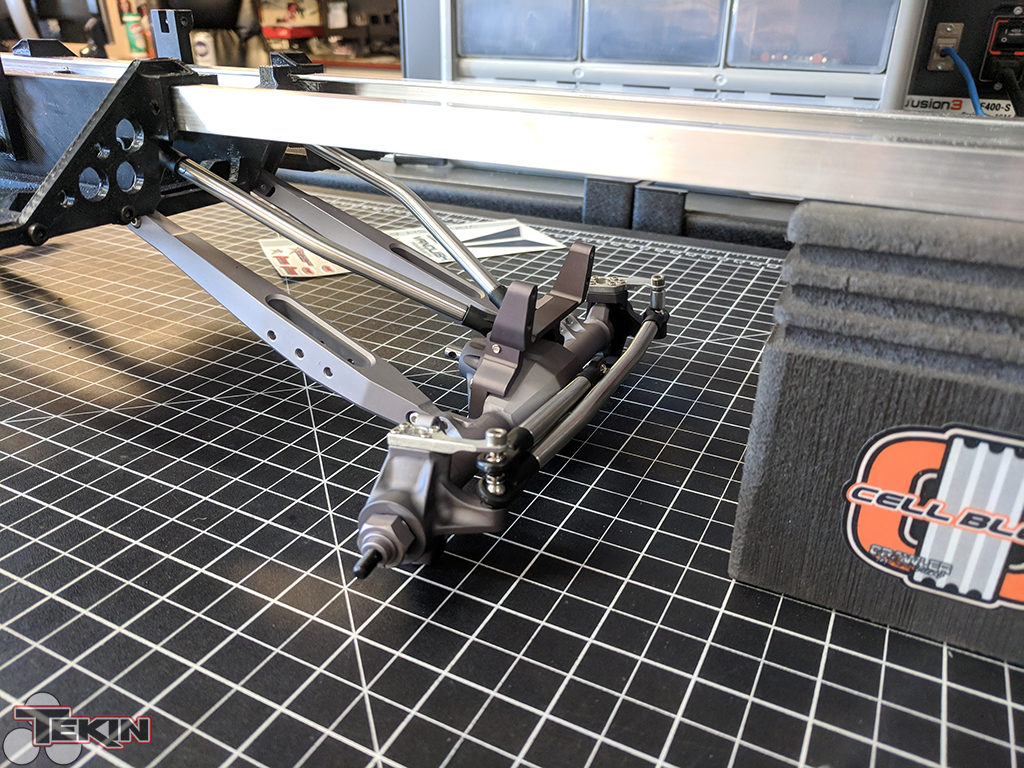
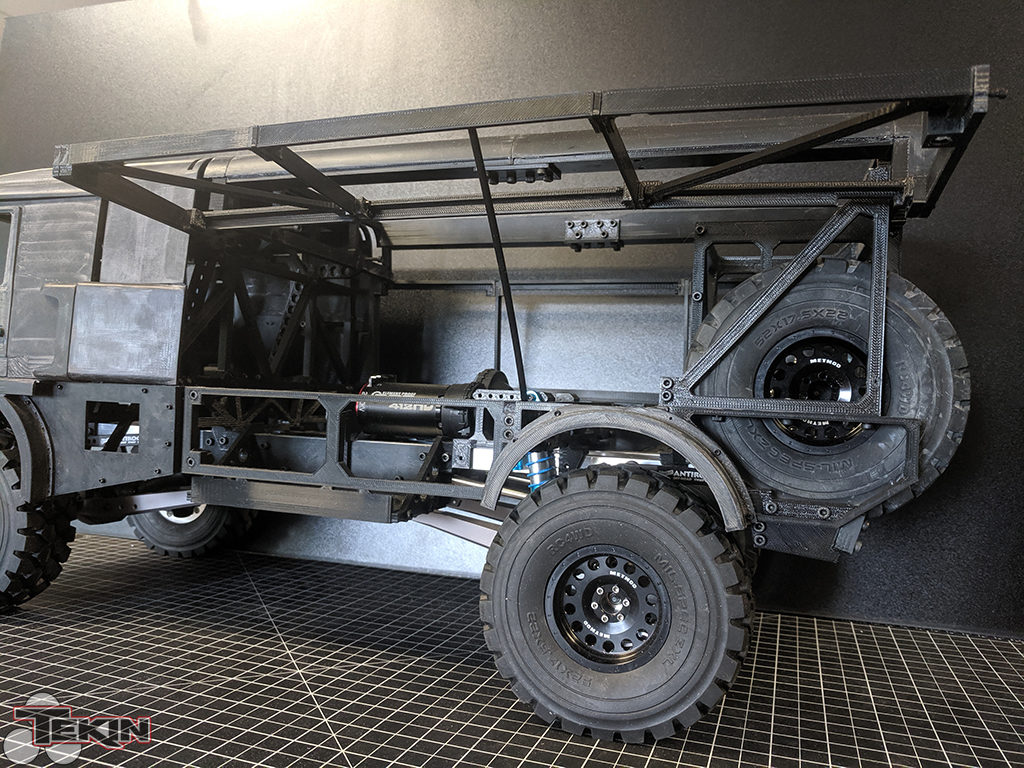
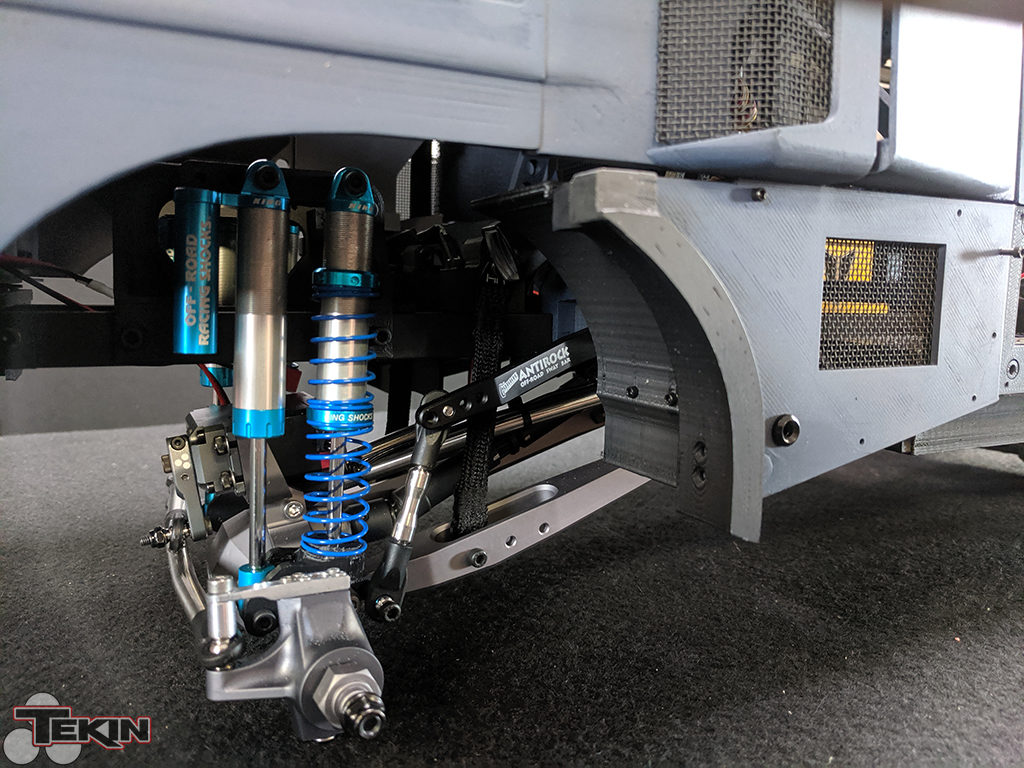
Suspension
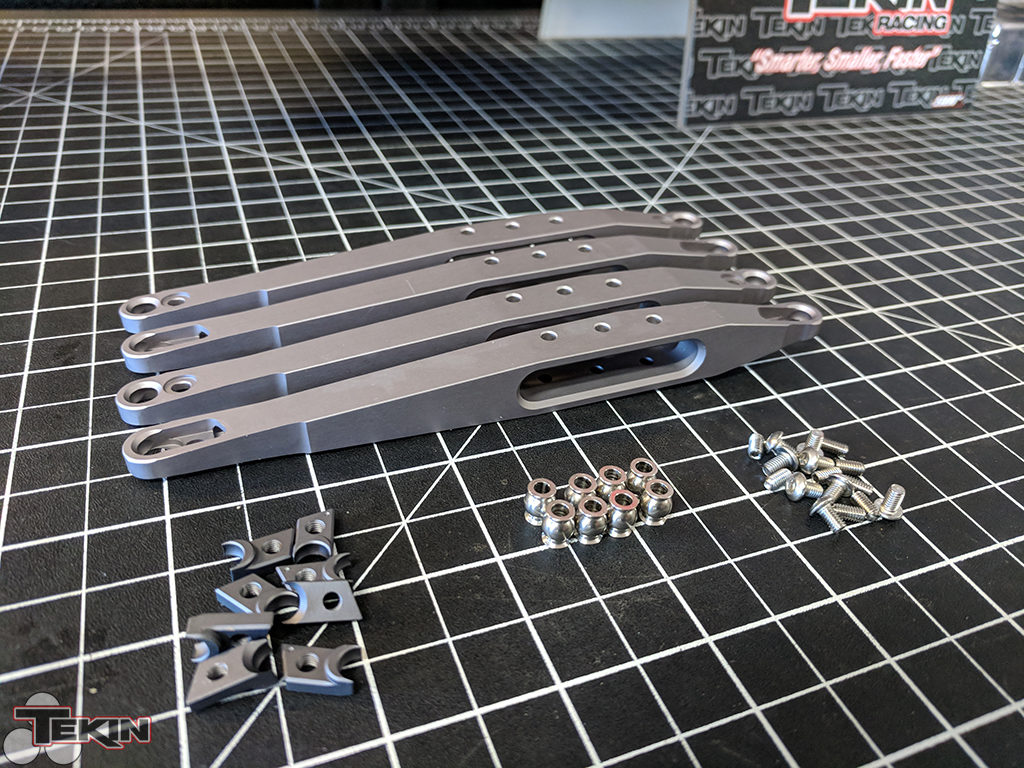
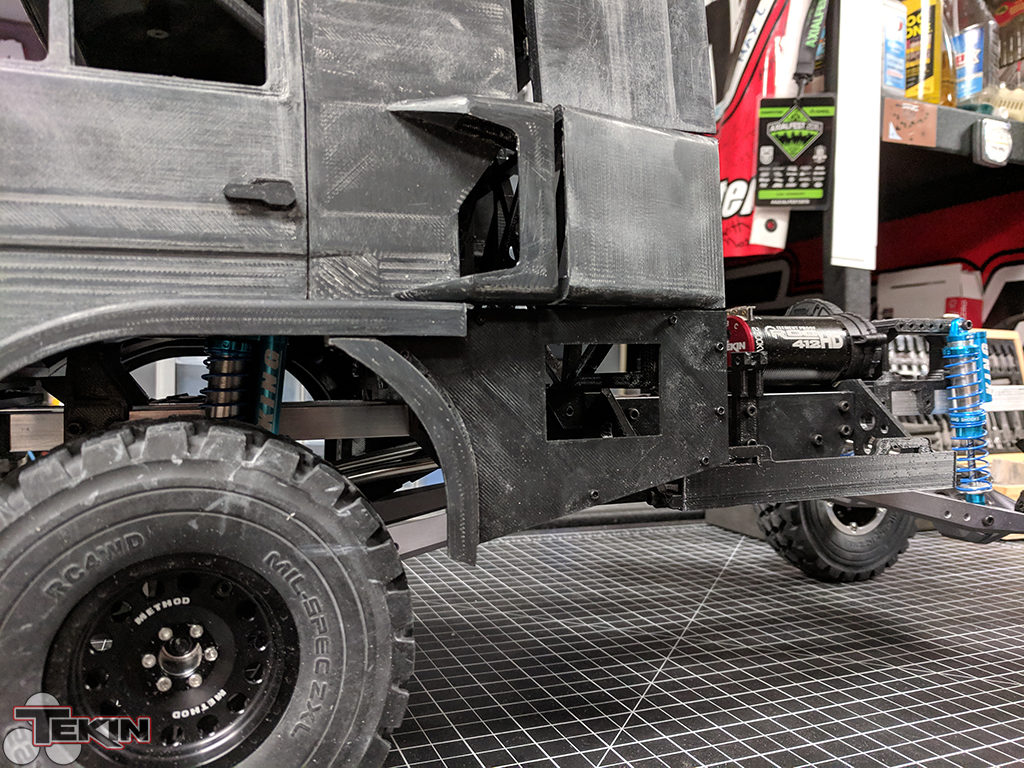
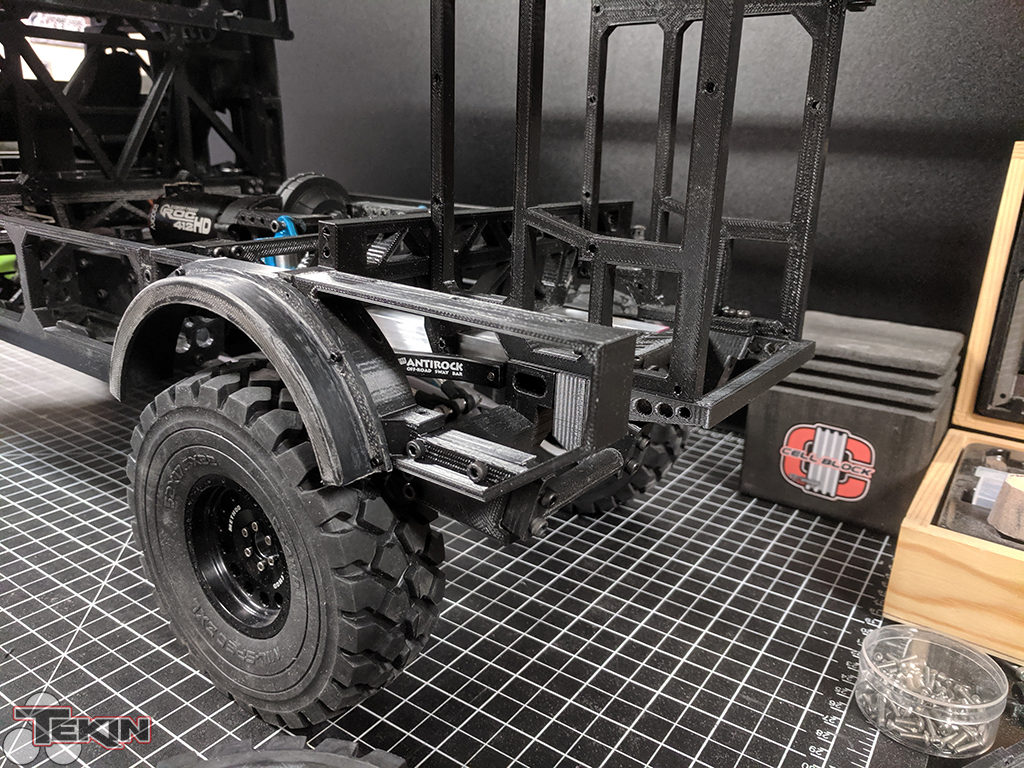
The suspension is not scale to the real trucks, but it worked so well on the M-55 build we used the same hardware. Vanquish Bomber lower rear arms were used front and rear and Vanquish Incision 1/4″ stainless Bomber upper links were also used front and rear. We stretched the sub-frame section of the chassis from the M-55 build to achieve the desired wheelbase and RC4WD 110mm King Shocks hold the truck up. There are 8 of them in the finished product!

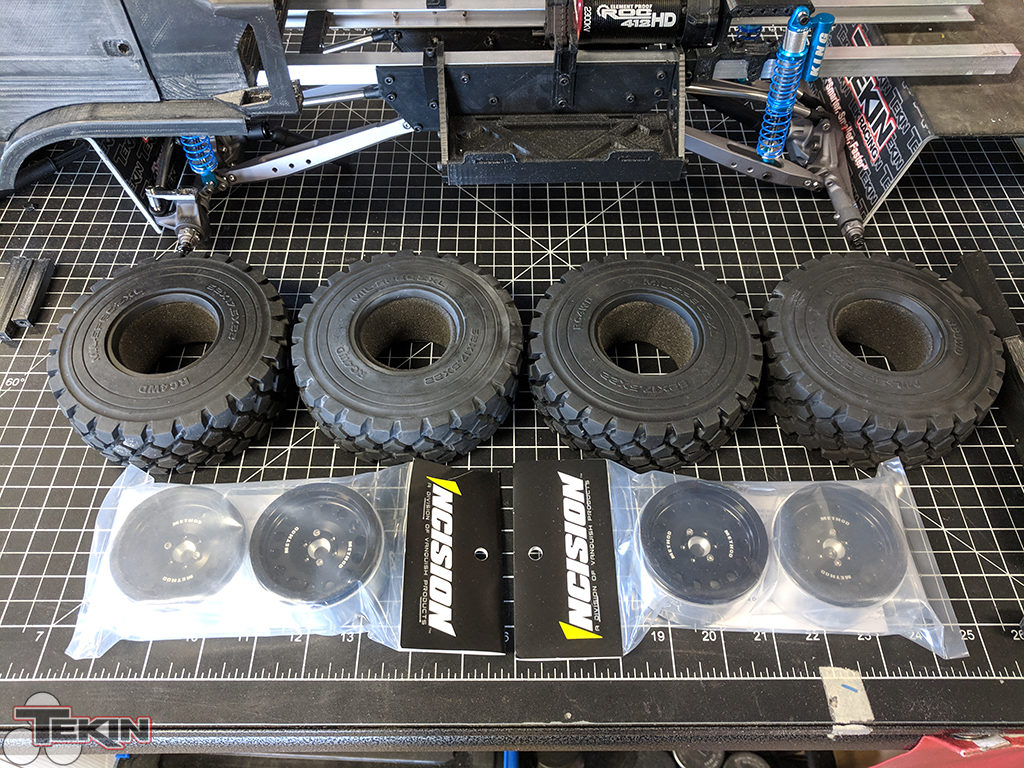
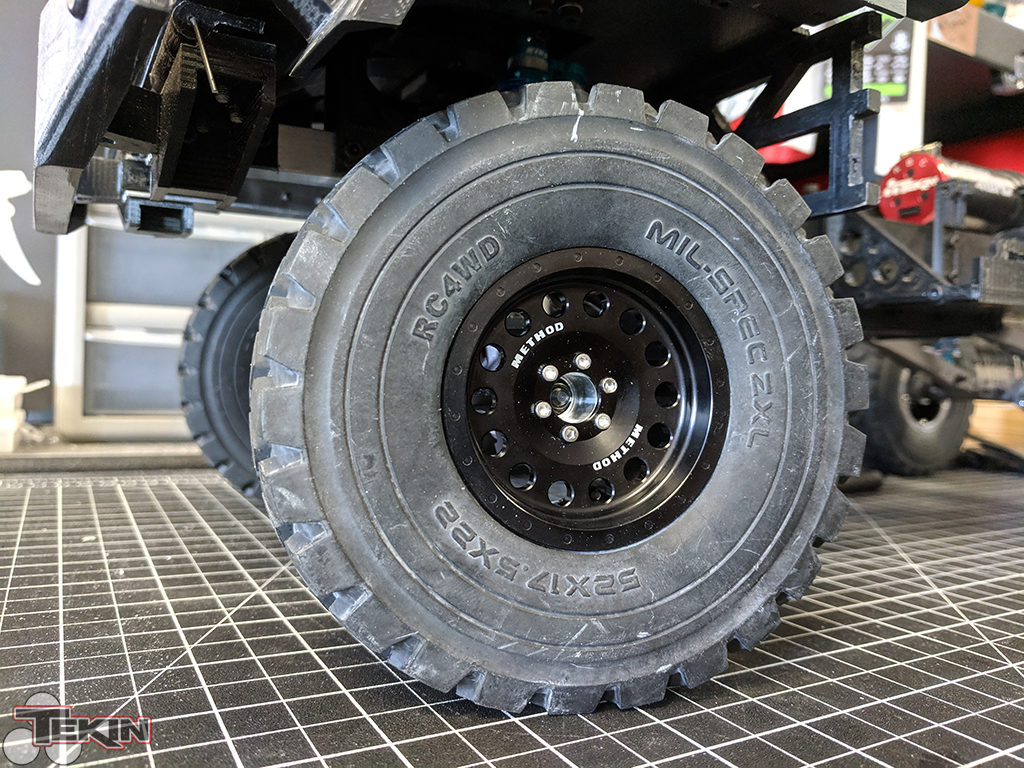
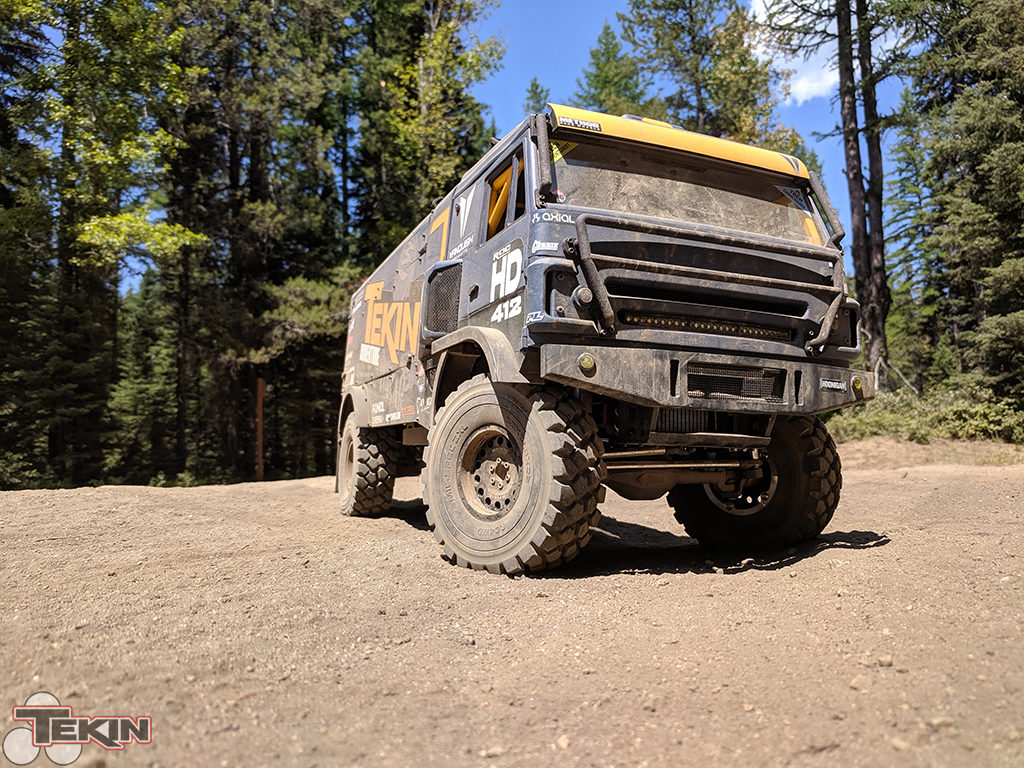
Wheels & Tires
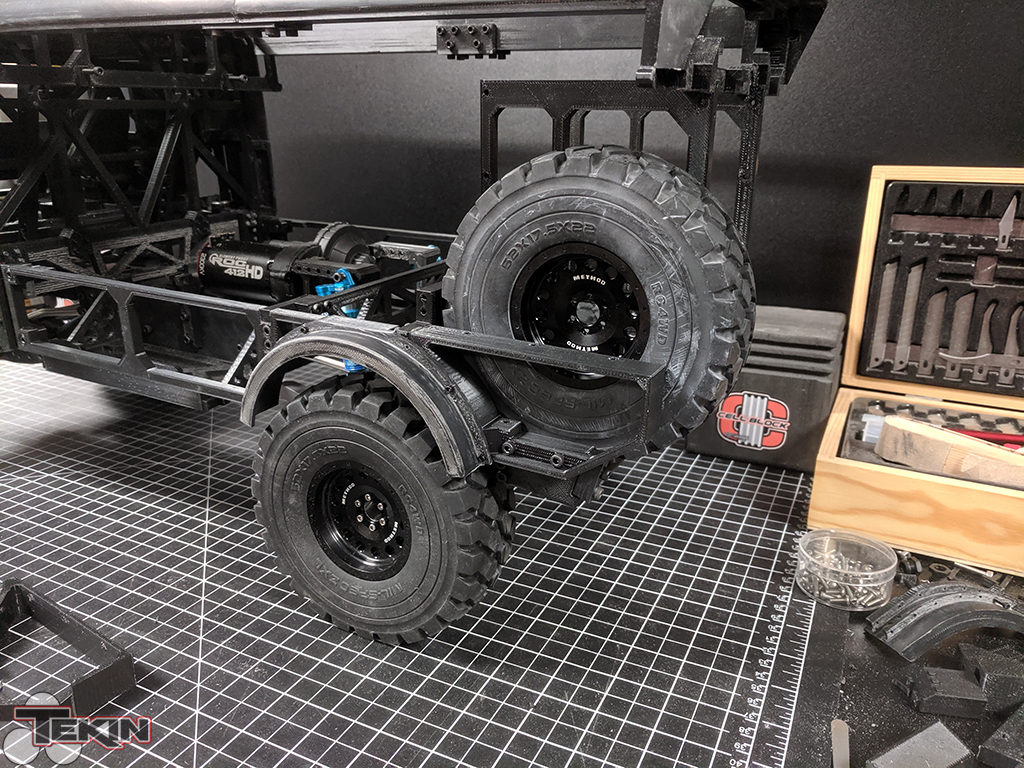
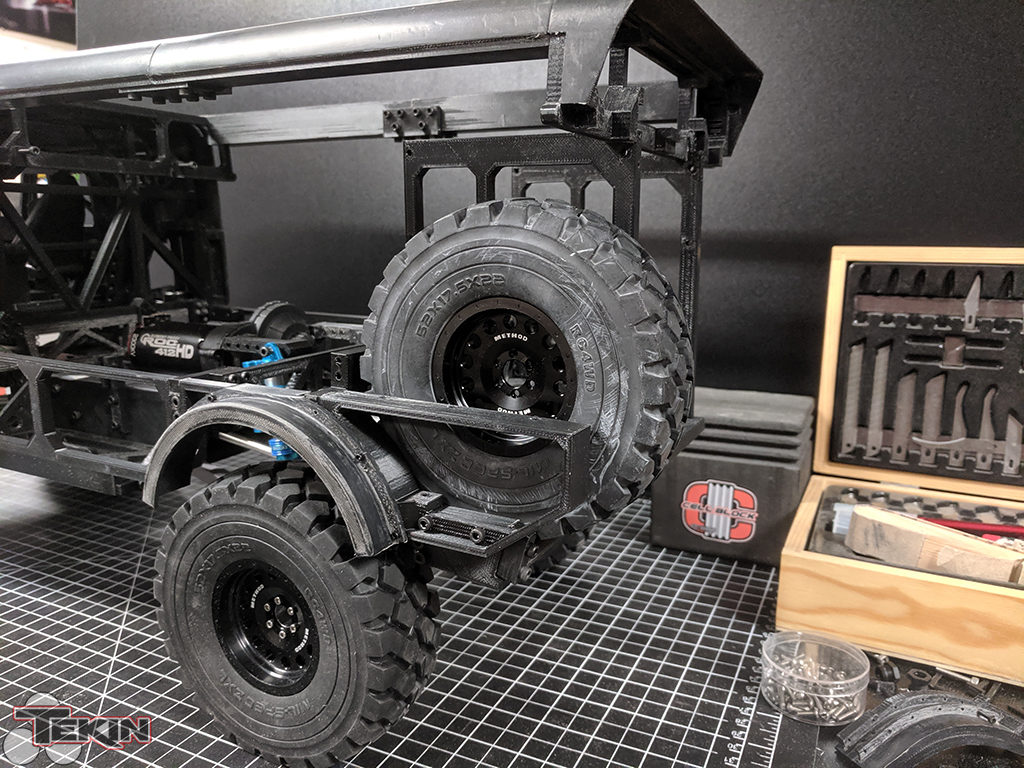
The wheels are 2.2 Method MR307s by Vanquish and tires are 5.2″ Mil-Spec ZXLs by RC4WD. Perfectly sized for this rig and they hold it up really well. The tires have a pretty stiff sidewall and the tread pattern is exactly what we needed.
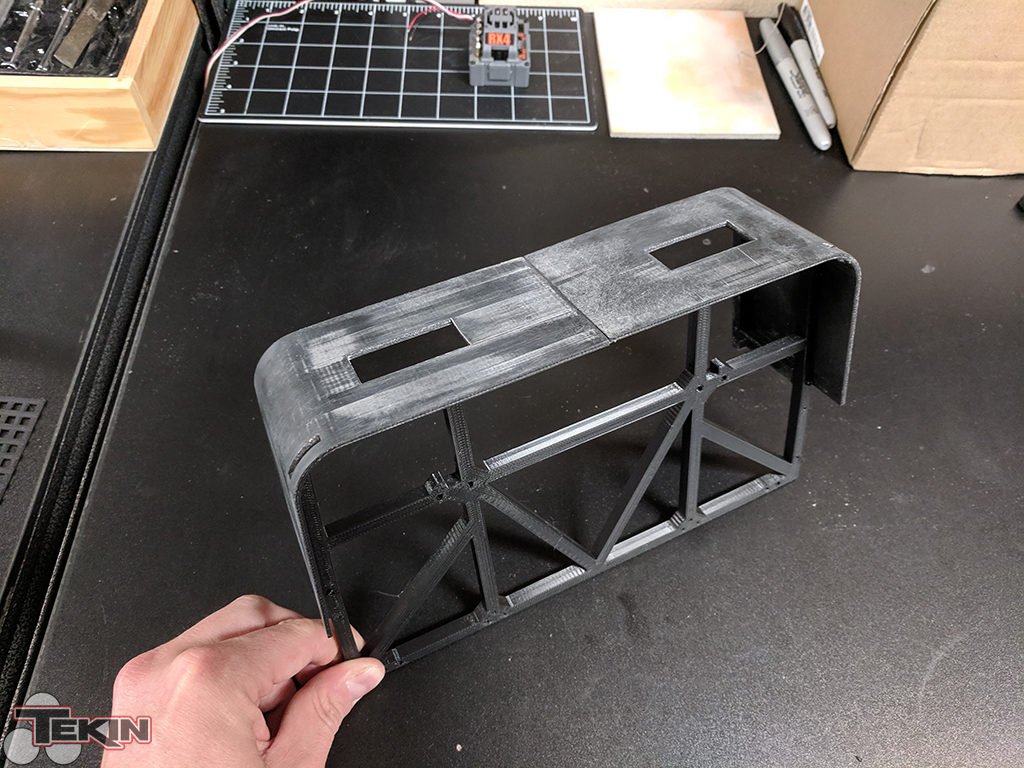
Body
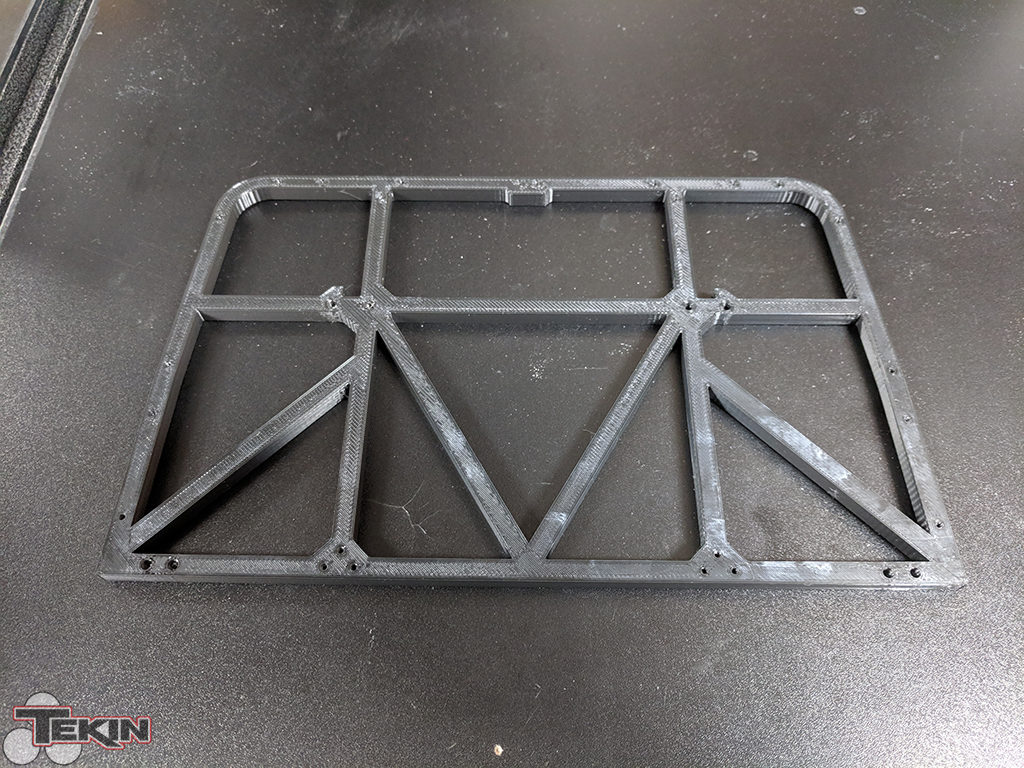
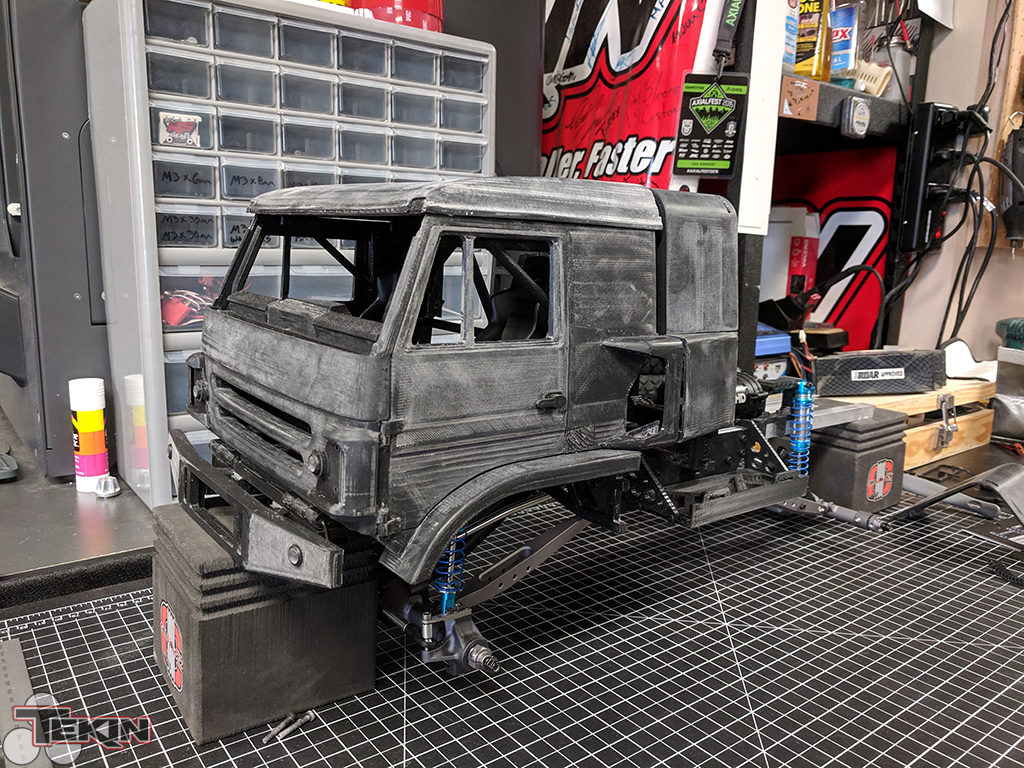
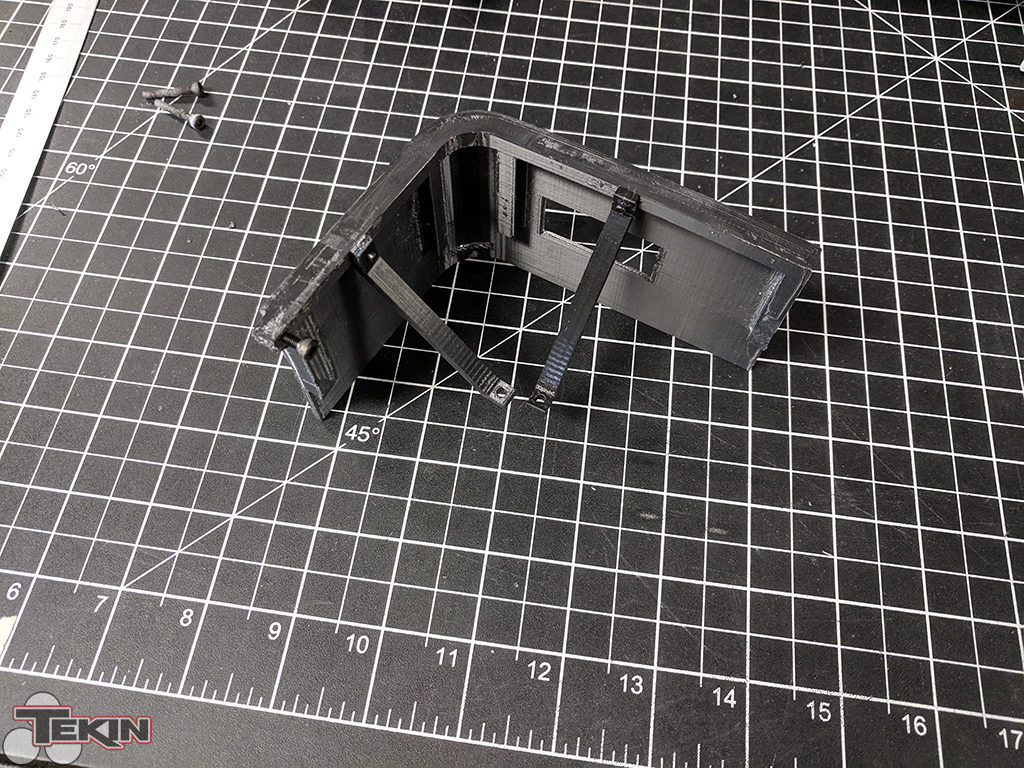
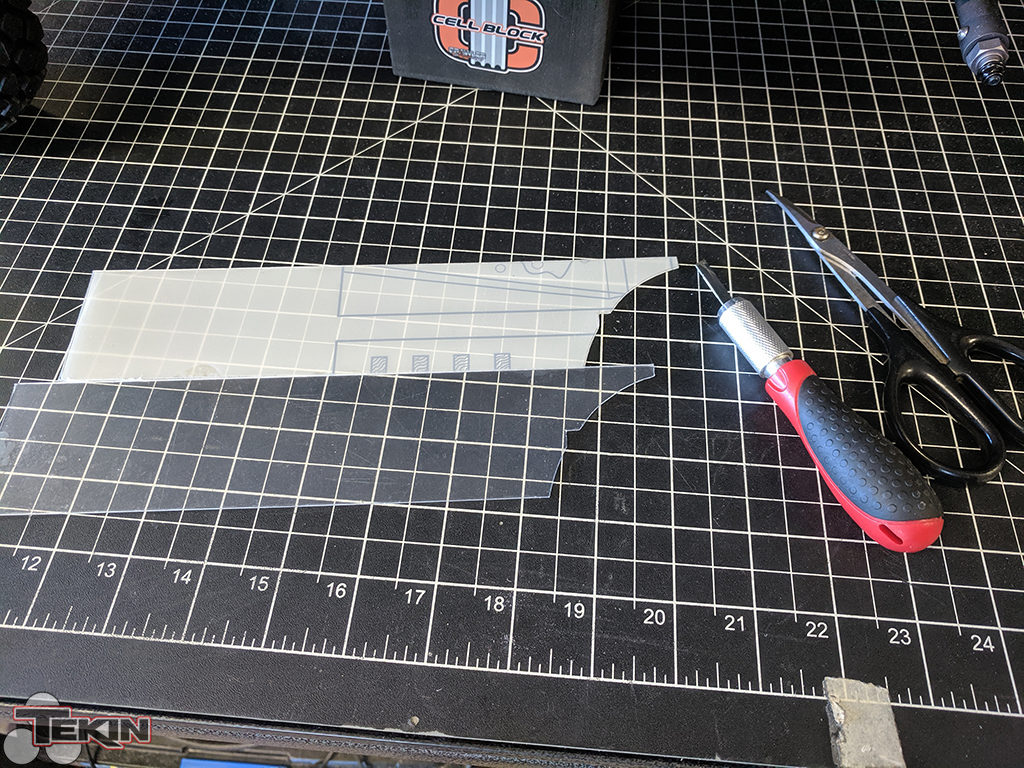
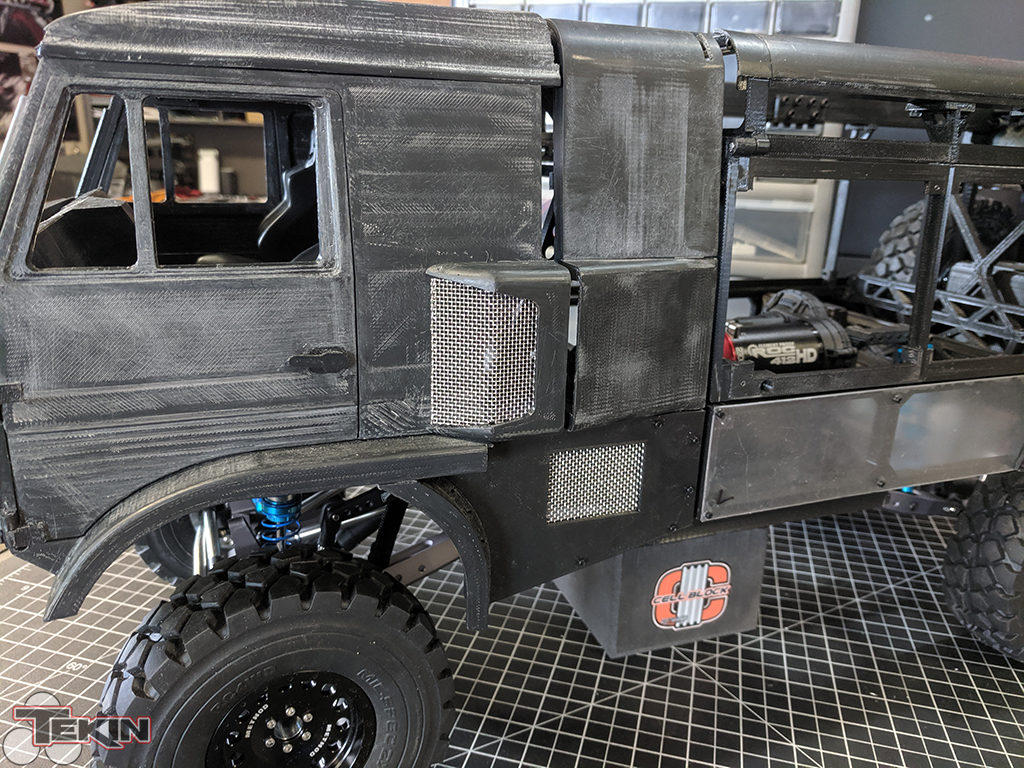
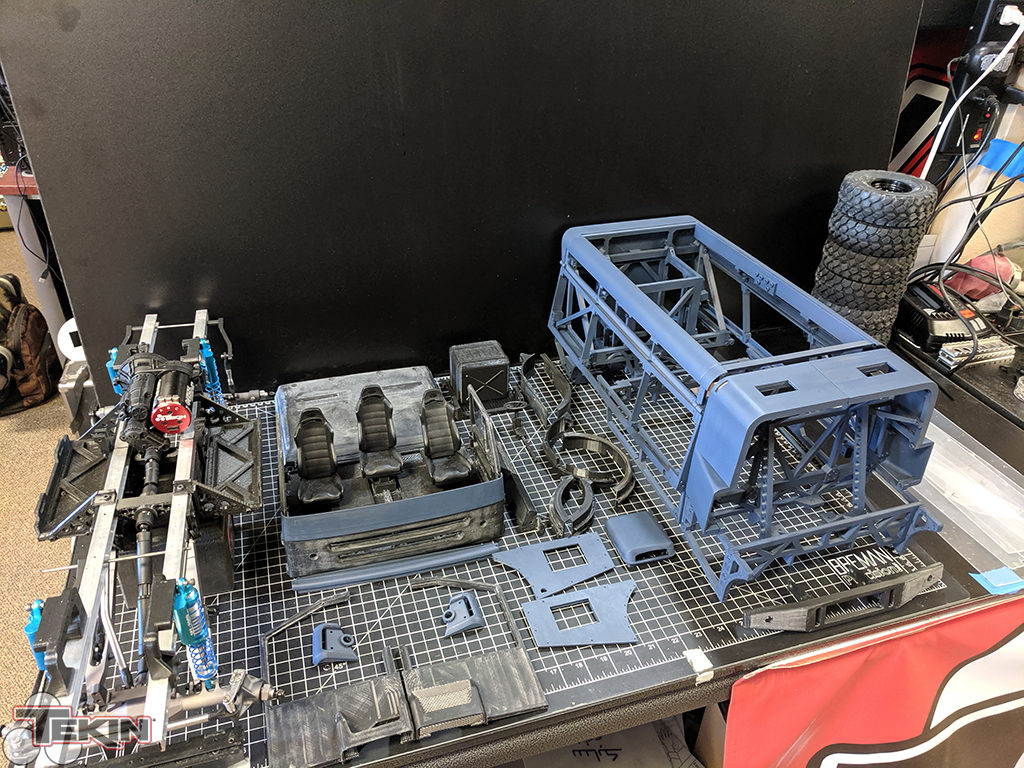
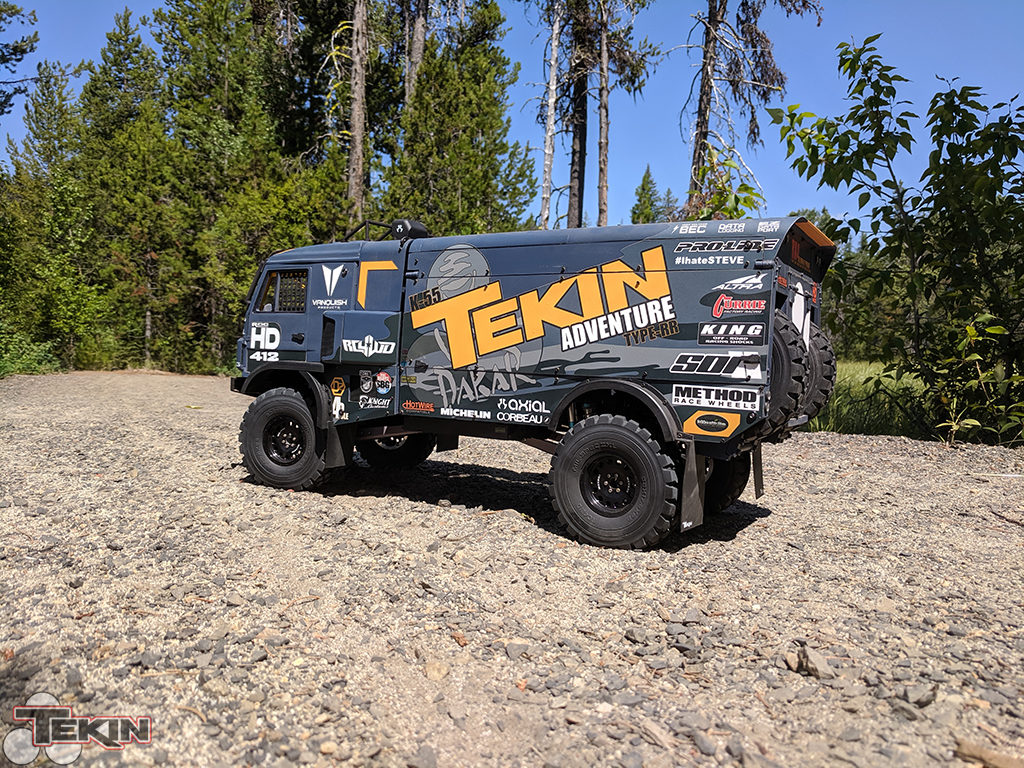
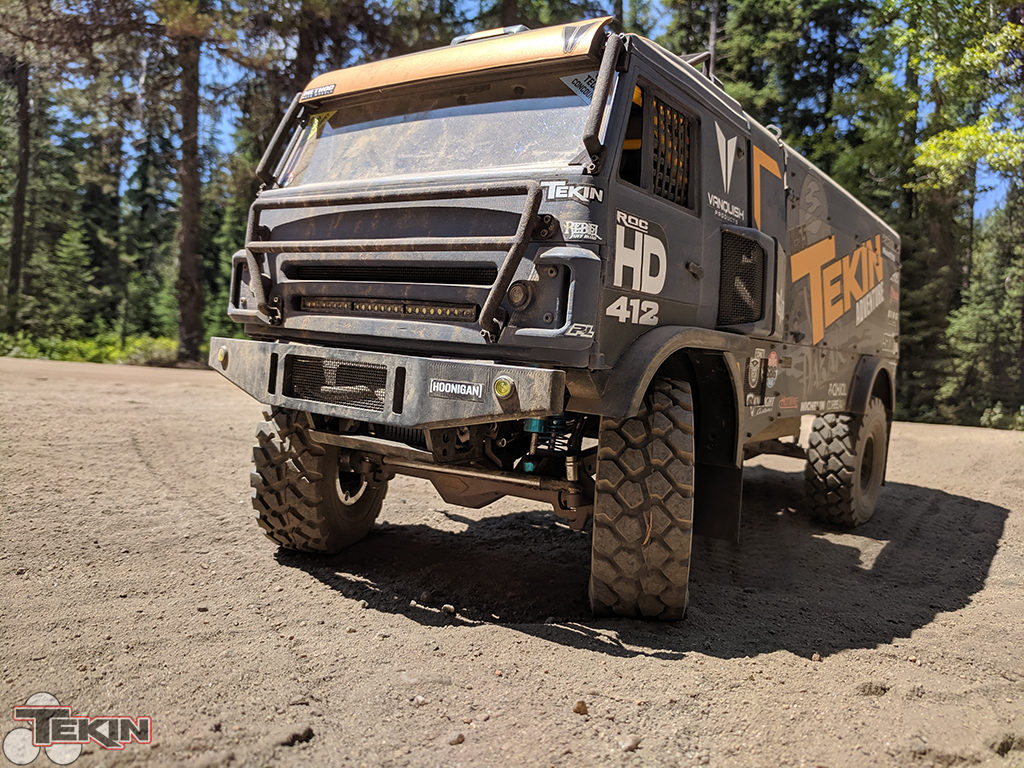
The body of the truck is entirely 3D printed, other than the top and some side panels of the rear box, which were hand cut from polycarbonate sheet, drilled, painted and ultimately wrapped with our custom graphics. This part of the build took some time, many choice words and even a toll on our printer, which suffered a thermistor failure with just weeks left to our Axialfest deadline. We spent hours sanding and filing the parts on this truck to bring it all together because nothing comes off the printer ready to go on. There’s always clean up and finish work to be done before it can actually go on the build.
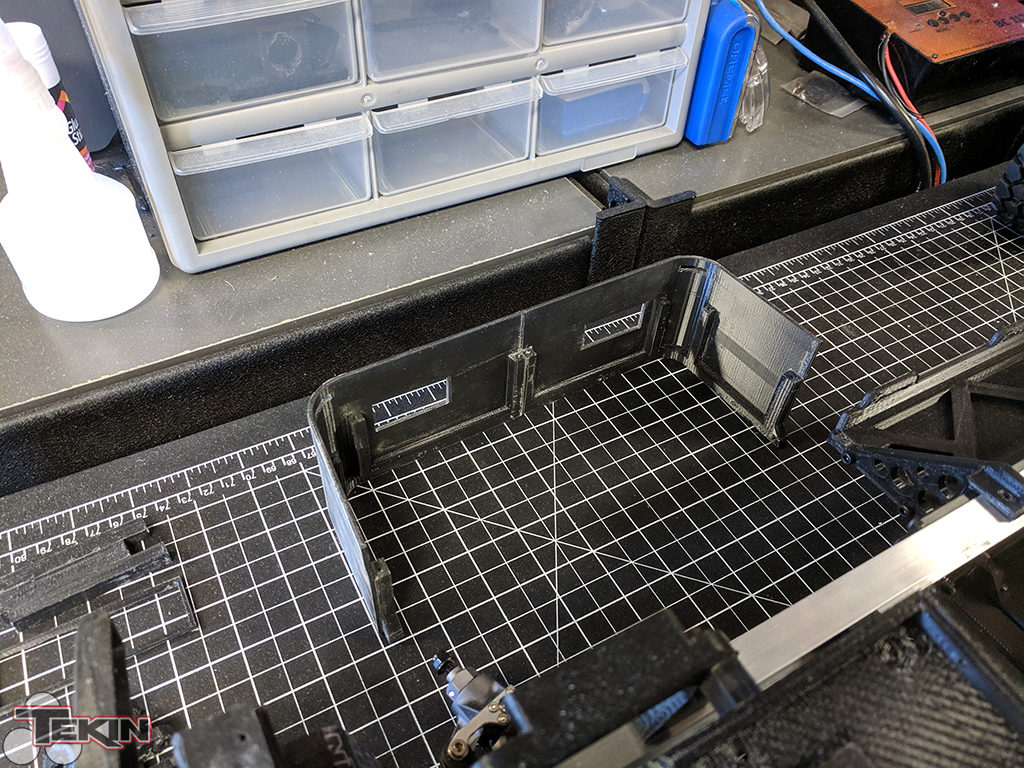
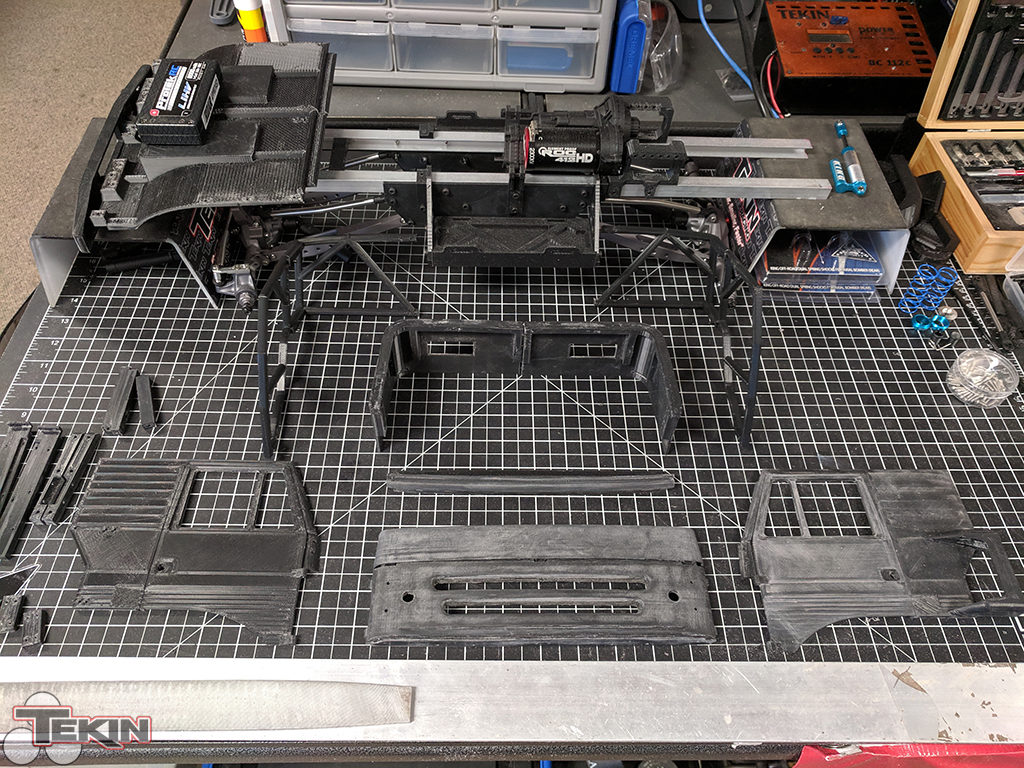
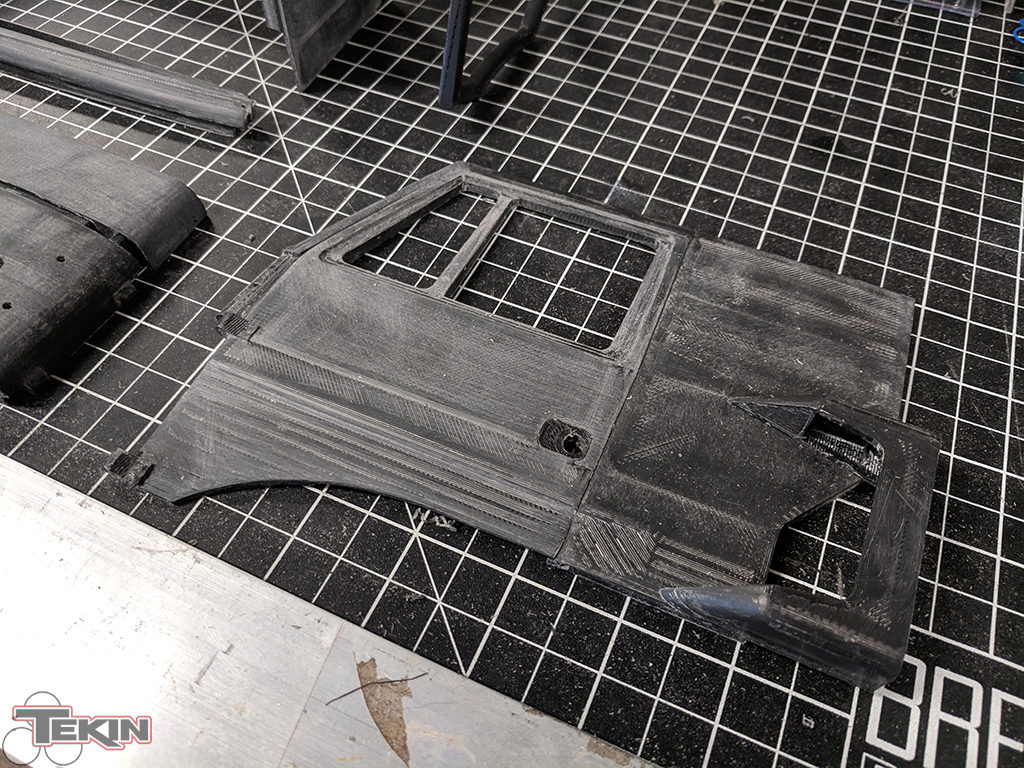

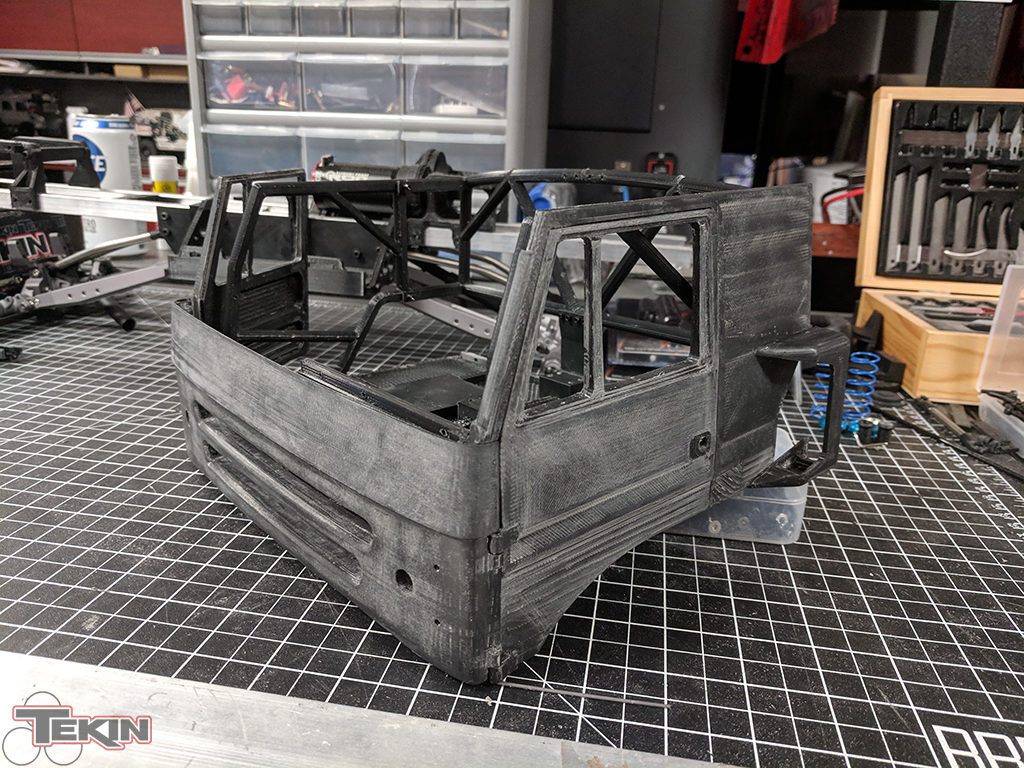
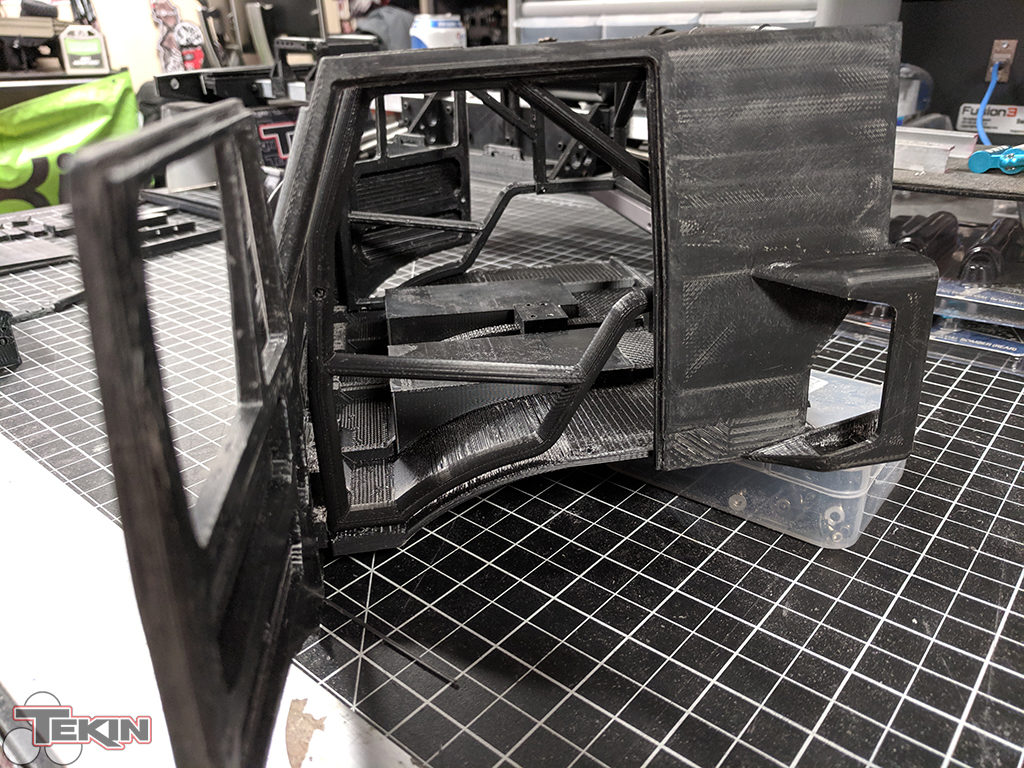

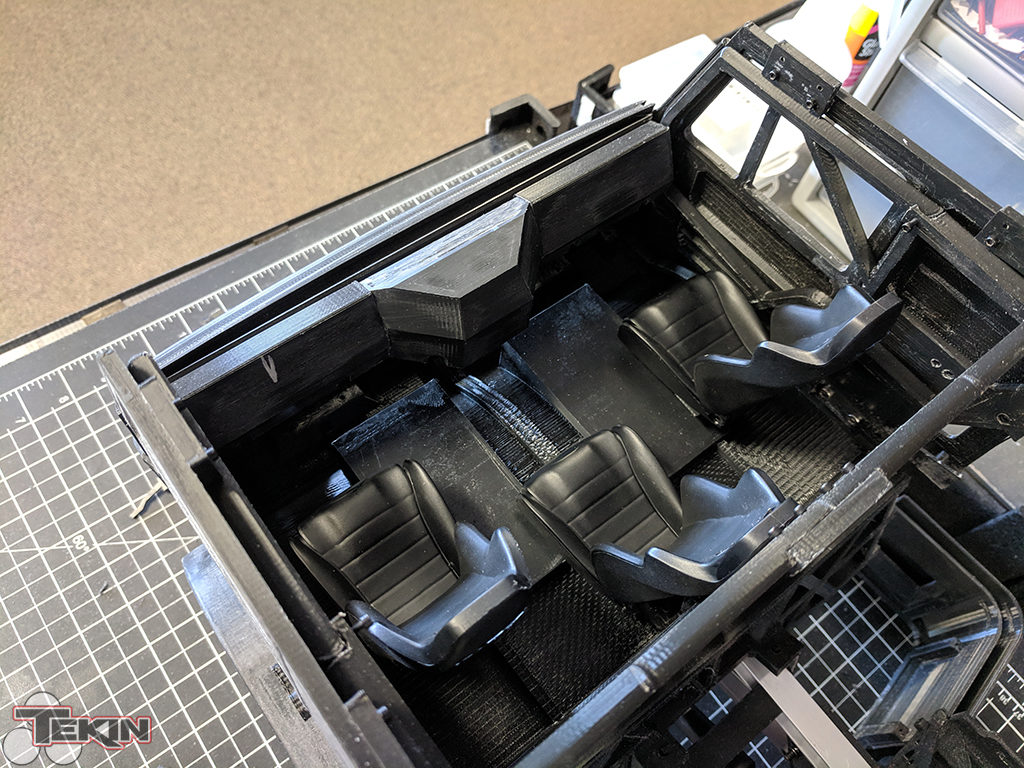
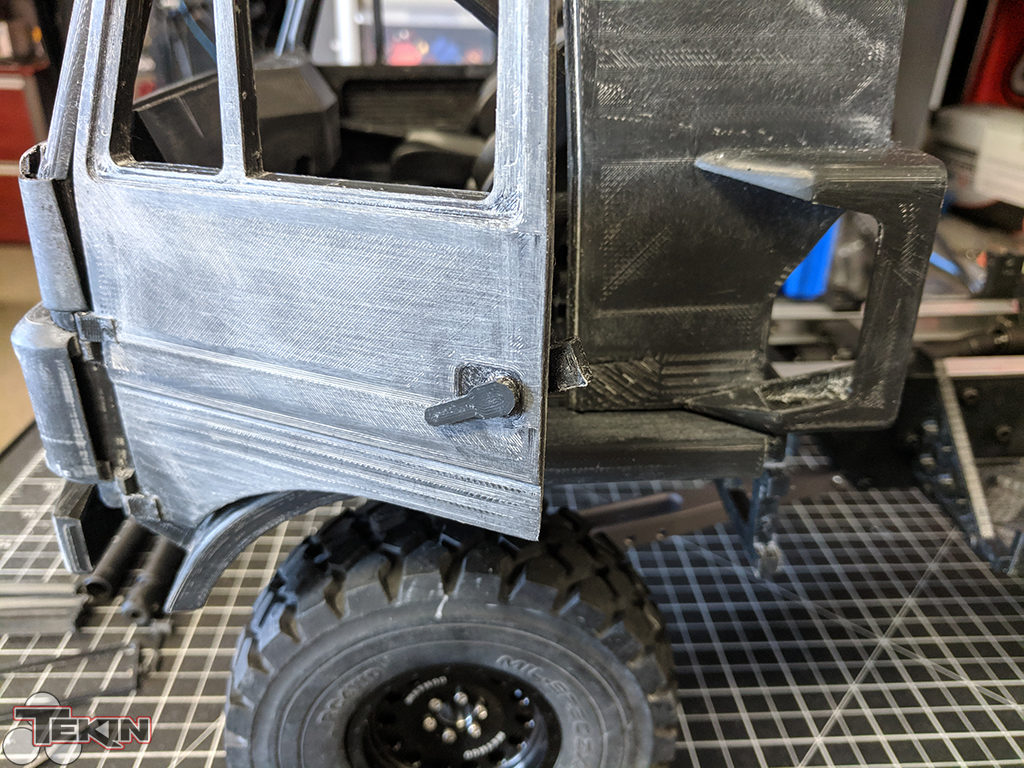

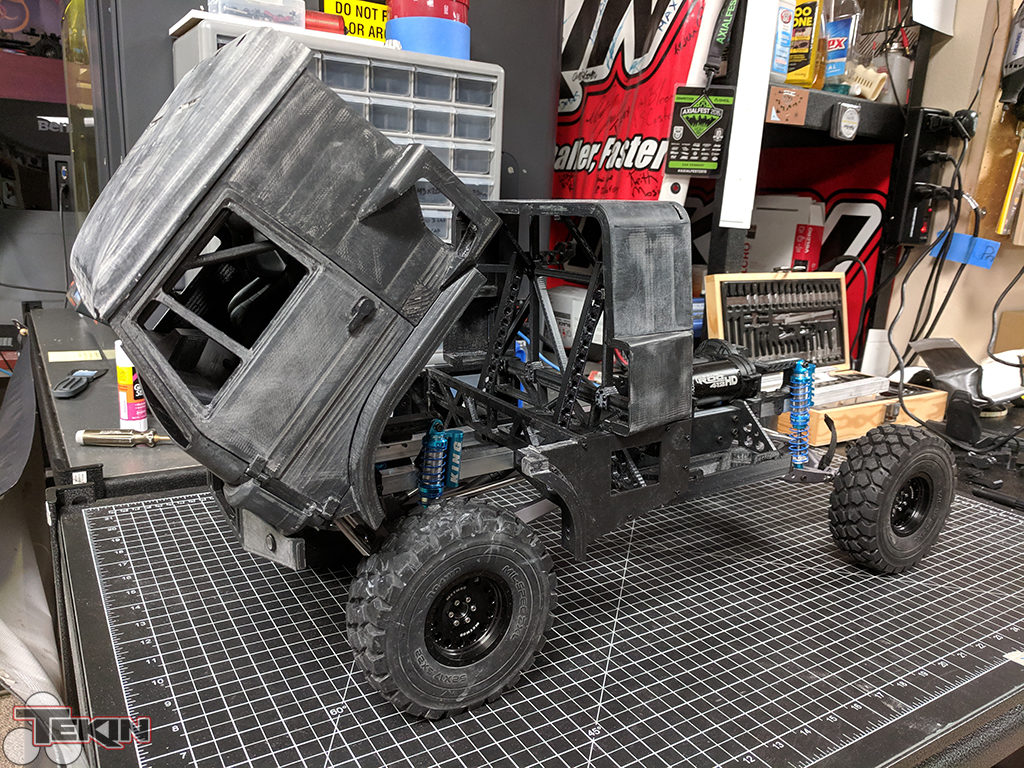
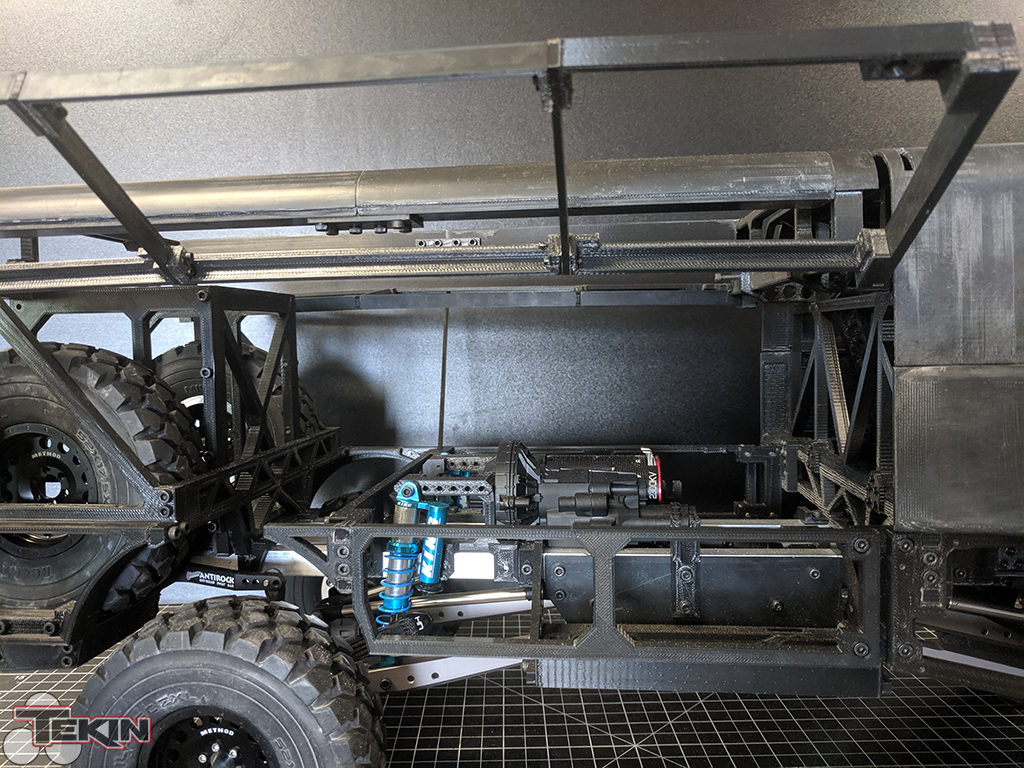
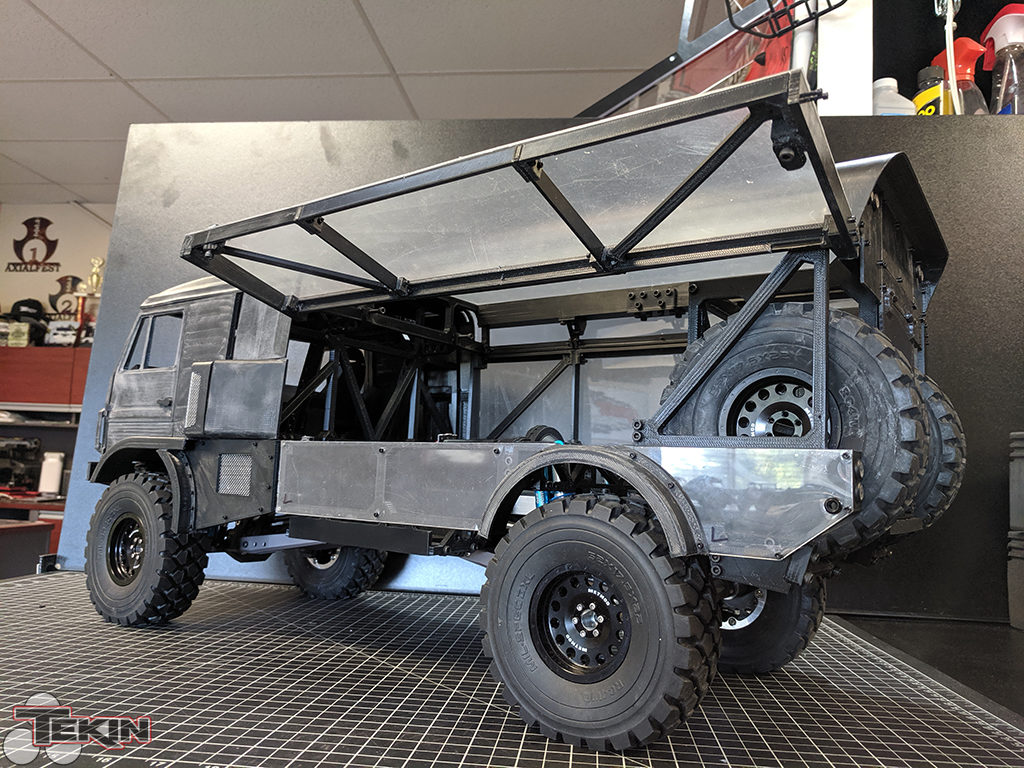
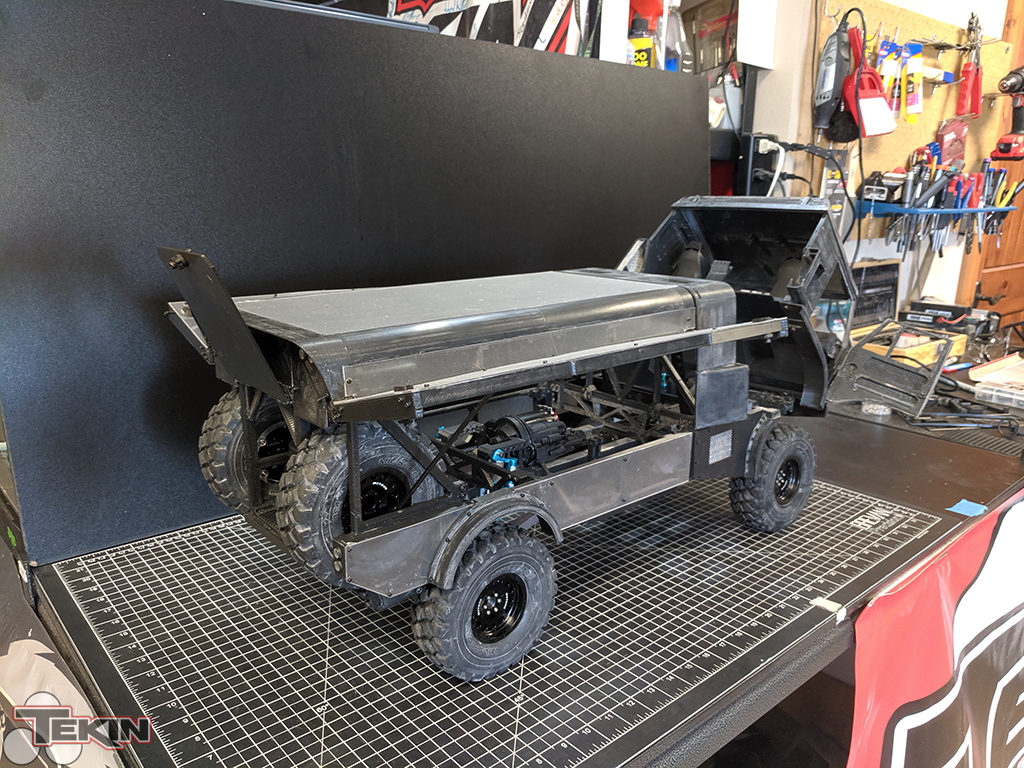
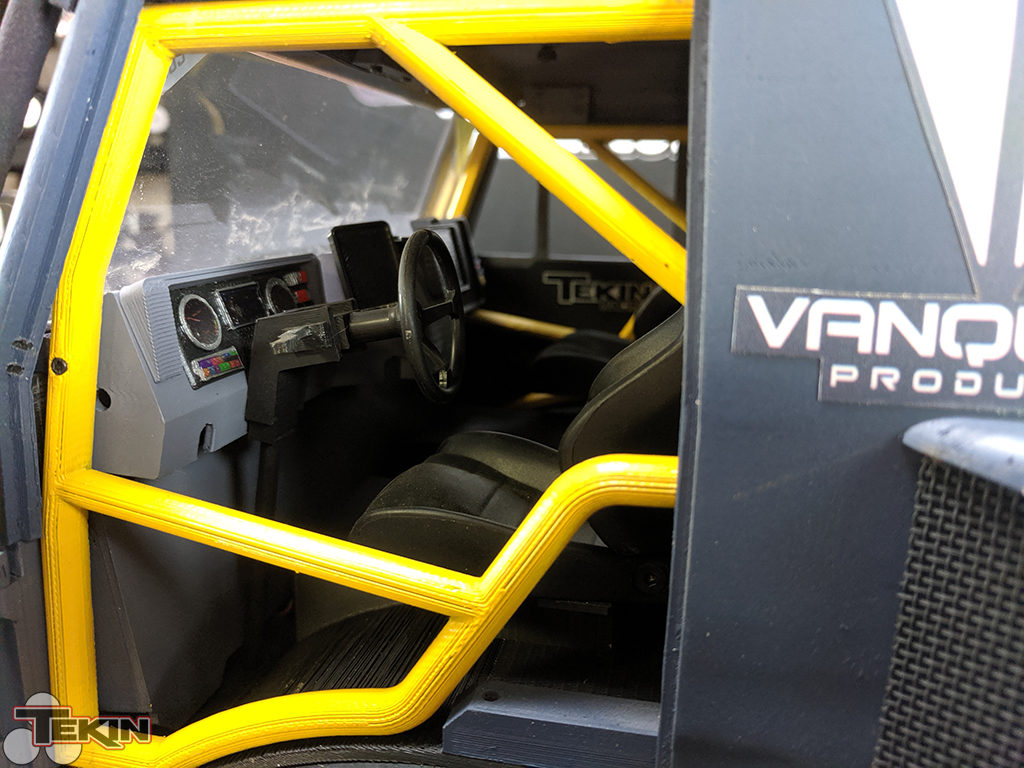
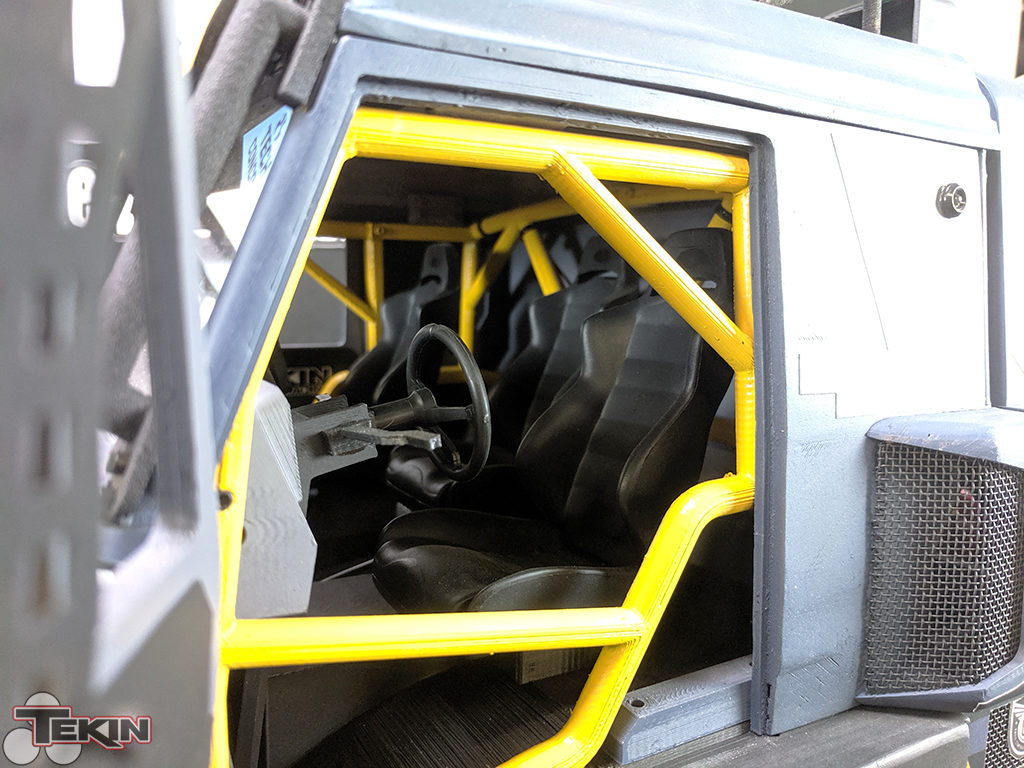
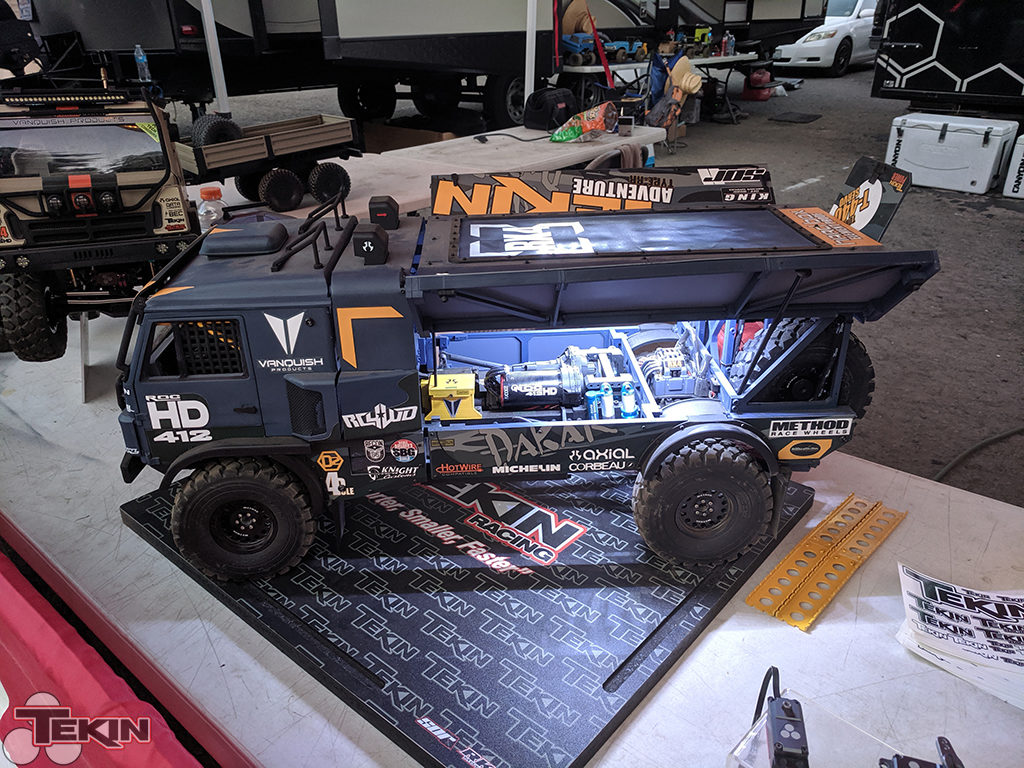
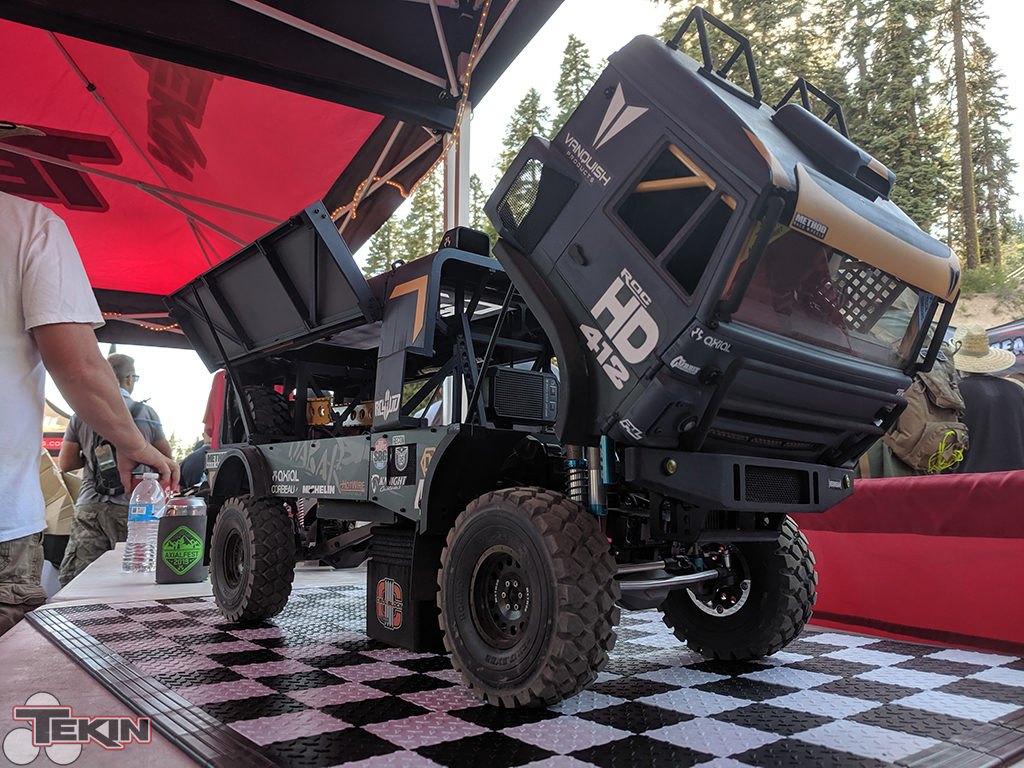
We went all out on this one with opening cab doors, door latches, a full interior with 3 seats, a partial roll cage and a detailed dashboard. We also made the cab hinge, so access and removal if necessary are easy. The rear box presented some challenges along the way as it had to out do the previous build. The middle section behind the cab starts off the rear section of the truck and is braced heavily since our box has no mid supports. We wanted a nice open layout for easy access to the batteries and of course, easy viewing of everything that makes this truck go!
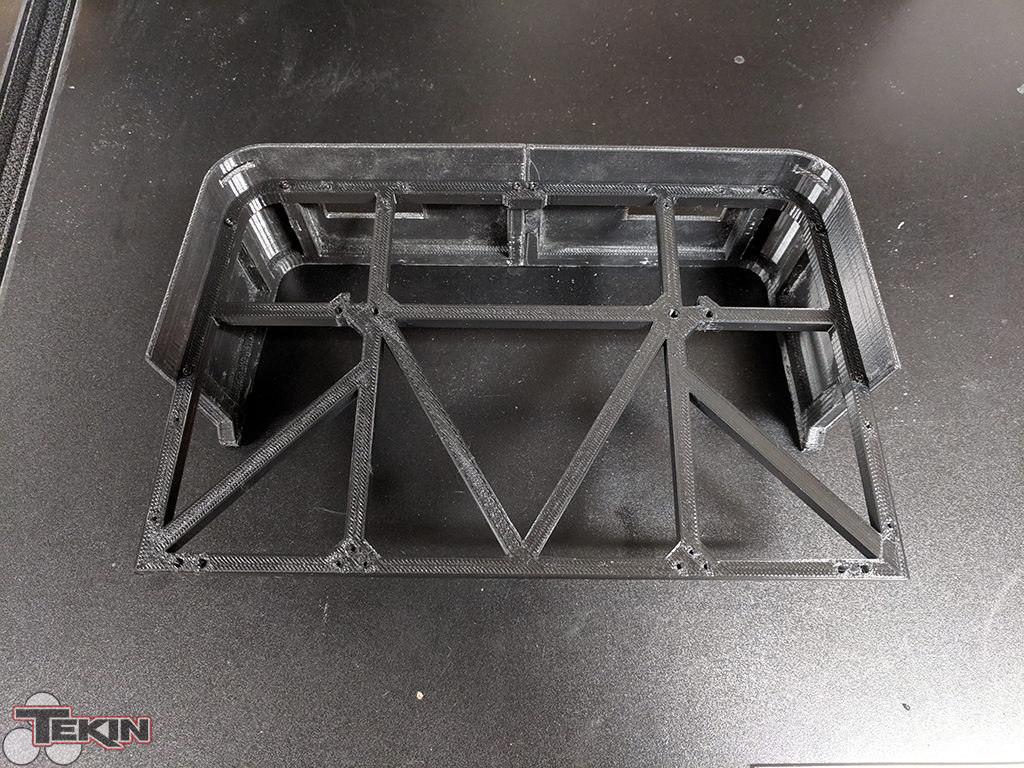
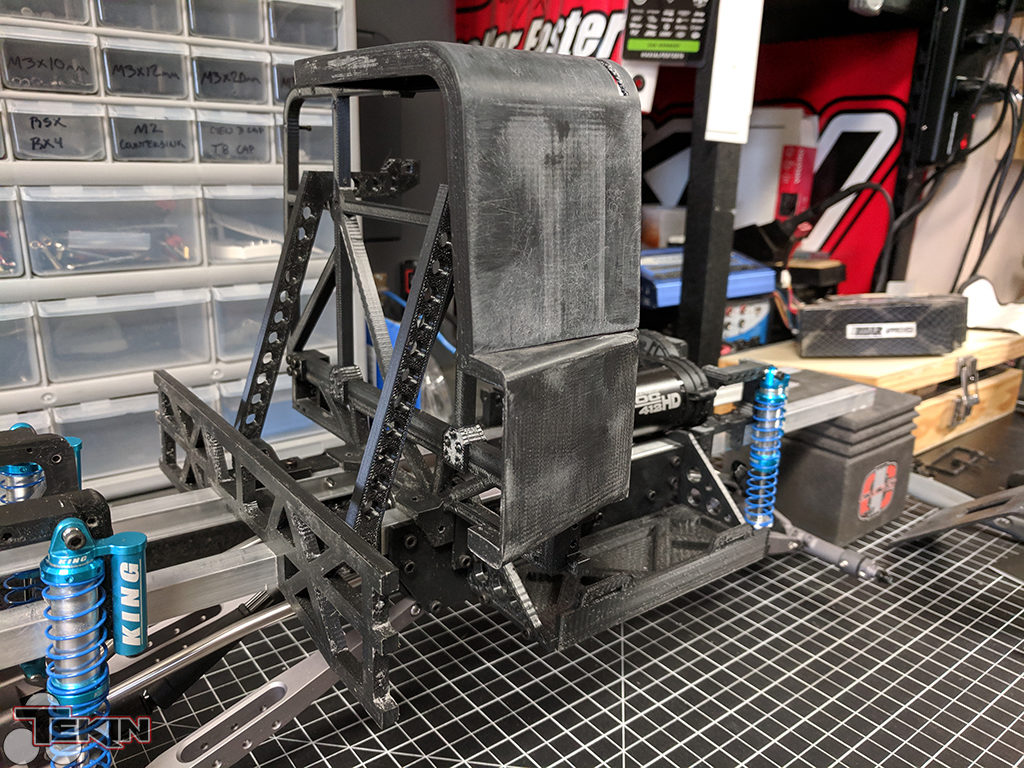


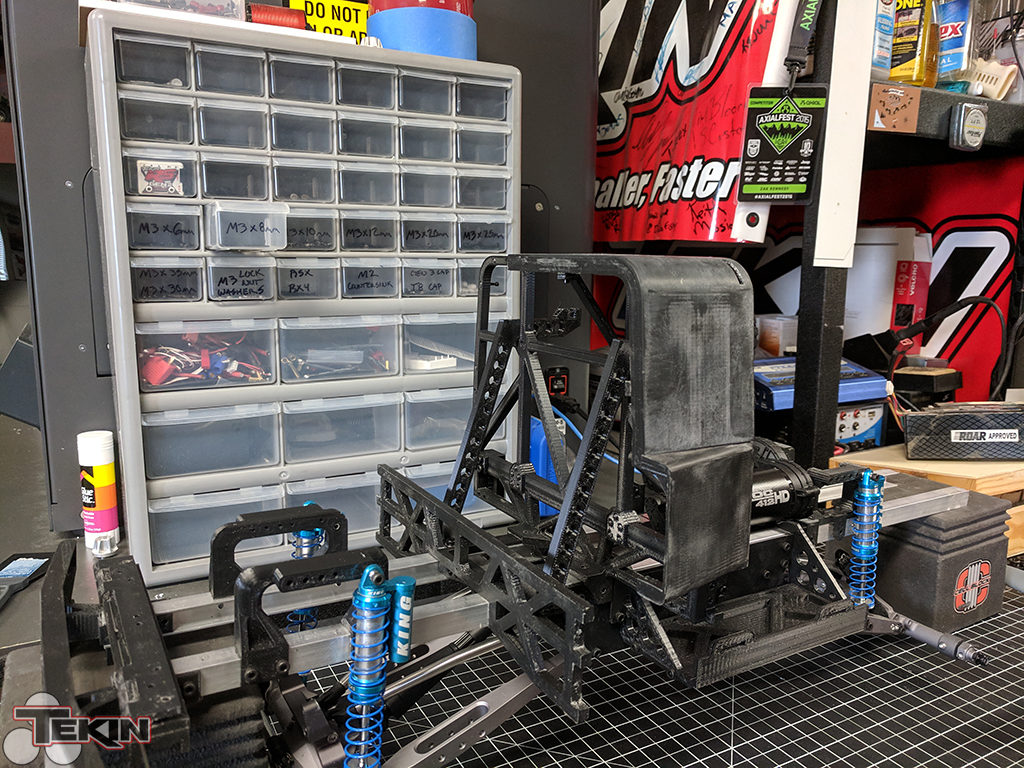
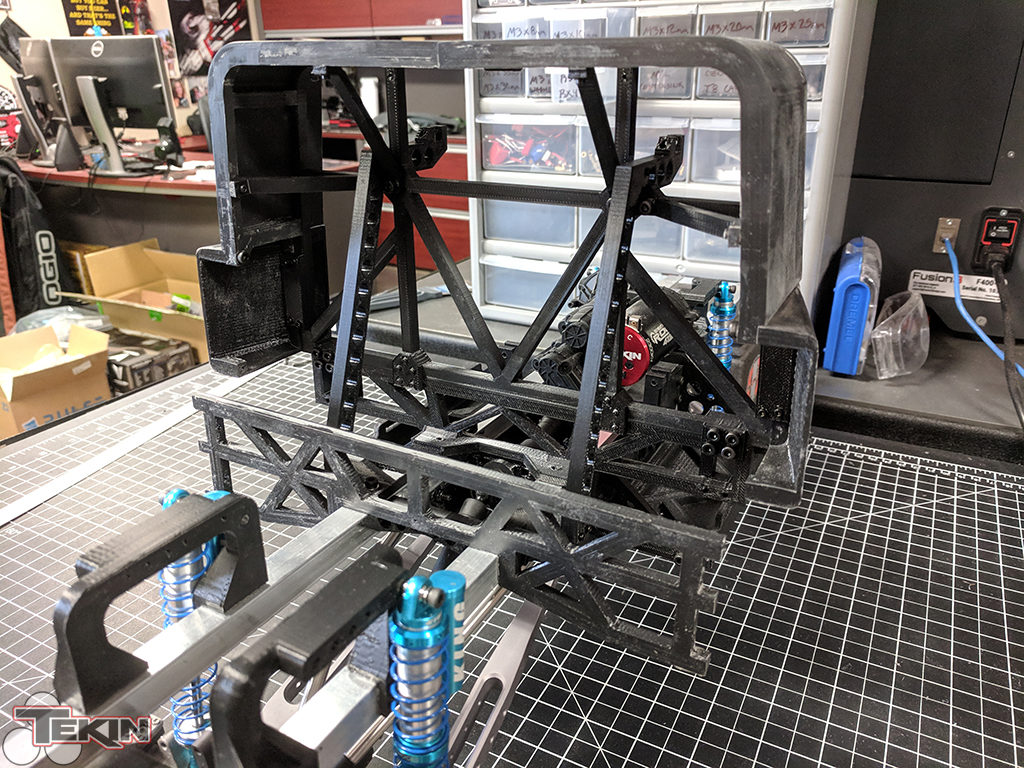
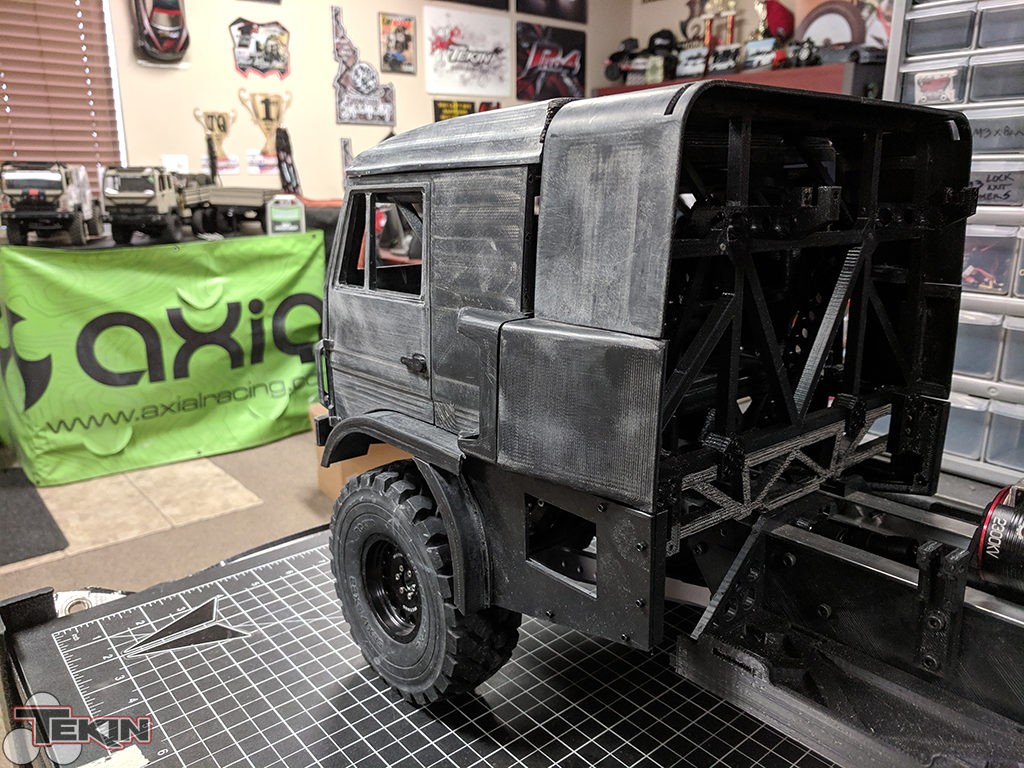
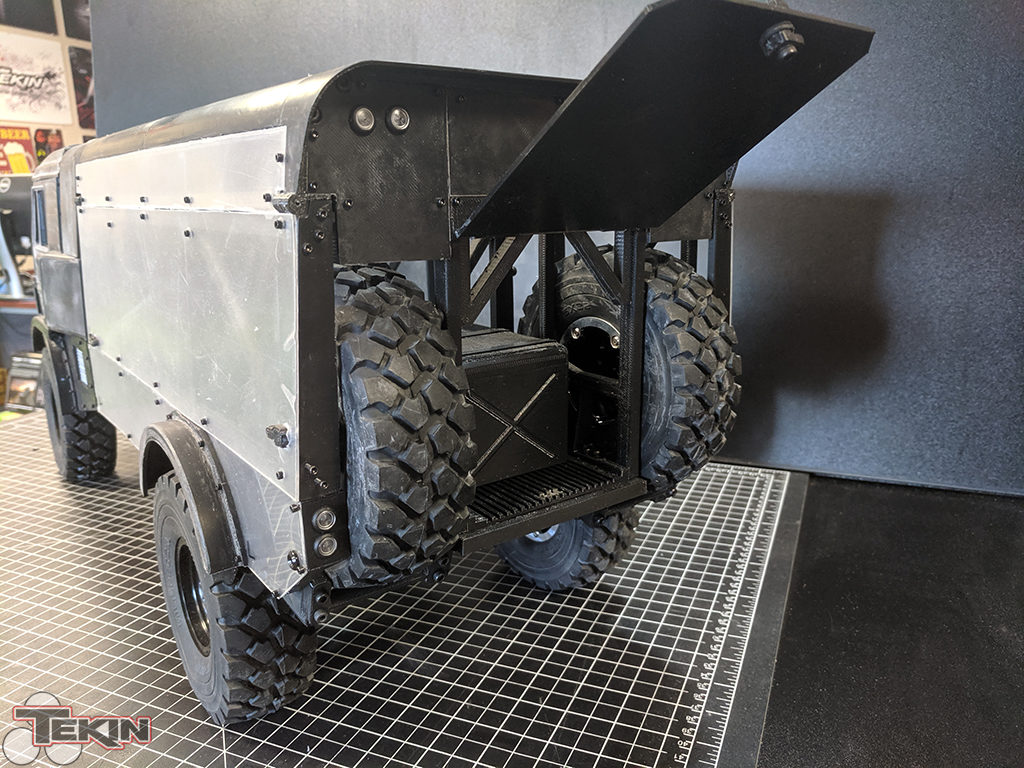
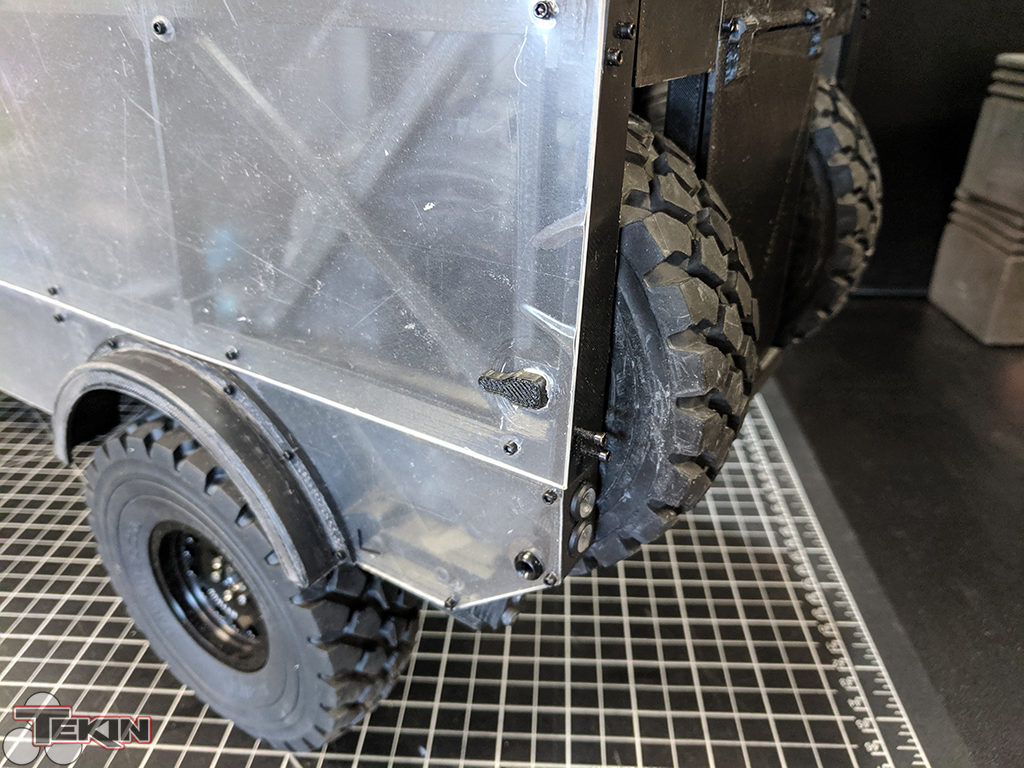
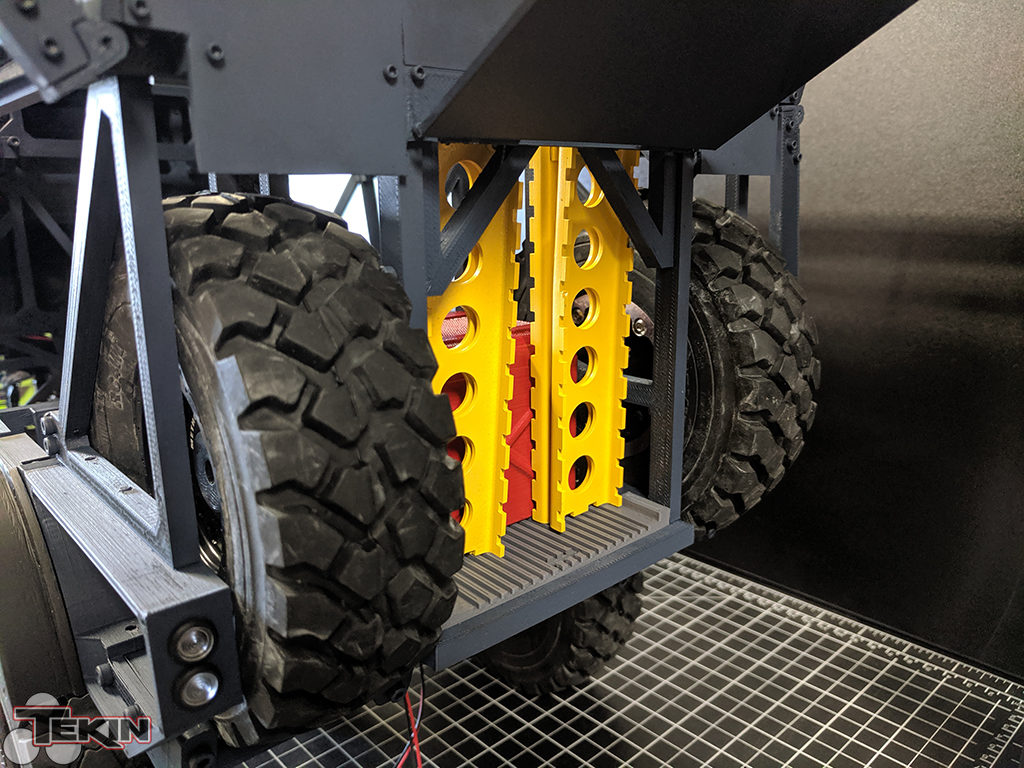
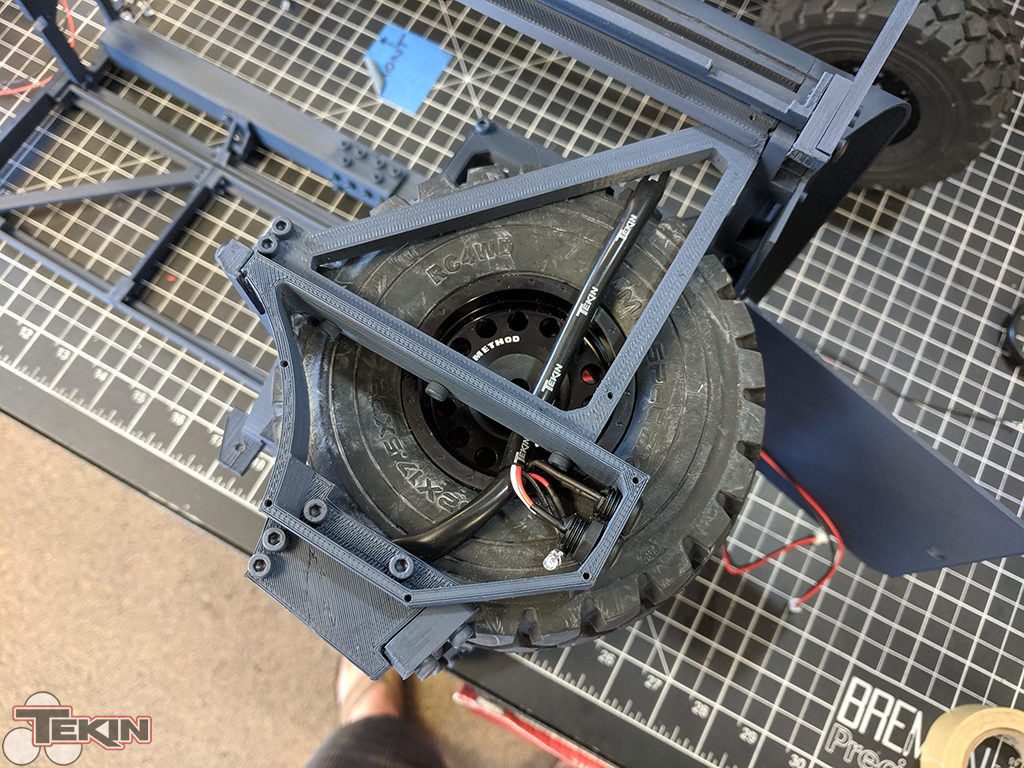
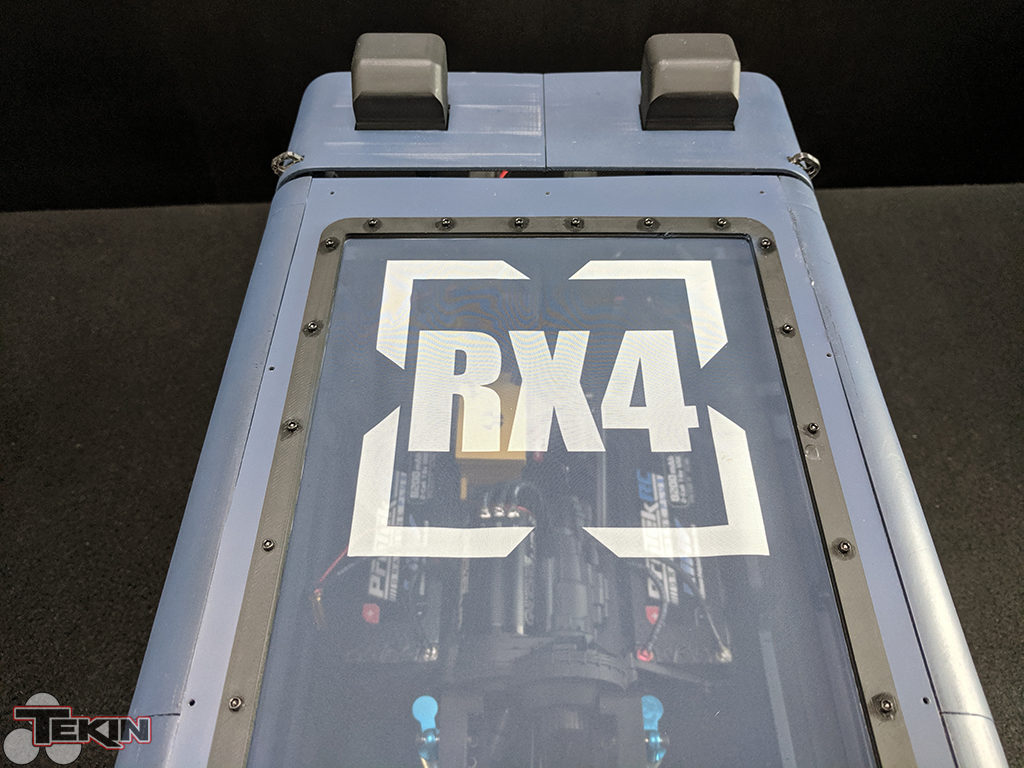
The rear box has two side doors that open and a rear door that opens for access to the fuel cell, which hides all the light wiring and controllers. Two full size functional spare tires are mounted in the rear, just like the 1:1 Kamaz.


With the truck just about fully assembled, it was torn down for the painting process. I spent a couple days painting everything. The chassis got the full black-out treatment and the rest went under the airbrush to be painted the blue-grey color we selected with some splashes of yellow and red mixed in.

Electronics & Final Assembly
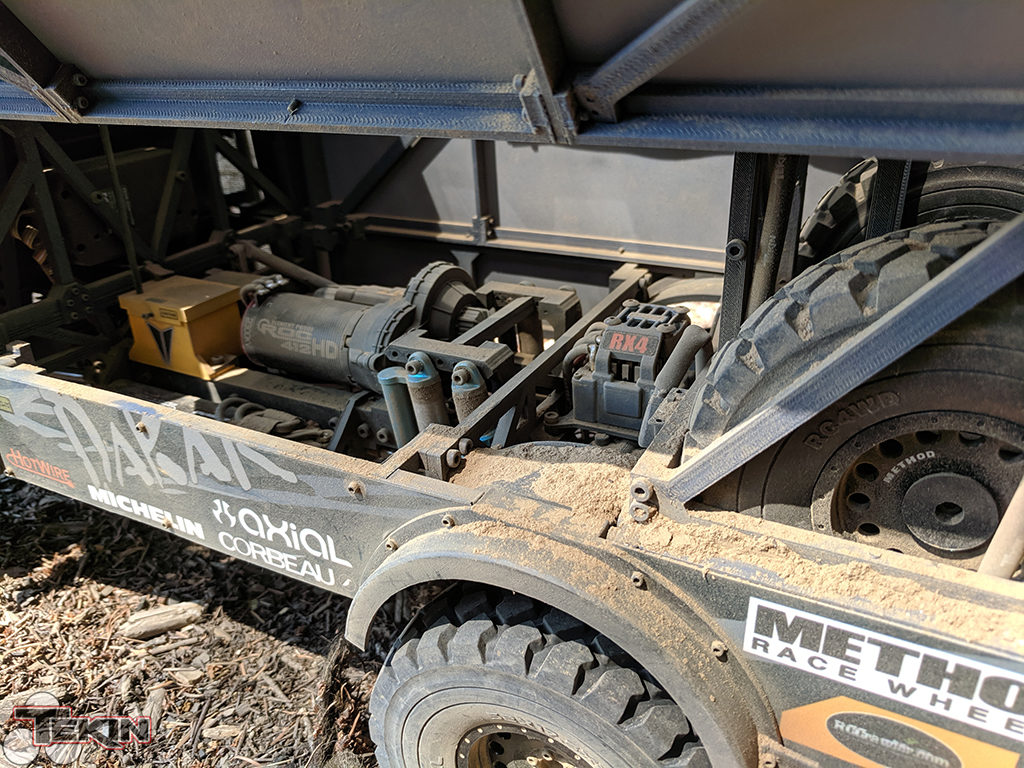
Reassembly started as soon as the paint was dry since time was running out. There was still a ton of wiring that needed to be done, so I started in on that with the chassis partially done. I spent another couple of days pulling the 30ft of wiring through this truck for all the lighting, esc, motor and battery wiring. I took my time and ran everything as tucked, shielded and cleanly as I possibly could so it wouldn’t take away from the finished product. The custom receiver box fits the Spektrum 6ch receiver like a glove and tucks all the wiring out of site in the conduit on the side.
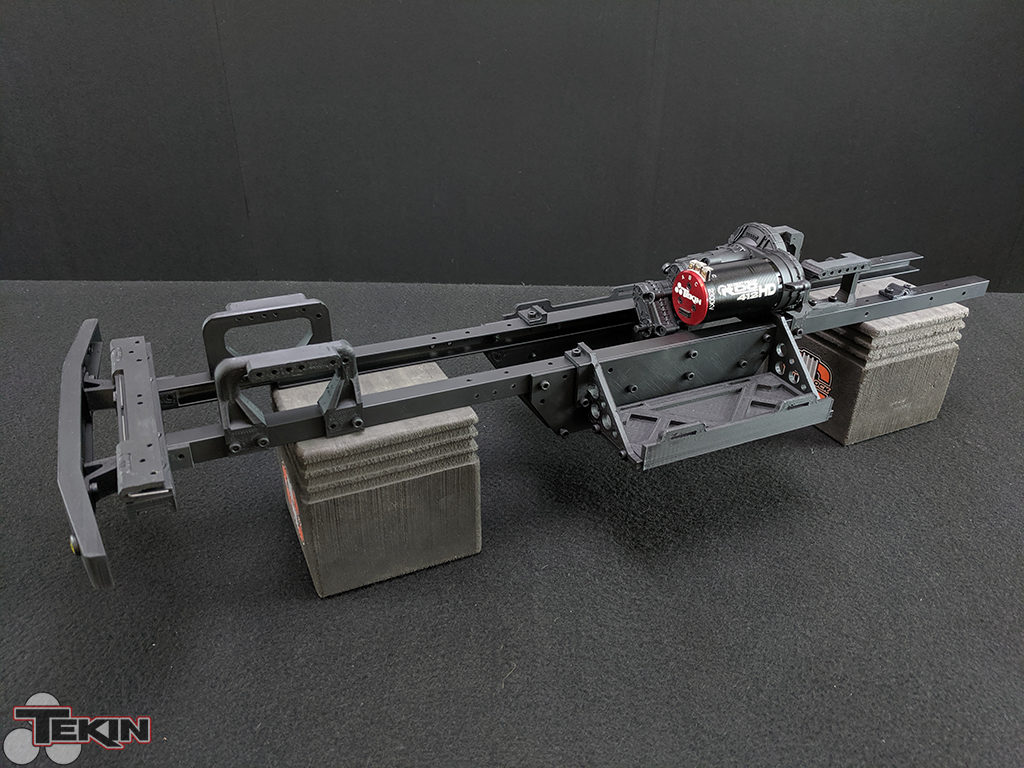
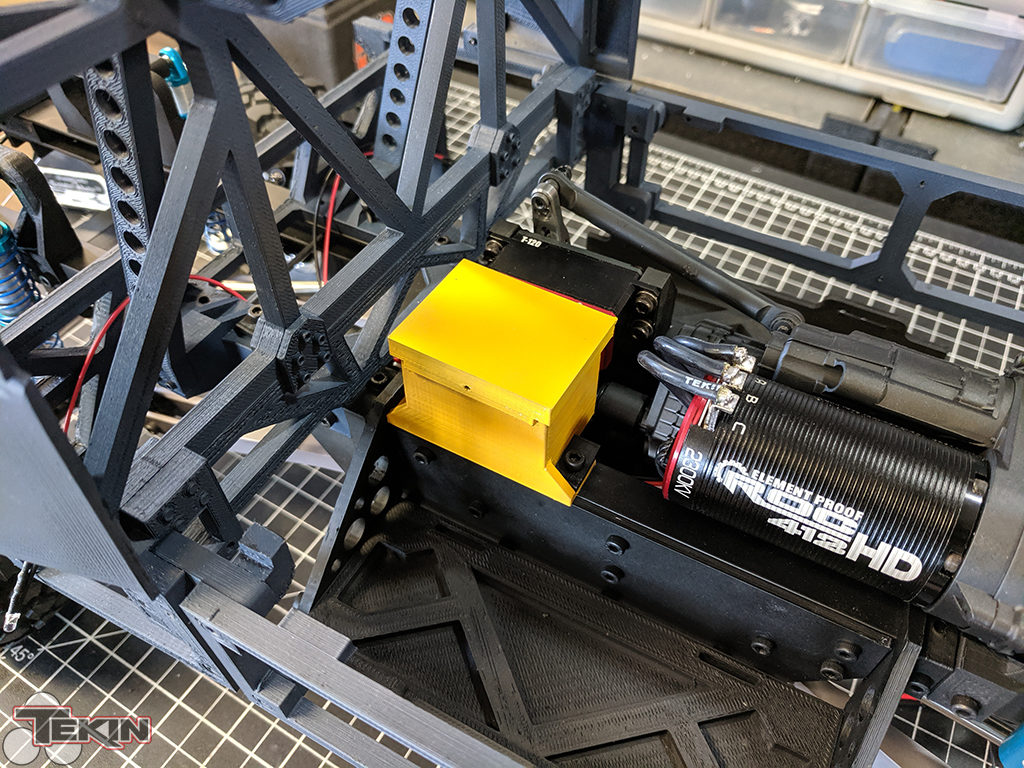
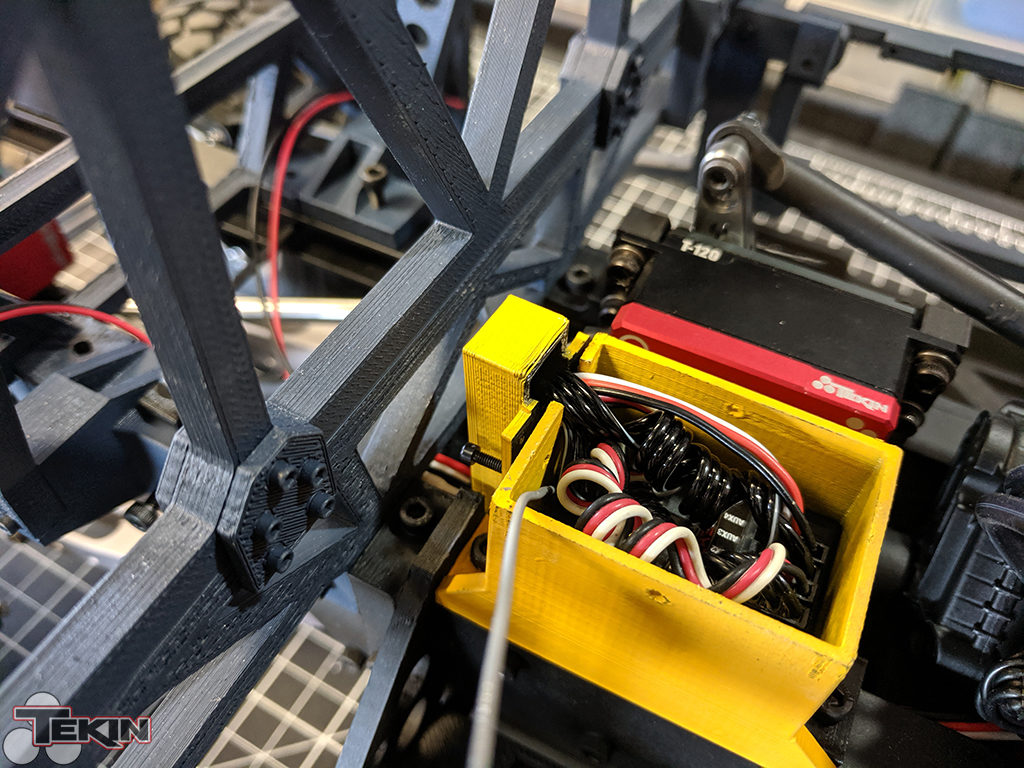
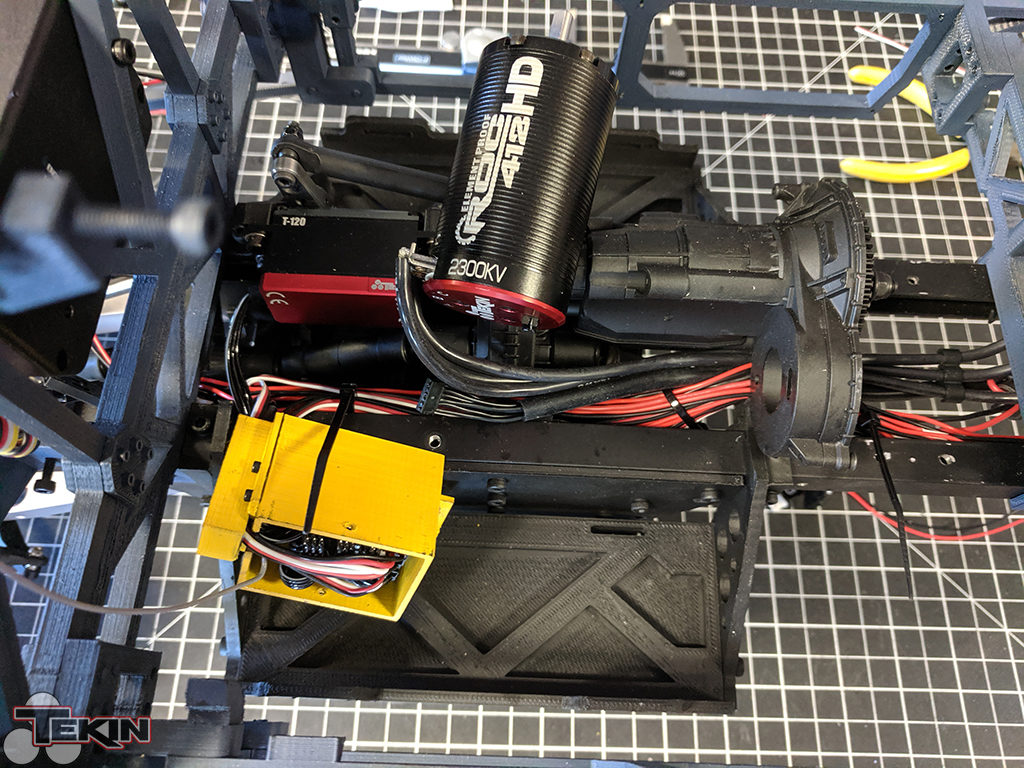
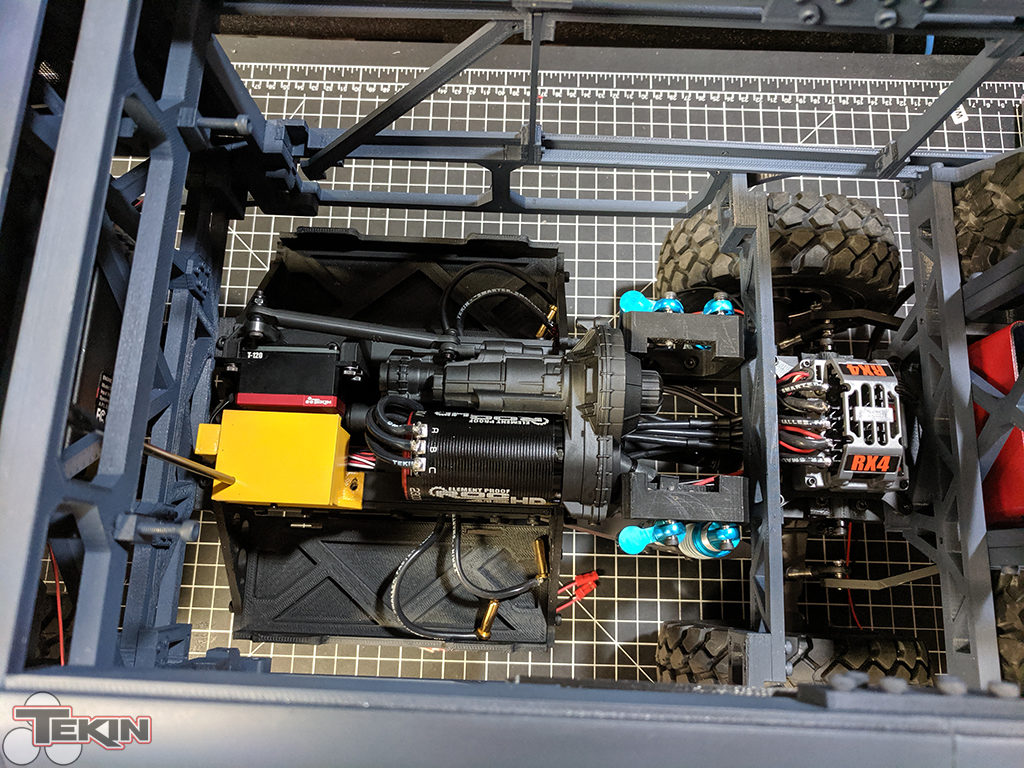
I killed a few of our sensor wires and used the jacket to tuck and route a bunch of the LED wiring. The motor wires are tucked under the transmission and the battery wiring runs through the sub frame with just enough length to reach the batteries. The main wiring bundle is zip tied and held inside the frame rail with a couple printed clips. Overall, I’m really happy with how it worked out and ended up so clean!
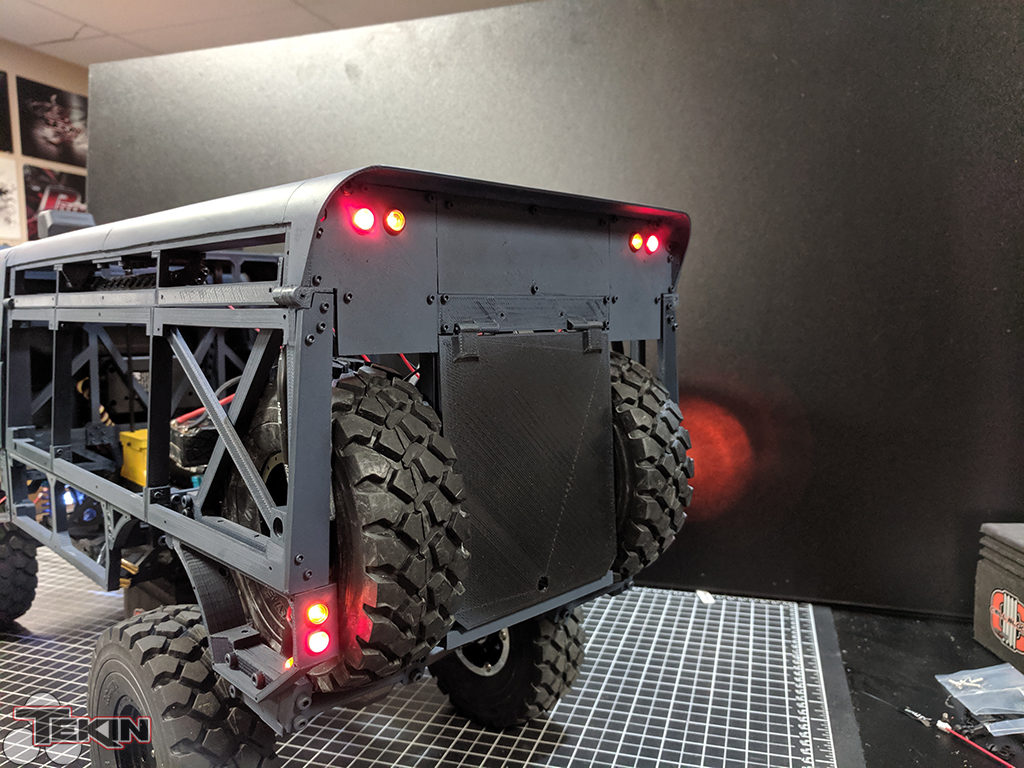
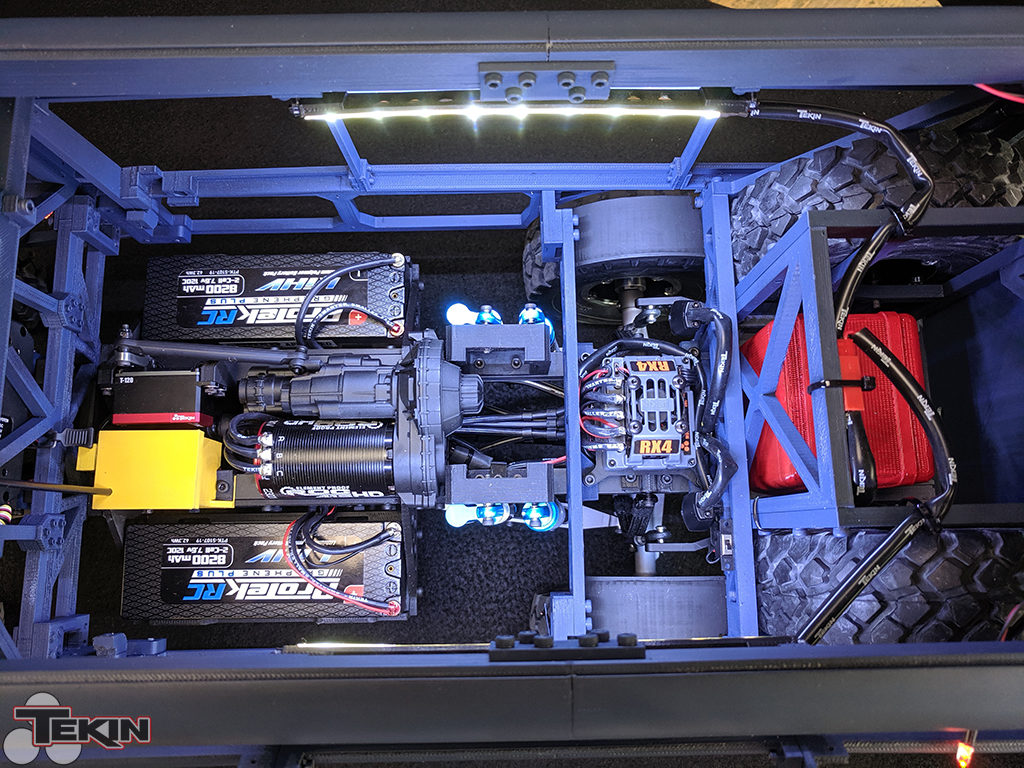
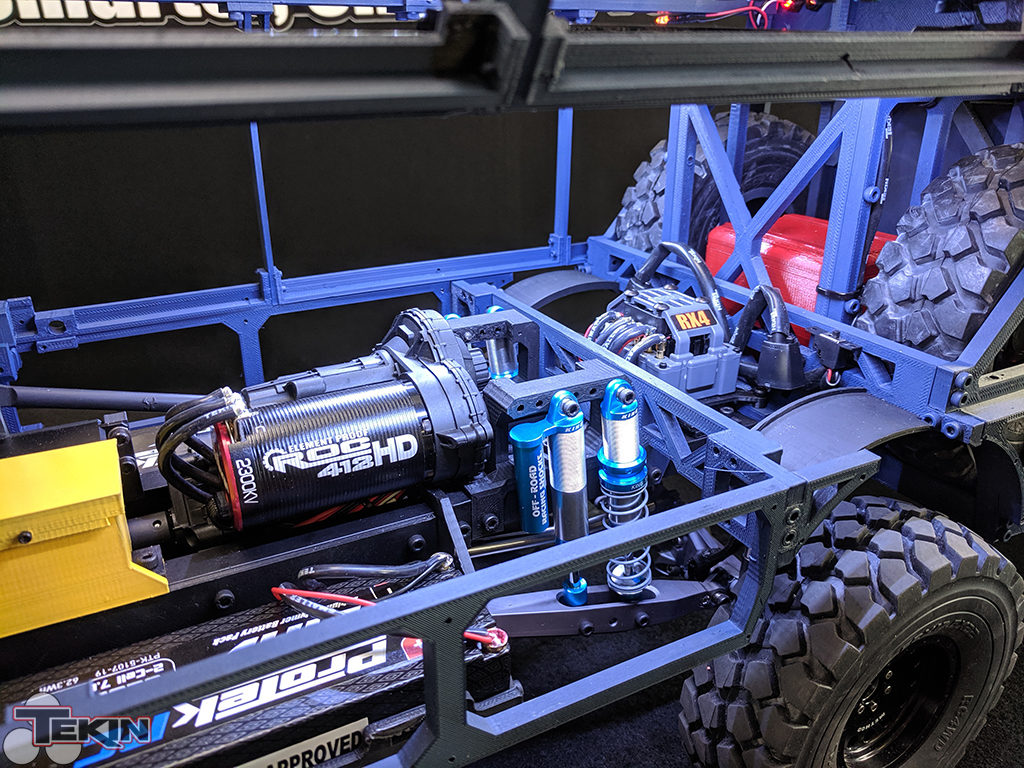
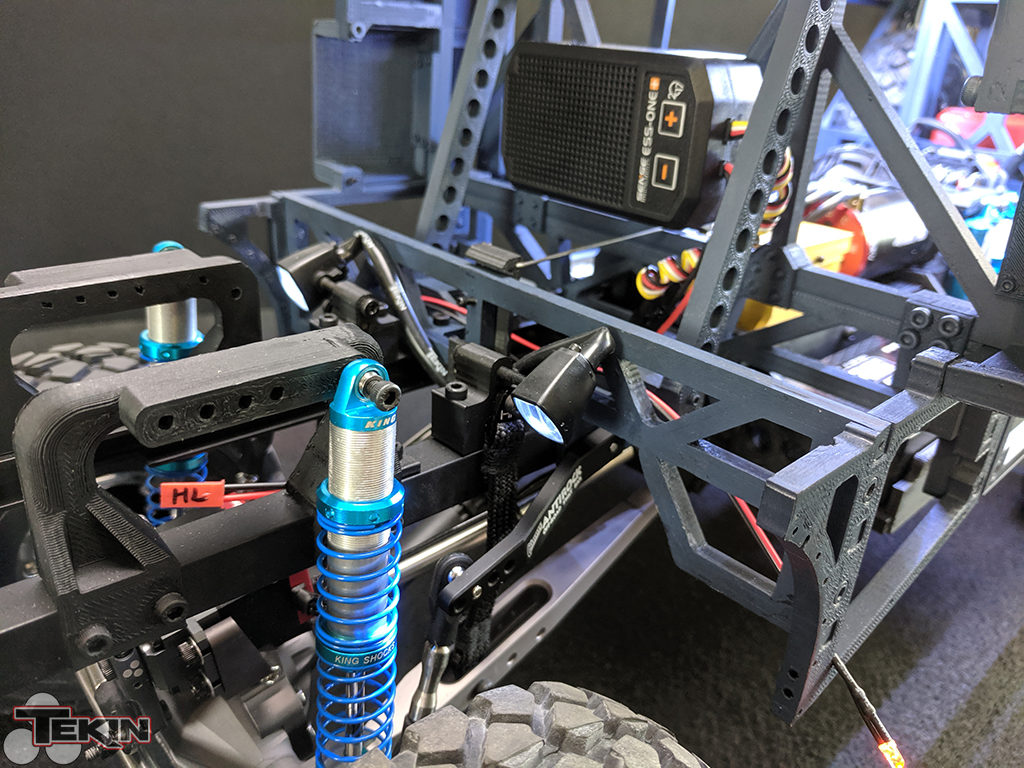
Rock light pods were added both front and rear, as well as mounts for the 85mm Hot Racing limiter straps. There are two 6″ LED strips in the rear box running off 4S power to light up the space for display. The ESS One+ was mounted right behind the cab for diesel noises and this thing is plenty loud! A very nice sound option that sounds smooth when transitioning through the RPM ranges and it is super easy to install and set up.
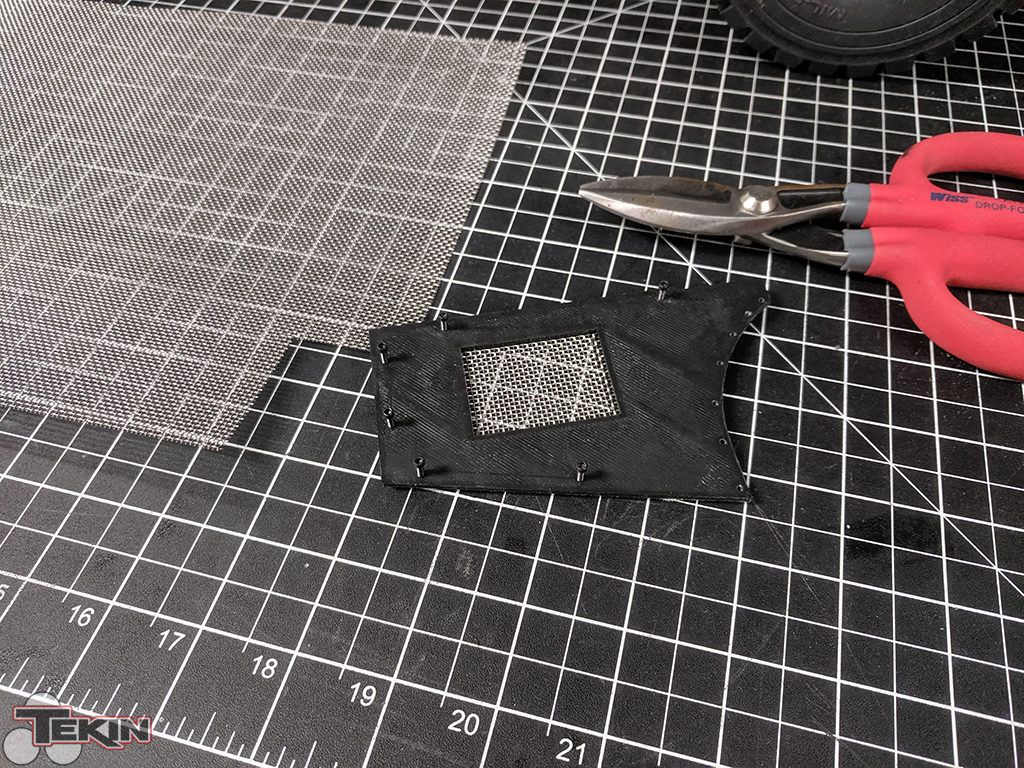
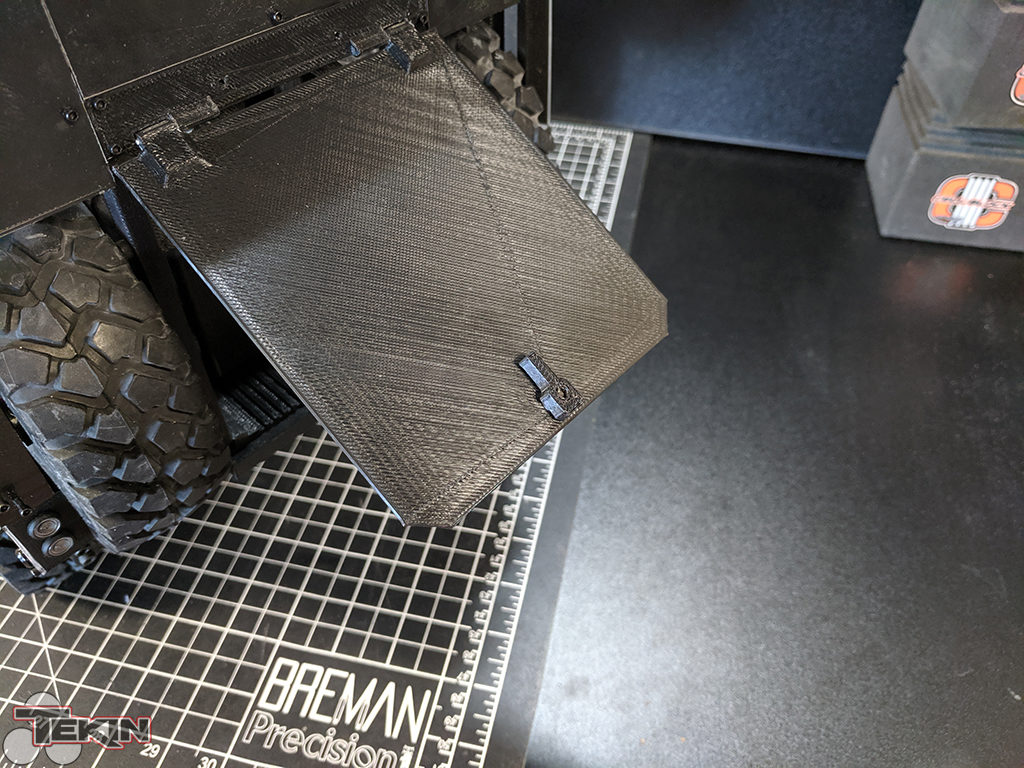
The end was in sight with just a few more projects to cross off the endless list. Mud flaps printed from flexible Bridge material and inner splash guards were some of the final pieces to come off the printer just days before we were to leave for Axialfest. The shocks were all mounted, Currie Antirock swaybars hooked up front and rear, limiter straps in place and the parts we printed at Shapeways were mounted on the cab. The last big project was the mesh top for the box, which we made from silk screen. After the screen was successfully mounted in our frame with the surround panel in place, it was masked with a vinyl decal and airbrushed. It might be my favorite part of the whole truck! The interior was finished off with a few decals on the dash, a steering column, a bunch of monitors and the yellow roll cage.


Graphics
With assembly pretty much finished, the last part of the build was applying the graphics. Luckily we can kind of measure, so most of the wrap came pre-cut from SOR Graphics, which definitely saved me some time, but I still spent close to 5 hours hand cutting sections, trimming pieces and putting the wrap on the truck. The effort was absolutely worth it and the finished product turned amazing! The morning we left for Axialfest I revealed the finished truck on social media.
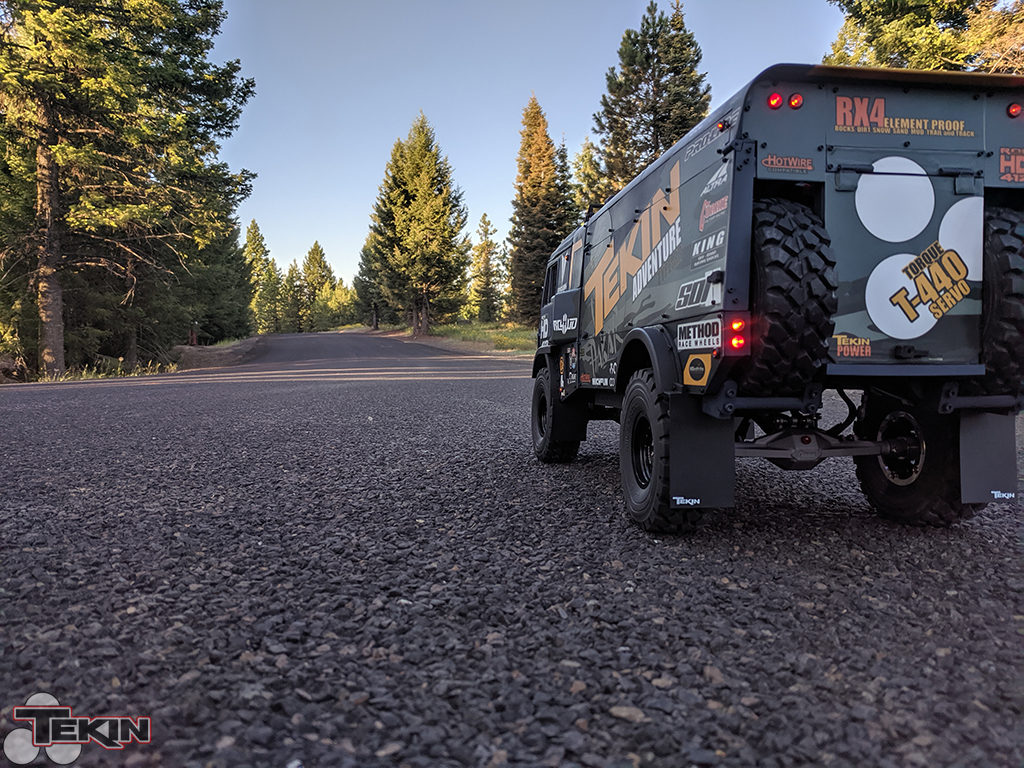
These trucks are not shelf queens either, I run them and probably drive them harder than I really should but it’s worth it for some of the epic video and pictures we’ve gotten so far!
Video
Specs
Length – 27.8″ / 706mm
Width – 10.5″ 267mm
Height – 13″ / 330mm
Weight – 18.3lbs / 8.3kg
Wheelbase – 17.5″ / 445mm
Track Width – 10.25″ / 260mm
Electronics
Tekin RX4
Tekin ROC412 HD 2300kV
Tekin T-440 Steering Servo
Tekin T-120 Shift Servo
Tekin 20mm Crowbar Servo Arms
Spektrum DX5C
Spektrum 6CH Receiver
2 ProTek 2S 8200mAh LIHV
ESS One+ Sound System
Pro-Line Racing 5″ Curved LED Bar
70 LEDs
30ft of wiring
Parts List
Vanquish Currie F9 Front Axle Housing
Vanquish Knuckles
Vanquish Knuckle Bushings
Vanquish 6-bolt HD Locker
Vanquish Ring and Pinion
Vanquish Incision VDI Universal Shafts
Vanquish Clamping Hex Hubs
Vanquish Servo Mount
Vanquish Currie F9 Rear Axle Housing
Vanquish 6-bolt HD Locker
Vanquish Ring and Pinion
Vanquish Chromoly Axle Shafts
Vanquish Clamping Hex Hubs
Vanquish Bomber Lower Arms
Vanquish Bomber Upper Links
RC4WD 110mm King Shocks
RC4WD 110mm King Piggyback Shocks
Vanquish Incision 2.2 Method MR307
Vanquish Incision #8 Hubs
RC4WD 2.2 Mil-Spec ZXL Tires
RC4WD Foams
Axial SCX10-II Transmission
Axial 2 Speed Conversion
Axial WB8-HD Driveshafts
Fast Eddy Bearings
Huge Thanks To
Vanquish Products
Axial Racing
RC4WD
Scale Builder’s Guild
Fast Eddy Bearings
SOR Graphics
Pro-Line Racing
Knight Customs
Altra Running
RECON G6
RC Crawler
Currie Enterprises
Method Race Wheels